21 TRAVEL PHOTOGRAPHY TIPS (Easy Ways to Improve Today)

- Last Updated: February 8, 2024
Here are our best travel photography tips for beginners and intermediates, based on our experience of going from complete beginners to professional travel photographers, and now working in the industry for 8 years.
Picture this.
You finally book a trip to your ultimate bucket list destination.
Antarctica, Iceland, Namibia, Bali, seeing the Aurora Borealis – wherever it is, you’ve waited your whole life to finally visit.
Naturally you are going to want to capture the best travel photos possible of this once-in-a-lifetime adventure to share with your friends and family members, on social media, and maybe even print on the wall at home.
Moments in time or a travel experience that you always want to cherish.
So you’ve splashed out on a new camera based on expert recommendations , and you’re keen to hit the road.
But here’s the problem – you don’t have the faintest idea how to get the same kinds of images you see in postcards or on the internet.
The kinds of travel photos that just pop, stand out from the rest, inspire you to book a flight immediately.
Luckily that’s where we come in.
We’ve been fortunate enough to work as professional travel photographers for almost a decade now, being paid to fly around the world, running photography workshops, take pictures for the tourism industry and tell stories.
And now we want to share our knowledge, secrets and insights from our travel photography journey with you so you can take better travel photos.
In this post you’ll find many of our favourite travel photography tips you need to know to come home with shots you will be proud to show off.
Today is the time to learn. Let’s begin.

Table of Contents
1) Know Your Camera
2) focus on the golden and blue hours, 3) plan your shots, 4) learn about composition, 5) framing, framing and more framing, 6) move your feet, make them feel comfortable, 8) use a tripod, 9) find the right travel photography gear, 10) be unique, 11) find your voice as a photographer, 13) aperture, 15) shutter speed, 17) bonus – general ideas for camera equipment settings, 18) use manual mode, 19) shoot in raw (if available), 20) learn about post processing, save this pin for later, general travel photography tips for beginners.
To start with let me talk about the general travel photography tips that I feel are not only the most important, but also the most difficult to master.
Developing an eye for photography takes time. Years in fact. It’s a never-ending learning process, but I promise you with practice you will get much better.
And once you start to get the skills for framing and composing a shot, the rest is easy.
Whether you shoot on a dSLR, mirrorless, smartphone or an old film unit, the first travel photography tip is to get to know your camera equipment.
Whatever you have in your camera bag , take the time to read the instructions, play around with all the buttons and camera settings, and spend hours with it in your hand so that it becomes a part of you.
Study the menu so that if you need to change camera settings in the field you’re not spending minutes scrolling through it when timing is critical.
Also don’t forget to learn your camera’s limitations.
Does it perform well in low-light or does the image fall apart? Is it sharp wide open, or do you need to stop down to get the best clarity? Does it have inbuilt image stabilisation?
Ultimately when you pick up your camera you want to feel comfortable and know exactly how it works. Then getting better pictures will come faster and easier.

Light is everything when it comes to travel photography images, and there’s a good chance you’ve already heard about the golden and blue hours.
The Golden Hour is that time when the sun is low in the sky and it throws a magical, warm glow across the scene.
Think the first hour after the sun peaks in the morning, and the last hour or two before the sun drops over the horizon in the afternoon.
The Blue Hour is when the sun is below the horizon and the sky gives off a beautiful blue hue.
If you really want better travel photos, one of the best travel photography tips we can give is to get used to waking up early and stay out late to make the most of these two times of day.
If you’re not a morning person, get used to setting an alarm. Many of the great travel photos of the Taj Mahal and other tourist sites with no one in them for example were taken by people who got there early.
Taking photos in the middle of the day can still result in great shots, but in general you’ll find the blue sky too blown out unless there are some interesting clouds, and on a sunny day you’ll find the lighting conditions can be a bit harsh.
Instead use the middle of the day to get street photography, or scout out photo locations and a vantage point for your sunrise and sunset photos to come back later.
Bonus Tip – Even if it looks like the sunrise or sunset might not be so beautiful, wait around. You never know when the clouds might break or the sky randomly lights up in brilliant colours.

Before you arrive in your tourist destinations, spend a few hours planning out your shot list of images you want to photograph.
You can get inspiration from Instagram, Google Maps, travel guides, magazines and more.
Make a note of these pictures, and then plan your day around the optimum time to shoot (sunrise or sunset for example).
Doing this will help you nail the shots you want to go, and give you more purpose and direction.
You need to know that all of the best photographers use tools like Google Maps or social media to form a shot list, and you should get used to it too.

You’ve probably heard about how important it is to compose a shot properly, and I bet if you’ve ever read a photography manual you would have come across the ‘ rule of thirds ‘.
Good composition can be the difference between an average shot and award-winning travel photos.
There’s all kinds of ‘rules’ that theoretically make a photo look nicer, such as not putting your subject in the middle of the shot, don’t cut elements out of the frame, etc.
But right now let’s go a bit into the Rule of Thirds.
This concept is where you divide your image into 9 even squares (many cameras actually have this grid line feature built into their display options).
Then what you do is you place the subjects and points of interest such as a human element along those lines and squares.
Here’s an example of how this looks:

The idea of the rule of thirds is that this is a mathematical idea of what our eyes naturally find pleasing. So it’s good practice to incorporate this method into your shots.
Another thing to look for is leading lines that naturally draw your eye around the photo, as well as different angles and shapes.
Have a river flowing from the side of the shot up to a waterfall on the top left for example, or the foreground bending around, leading the eye towards a church at the top of the photo.
This is a skill that you’ll learn with more practice.
An important thing to remember is that rules are meant to be broken .
Get used to analysing your shots with the rule of thirds, but please don’t use it as gospel if you think a different composition would work.
Adding a human element also brings a lot of interest to a good shot, so place people in your frame.

When you look through the viewfinder or LCD screen, don’t just focus on the subject.
Make sure you run your eyes around the entire frame to make sure you’re not accidentally cutting off something important.
Double-check that the top of a mountain is fully inside the frame, or that your friend’s whole body is in the shot as an example.
This isn’t gospel, because sometimes having something cut off from the frame can be good for composition, but you’ll have to be the judge of that.
Also check to see if you can use something natural in the scene to create a frame inside your picture.
Think of looking out a window at a building, or a bent-over tree surrounding a pretty lake.
These can all help make better travel photos.

This is one of the most important travel photography tips I can give – Move your feet.
Don’t just arrive to a scene and take a shot from the place you’re standing.
Instead take a few minutes to walk around and see if there is a better frame or composition.
Go closer, move back, step to the side, consider your lens’ focal length, etc.
Imagine trying to take that iconic Taj Mahal photo, only to find out later that you were 2m to the left of centre, throwing off that perfect symmetry.
Or maybe if you walk to the river’s edge you’ll be able to incorporate some interesting rocks into the scene instead of just water.
Better yet, take multiple travel photos and fill up those memory cards from the same photo locations so you have lots of options when you get home to see which is your favourite.

7) Ask People for Permission
Travel photography isn’t all about capturing the most beautiful sunsets and gorgeous architecture around the world.
Travel photography is also about the people you meet. But if you’re a bit shy like me, how do you get those amazing portrait photos without feeling rude?
Simple – just ask for permission.
Asking someone for permission to take their photo is polite and respectful.
If you have had a great encounter with someone, or you just see a great opportunity and want to capture a wonderful portrait, give them a big smile and ask if it’s ok to take their photo.
You’ll find many people are more than happy to pose for a photo if you just ask (just make sure you respect them if they say no).

But what if you want to get a candid shot, with the subject looking natural?
There’s always another way to get these without annoying the person.
Don’t make it obvious that you are taking their photo. Act natural and take lots of photos of the environment around them.
You can also keep your camera down by your side and point the lens in their direction.
If you have a zoom lens, use it. This was you can be on the other side of the street or market and still photograph the person.
Interested in learning more? Join one of our exclusive photography workshops in Antarctica, Kyrgyzstan, Tajikistan or Mongolia !
Another one of my favourite travel photography tips for portraits is to bring in another element to the shot.
Some people will feel uncomfortable posing for a stranger, but if you can make it about something else they will feel much more at ease.
As an example, maybe ask if they can pose with something in their store like a rug, or ask them to show you their wedding ring.
This way they’ll realise there is more to your photo than just them. This will also add a lot more interesting elements to the shot!

A tripod is one of the best camera accessories you can have in your camera bag, and really essential for travel photography.
This will allow you to get excellent shots in low light, as well as get creative with your images (like taking long exposures).
These days you don’t always need a massive tripod to travel around with, especially if you want to travel light and are a hobbyist photographer. Look at some of the Joby Gorillapods .
Another good thing about using a tripod is that it will force you to slow down with your photography and put more thought into each shot.
Rather than just pointing and shooting, you will think carefully about where you want to set up your tripod and how you want to compose your shot.
Honestly if you want to become a better travel photographer, you’ll need to invest in at least a small tripod.

You don’t need to go out and spend tens of thousands of dollars on new travel photography gear to get the best shots.
In fact chances are you already have a perfectly adequate camera right next to you (your phone).
Instead just get what you an afford, and as you grow with your photography style, post production, etc, you’ll learn what camera gear you need as well.
Things like filters, tripods, flashes, prime lenses, zoom lenses, etc will come in time.
For now, all you really need is a camera, memory card and enthusiasm!
Check out our recommendations for the best travel tripods .
There’s nothing wrong with getting those iconic shots of the Eiffel Tower or Machu Picchu to share on social media.
They’re beautiful and are often amazing camera angles of famous places that everyone wants to visit.
But don’t forget to be unique as well! Find a different perspective that hasn’t been photographed a million times.
In fact make it your goal to get a few unique shots that you can be proud of.
Over-expose, under-expose, incorporate motion blue – the only limitation is your imagination!

Just like a writer or musician finds a particular style they like, as a photographer you need to discover your ‘voice’.
Travel photography is such a broad term that can cover just about anything.
Really just taking any travel photos will fit the description, whether it is landscape photography, wildlife photography, architecture, portraits, food or whatever.
Just find a style you love most, and focus on getting better at it.
If you really like black and white photography, then start shooting in black and white! Love taking images of crazy street markets? Then get out there and find them!
Experiment, learn, discover and nurture!

Technical Travel Photography Tips
While the technical side of using a camera is usually the most overwhelming thing for a new photographer to think about, it’s actually one of the easiest things to master. All it takes is a bit of study and practice.
If you’ve never looked into getting out of ‘Auto mode’ on your camera, then terms like ISO, aperture, white balance and shutter speed will seem completely foreign.
READ MORE: Check out our great article and blog posts featuring our best landscape photography tips !
12) Exposure Triangle of Photography
The Exposure Triangle is a metaphor to explain the 3 elements that allow light onto a sensor.
A camera captures light, and the right amount is needed so that your image isn’t too bright or too dark.
The 3 parts of the Exposure Triangle are aperture, ISO and shutter.
Each one affects how light reaches the sensor in different ways, and getting this combination right is essential to capturing a beautiful image.

If you want more information, I’ve put together this comprehensive guide to understanding the exposure triangle which you should really check out.
For now though I’ll explain these three things briefly, and how they relate to taking better travel photographs.
Aperture is how wide, or small, the blades in your lens are and how much light goes through the lens.
The aperture size is measured in ‘F Stops’, and displayed as numbers. f5.6, f8, f11, f16, etc
A wide aperture (small number – f1.8) lets in more light than a low aperture (big number – f22).
A wide aperture also has a shallowed depth of field than a low aperture. I know it can be a little confusing, but you’ll pick it up the more you play around with it.
If you want the background blurry in your photo, you’ll want a wide aperture. If you want everything in focus, you’ll want a low aperture.

ISO is how sensitive your camera sensor is to light. A small number, such as 100, means it’s not very sensitive and therefore needs more light to leave an impression.
A high number, like 6400, means it’s very sensitive and needs only a little bit of light to show up on the sensor.
The higher the ISO, the more noise shows up in a photo. Noise lowers the quality of your image, so in a perfect world you’ll want to keep this as low as possible (unless you’re going to stay out late doing astro and night photography ).
It’s also necessary to raise your ISO if you’re shooting moving subjects (or handheld) indoors.

Shutter speed is pretty straight forward – how long it takes for your shutter to open and close. This allows you to freeze a frame, or introduce motion blur.
Want to capture a bird in flight? You’ll want to have a fast shutter (1/4000th of a second for example).
Want to make a waterfall look silky smooth, like you see in so much Iceland photography? Go for slow shutter speeds (3 seconds for example), and check out our guide to waterfall photography tips while you’re at it!
Keep in mind that if you are holding your camera equipment rather than using a tripod, you’ll need to have a fast enough shutter to eliminate your own hand movement.
As a general rule 1/60 of a second is the slowest you should go so your picture doesn’t pick up hand movement. Any slower than that and you’ll probably need a tripod.

16) Combining All Three for Perfect Exposure
There is no ‘perfect setting’ for aperture, ISO and shutter. It all depends on what you are trying to photograph and the style you’re going for.
Luckily most decent digital cameras have two little tools that will let you play around figure out how all three work together – manual mode and histograms.
Manual gives you complete control over your camera’s ISO, aperture and shutter.
If you change one, nothing else will change, unlike in ‘aperture priority’ mode or ‘shutter priority’ mode.
The histogram is a visual display of light. When the bars are all the way to the left, the image is darker. When they are all the way to the right, the image is lighter.
When most of the bars are in the centre, this is perfectly exposed.

The best way to figure out what combinations work best when you’re a complete amateur is to put your camera on “manual” mode, activate the histogram, and play around with the settings.
Pick an aperture (f/8 for example) and point it at the scene. Now look at the histogram.
If the image is too dark, then you’ll need to let more light in. Let’s make the speed slower. See a change?
Now put the shutter back to where it was and instead change the ISO. Make the ISO higher. Is the image getting lighter?
Spend an hour or two playing around with different apertures, ISO and shutter so you get an idea of how each one affects the light hitting the display.
Take note at how drastically things can change if a cloud goes in front of the sun, or you take the camera inside.
This just comes with practice of course, and knowing what settings you want for a particular scene will become second nature
Keep in mind that not all travel photos needs to be perfectly exposed. Sometimes having a darker image looks much better than having one that is nice and bright. You can use your judgement for this.

This is very, very basic and by no means should be read as gospel. There are a million different things that can affect why you would want a faster shutter, or wider aperture. But if you are confused about what to pick for what here’s a quick idea.
- Landscapes – You’ll want your aperture around f8-f11. You’ll also want your ISO as low as possible. Slow down the shutter accordingly.
- Portraits – You’ll probably want to photograph your subject to be sharp, but the background blurry to bring focus on the person. Have a wider aperture (say f2.8 for example), and a faster shutter (around 1/160 at the absolute slowest) to freeze the subject. Adjust ISO accordingly.
- Indoors – Because it is darker inside than outside, you’ll need to let a lot more light into the sensor. Unless you’re using a tripod, keep the speed at around 1/60 as the slowest, and the aperture around f5.6 to start with. Adjust ISO and aperture accordingly.
Of course there’s a bunch of other styles of travel photography that would use different settings, such as astrophotography, architecture, street scenes photography, wildlife photography, etc.
In time you’ll learn what settings work best for each scene.
The best way to get to know your camera and how light works is to have complete control over what settings you choose.
The only way to do this is to shoot in manual mode (shown by the letter M on most cameras).
It will take months of practice, but I promise you that in time you’ll be able to look at a scene and instantly know what aperture, ISO and shutter to use to get the exact style of image you’re looking for.
You can also use aperture priority mode (the letter A on your camera) if you don’t want to make the big leap to manual just yet.
This way you can lock in the aperture you want (f8 for landscape photography, f2.8 for portraits, etc) and the camera will automatically adjust the ISO (although you can control this part too) and shutter to get perfect exposure.
I highly recommend focusing on learning manual settings though until you have it perfected.

When you take a photo on your digital camera, the computer chip inside it takes what you captured on the sensor and converts it into a format that can be easily read. For most cameras, these two formats are RAW and JPEG.
JPEG is a compressed format that the camera creates to save on space. In doing so it ‘locks in’ all the data that it picked up such as the colour and white balance.
RAW files actually saves all the data of what you took and doesn’t compress it.
Most decent digital cameras will give you the menu option of shooting in RAW, and I recommend you use it if you ever plan on editing your photos.
Keep in mind that the file sizes will be a lot bigger (for example on one of our cameras a RAW is 42, while a JPEG is just 20), so you’ll need to have extra memory cards and external hard drive storage.
If you have no plans on editing your photos then shoot in JPEG.

Some people think that editing your photo is ‘cheating’. But the truth is photographers have been editing their photos ever since photography was invented.
Yes, even your favourite photos in National Geographic have been manipulated in some way.
99% of photos you see in your favourite travel magazines have been edited. Every professional photographer edits their photos to some degree.
The reason is that not all cameras are great at capturing exactly what the eye saw in terms of colour and light.
If you really want to get the most out of your professional travel photography business, you should start playing around with post processing.
Many people have heard of Adobe Photoshop , but it’s a pretty advanced tool that most people wouldn’t ever need to use (until you get more experience).
To start with look at the free apps that you can get on your phone, such as Snapseed, or free editing programs on your computer, like iPhoto or GIMP.
Once you get serious about travel photography and you want to start editing all of your photos that are filling up your memory cards and external hard drive, we recommend purchasing Adobe Lightroom.
If you’re ready to make the jump to using Lightroom and Photoshop, Adobe have a great ‘Creative Cloud’ package, which is what we use for only $10 a month. You can buy it here with a 7-day free trial

21) Practice, Practice, Practice
Just like anything, becoming a great travel photographer takes time, and a lot of practice. The only way you can get better is by getting out there taking travel photos!
You don’t even have to travel the world to tourist destinations or have the most travel camera available to be a great photographer.
Borrow some family members to take their portraits, get a friend who is also interested in photography and push each other, or grab your smartphone and go shoot sunset.
Buy whatever you can afford, go for a walk around your city and snap away.
We hope that this general guide on travel photography tips for beginners has been helpful.
Please feel free to reach out to us if you have any other questions. We have a lot of experience working with tourism boards, and would be happy to help you too.
Good luck on your photographic journey, and maybe we’ll see you in National Geographic one day!
DISCLAIMER: Some of the links in this article are affiliate links, which means if you book accommodation, tours or buy a product, we will receive a small commission at no extra cost to you. These commissions help us keep creating more free travel content to help people plan their holidays and adventures. We only recommend the best accommodations, tours and products that ourselves or our fantastic editorial team have personally experienced, and regularly review these. Thanks for your support, kind friend!

Alesha and Jarryd
Hi, We’re Alesha and Jarryd!

We’ve been traveling the world together since 2008, searching for the planet’s best destinations and adventures.
Love Travel?
Sign up for our free weekly newsletter for the best travel tips, ideas and deals!
We respect your privacy. Unsubscribe at any time.
READ MORE...
GoPro HERO 13 Review – The Ultimate Camera Guide [2024]
10 BEST Camera Backpacks for Travel [2024 Guide]
GoPro HERO8 Black Review – Is it Worth Buying in 2024?
Related Posts
Espresso display review – is this the best portable monitor in 2024, best gopro accessories – the mounts we actually use [2024], the 10 best travel tripods – ultimate photo guide [2024], the people of the world nomad games (photography essay), 74 thoughts on “21 travel photography tips (easy ways to improve today)”.
Your work is greatly appreciated and has had a positive impact and it has greatly benefited both myself and my students. It’s creators like you who elevate the educational experience, making it a blissful endeavor for learners across the globe.
I indeed agree in Know your camera and Plan your shots. These tips would make a good start in achieving your socmed worthy travel shots. And ofcourse, the other tips will surely be useful too. Great post!
Good article but I need to say something about using Manual – it’s not that great. Manual is just a different mode of settings for exposure, little different from either shutter or aperture priority, except these two give you a leg up, to where you’re going anyway. At the end of the day whatever exposure setting you choose will be just a combination of the 3 on the ‘exposure triangle’. Instead of using manual try these other two in conjunction with exposure compensation, which overrides the exposure meter reading. You still need the meter for any exposure anyway, just not necessarily using the value it recommends. It amounts to the same thing, only easier, quicker, and still constraining one of the triangle sides that you want. I use manual for specific unusual objects, such as sun, moon, stars, but during general daytime subjects it’ll be very unusual to hamper yourself by not using the aid provided when there is no advantage.
Your blog has become my go-to source for insightful content.
Thank you so much. So glad to hear. 🙂
Before you go, research your destination and its culture. This will help you better understand the people, customs, and landscapes you’ll be photographing.
I benefited a lot from your post. Thank you
So glad you did. Thank you for stopping by. 🙂
Thanks for sharing all this amazing tips & information. Fabulous post !
You are welcome. We are happy to help. Happy photographing
nice summary of basic photo tips that will improve my shots, thanx!
You are rocking..keep it up your work
Thank you so much. We really appreciate it.
Great article with great tips and i also like the pictures
Thank you so much Alesha and Jarryd for these amazing photography tips! I look forward to putting into practice some of your wonderful ideas and tips! I do so appreciate any tips that I can get to improve my photography. :)) Cheers, Marilyn
I absolutely loved this article! Like you I received my first ‘proper’ camera at 14 and since then have been hooked. I recently purchased a Nikon D750 and am absolutely loving it. Although at the moment I only have two lenses for it I am hoping to be able to afford more soon. What are your favourite lenses?
In my photography I love capturing candid portraits of people I encounter during my travels. I always struggle with the dilemma of getting the perfect candid shot and feeling compelled to ask permission before taking the shot. As a very shy person directing people in images is daunting, but it is something I am striving to work on. It’s nice to read that you are also shy yet manage to capture such incredible images of people.
As I am mostly self-taught, I always love to read technical tips to improve my images. I found the technical side of your post incredibly helpful and wanted to say thank you for taking the time to write such a detailed post. I believe it really helps and inspires amateur photographers like myself.
Glad you liked the article. Thank you for your comment. Keep photographying Caitlyn 🙂
Great tips and awesome photos! I always tell people if they aren’t comfortable with their settings, the #1 way to make sure their images aren’t blurry is to shoot in TV/S (shutter) priority. That way you can prioritize having no hand shake.
Thank you so much. Great advice. Thanks for your comment. 🙂
Awesome tips for everyone and specially to me who loves capturing photos everytime i travel.This one also help me and give me more knowledge on how to make awesome photos and its good because you don’t need to buy expensive camera to have a good quality photos, just your iPhone or smartphone you can make a great photos.
Hi, you are so right. You can take great photos with your phone. Glad the article could help you.
Great article! Do you even bother carrying your camera with you during the day in broad sunlight? I find it’s not worth the hassle for such poor shooting conditions.
Hi Scott, It all depends what we are doing. If we are on a job, we always carry our cameras with us. The midday sun is harsh but you get used to working with it. Especially indoors with the sun coming through the cracks, it can work out really lovely sometimes. When we are travelling on our own time, we don’t usually carry the camera. Happy travels
I really enjoyed reading this post, as I am a beginner in photography as well and it’s always interesting to see what gear other people are using!
I have the Canon Rebel as well, and also love the 50mm lens. It’s just great and is so versatile!
Thanks for sharing.
Glad we could help. Thank you for your comment. Happy photographing,
Great tips guys! Photography is an art so it must be learned properly. A good guide can teach art in a great way. This article is similar to a guide because it is an eye-opener for blooming photographers and travel lovers.
Thank you so much!
Thank you for your comment Glorias. Glad the article could help.
Hello Alesha and Jarryd, not sure to whom I adresse the message to, but I’m guessing Jarryd took the pictures and Alesha wrote about it :p
Anyway, do you guys use any customized Firmware on your DSLR? like the CHDK or Magic Lantern. That’s one question, the other one will be: can’t find any Mobile Phone photography on your blog? can you please refer me to any article that provide valuable info around Mobile phone photography?
Hi Ayoub, The photos and words in the article are a combination of both of us. Usually Alesha is the photographer and Jarryd is the writer.
We use use no customise firmware at all. We haven’t ventured this way as it voids our warranty.
As for phone photography, maybe this is an article we should write. With our phone photos, we do use Snapseed to edit them. But do not take any photos through any apps. All the best
Thank you for the tip regarding phone photography, I mostly use the customized firmware to do timelaps and edit directly on the camera, keep me posted after publishing the new article. (Already subscribed to the weekly newsletter)
Definitely will do. Thank you so much. Happy photographing. 🙂
you are doing a great job
Thank you so much. 🙂
This was really an amazing list of tips, I am a hobbyist photographer and this would really helps me a lot
Glad we could help. Keep up the photographing. 🙂
Great tips Alesha and Jarred. I really liked your golden and blue hours tip. Will try it soon and hope get amazing pics 🙂
Glad we could help. Practise will get you on the right track and before you know it you will be taking amazing shots. We are still learning about photography everyday. We love that you can never stop learning. Thanks Linda.
Some of the best tips I have read so far. Amazing post and captures so much detail. Worth the read for every travel photographer. 🙂 Keep it up.
Thank you so much,. We really appreciate it. 🙂
Priceless tips for amateurs like me. Thanks for sharing. For a long while, I’ve tried to follow the rule of thirds, but the best shots came out when I finally dared to break it. You’re absolutely right about the rules are meant to be broken. Regarding the camera, I agree it doesn’t have to be the most expensive. But sometimes I have a feeling my shots would have been better had I owned a proper camera. What device is the best balance between price and quality?
HI Robin, you’re welcome. We are so happy we could help. Sometimes breaking the rules works out to be better. 🙂 We definitely know what you mean. You do not need to buy the most experience camera. A camera that you can use manual settings, is great as you can start using and playing with aperture, shutter speed and ISO. We started off with a Sony RX100ii and it was great. Compact and a great camera to learn. Here is some articles that may help. https://www.nomadasaurus.com/best-camera-for-travel-ultimate-photography-series/ https://www.nomadasaurus.com/best-camera-accessories-ultimate-photography-series/
Thanks a lot for the great advise! I especially like your explanations about the exposure triangle. I was a bit aware of it before, but never played around with it unless I wanted to change the depth of field (and even then, I did this very rarely). But thanks to focusing more on it, I am starting to get the hang of it. I have taken some very good hummingbird pictures, for example, which never would have been possible if I hadn’t raised the ISO so I can keep the shutter speed fast. Those birds zip around like crazy!
Also, I think one of the most important pieces of advise, and the one I’m struggling with most, is to always look at the whole frame. I am guilty of looking at the main subject and later finding out that I cut off important things on the side or that something weird is in the photo that shouldn’t have been there.
Hi Ilona, so happy the article could help you. That’s amazing you experiment with your hummingbird shots. They are fast birds. By practising photography, you will get better and better. No matter how experienced you are, there are always things to learn. When you come to a scene you want to photograph, stop for a minute look around, walk around and think about what shots you want to take. Obviously this is hard when the subject is moving but great for landscape and street photography. All the best and keep up the awesome work. 🙂
Hi, I took around 500 shots on a trip to Kyrgyzstan recently, some I think are pretty good, but now after reading your tips, I think I will make another trip to that part of the world again soon!
what a great tips especially the lighting part – i also agree that getting up earlier and shooting in the natural sunlight is so great for your photos. talking to the locals and knowing your camera, You guys covered it all
Thank you so much for reading Shama. Glad you liked our article. Natural lighting is the best. Even though sometimes that early morning is hard it is worth it. 🙂
u are absolutely right u don’t need an expensive camera or go to Bali ( although it’s a good idea) to get great photos. it’s just simple common sense and a good eye and you can master photography
Well said. Thank you for your comment and reading Shama. Have a great week.
Thanks a lot for the helpful tips on holiday photos. My partner and I are in Easter Island, irresistible place for photo opportunity. My Nikon D7000 will keep on taking photos on auto mode for the time being until I have had enough practice following your guidelines and the who knows what photos I might produce! Thanks.
Glad we could help Balu. Definitely when you have time, go out and take some photos on manual. Play with the different settings. Before you know it, you’ll only be on manual. At the beginning when I was still learning, I would take a shot on the manual settings I thought and then a shot of the same view on auto in case I messed up. Better safe than sorry. Have a great time in Easter Island. There is so much to do there and learning about the history is amazing. Take care. Alesha
Guys your advice are completely helped me. I was stressed before, i want to travelling at the moment but i hope i can take a good picture cause you know how annoying it will be when we take a picture and then when we are home they are completely bad. So then you have to comeback at the same place again just to take a picture. But this one is helpfull
Hi Fabio, Don’t stress. You are going to bring back amazing photos from your travels. It is all overwhelming at the beginning but it gets easy. When you are shooting, put some time aside and concentrate on what you have learned. It doesn’t matter if it takes you 20 minutes to an hour to get your shot. If their are other photographers around, most of the time that are happy to give you some advice. Let them know you are new. Maybe they will let you know their settings for ISO, aperture and shutter. When it comes to editing, take your time as well. There are many You Tube videos that can help you for free. Have a great time on your trip. Happy travels
Hey Guys, very useful tips especially the Bonus tips.
Keep Sharing!!!
Glad we could help. Thanks for reading.
P(Program) you set either the aperture or shutter and the camera adjusts the other one accordingly to maintain the right exposure. Thanks
Thanks Rezan
I love traveling around the world. I wish to capture some of the beautiful places that I enjoyed. The above tips helped me to improve my travel photography skills. It also helped me to click some of the memorable moments of my travel with my friends and relatives.
Hi Vivek, Glad we could help. It is all about practise. We love having a day to ourselves and just getting out and shooting anything – landscape, cityscape, people or animals. We try to give ourselves a challenge sometimes. It makes it interesting and we are enjoying ourselves. 🙂
Great tips to help out beginners like me. I need to work on to ask people for permission as I get shy sometimes. I love the quote “rules are meant to be broken”!
Thank you Mao. Don’t worry, “asking” will come. Alesha was so shy and I used to take all the people shots. Now she is more confident and really enjoys shooting people. All the best.
THANK YOU . Your very easy to read starter guide to photography was AMAZEBALLS I learnt so much .cheers LIZY
Thank you. Glad we could help. Happy shooting and get creative. 🙂
Hey guys, this is an amazing guide, thanks for writing this up in such detail. As an amateur, I always look for good travel photography tips from other travellers. I left my tripod behind in Thailand and I think this was a huge mistake, I need to get a new one, urgently 🙂
By the way, really enjoy your photos on your blog and Instagram, they are amazing! 🙂
Glad we could help guys. We never used to use a tripod in our early years until we discovered how amazing the shots can be with one in low light and now we have 3. You can rest your camera on something to get a shot but you are limited to positions. Thanks for reading guys. 🙂
thanks for the tips. i’d make one edit: instead of ‘move your feet’ i’d say “don’t be lazy”…move left or right. move forward or back. climb up on something or get down on your knees.
Love it Aaron. You are so right. A little to the left might be the perfect shot or a little to the right and crouching might be the perfect shot. thanks for the input. Have a good one.
I love this post. It is incredibly helpful to all beginner travel photographers like myself! I have only been shooting in manual mode for the past 5 months and have already seen a huge increase in the quality of my photos! But I am always looking to improve. Will definitely be sharing your post
It is crazy how you improve when you start shooting manual. I know Alesha did also. You learn so much about the camera and what it can do, it is incredible. Thank you for reading and all the best with your photography Hayley. 🙂
this guide is amazing, thank you so much for explaining everything in a way an amateur can understand 🙂
Bookmarking the post for future reference!
Cheers, Naddya
Thank you guys. We are glad it is useful for you. 🙂
Wow! Amazing Tips. These tips will help a lot to click great pictures with your camera. Love the point of Shutter Speed. and about RAW.
Thanks for Sharing Helpful Post.
Thank you so much Nitin. Glad we can help. Thank you for reading.
Yeah I agree with you buddy.
Thank you 🙂
Leave a comment Cancel reply
Save my name, email, and website in this browser for the next time I comment.
Best Photo-Ops You Didn’t Know Existed

2. Head of Decebalus, Romania

The larger-than-life statue of King Decebalus boasts a face you (and your Instagram followers) will never forget. Venture out on the great Danube River, located on the border between Romania and Serbia . As you sail or boat through the Iron Gates , you’ll easily spot the 141-foot-high face of Decebalus carved into the side of a rock. There are many angles and fields of view that make Decebalus an exceptional photo opportunity. The statue is an ode to King Decebalus, who fought for the country’s independence against Roman emperors around 106 AD. But, there’s a twist. The ancient-looking carved rock is basically the same age as Instagram itself (okay, we’re exaggerating a little), as it was constructed between 1994 and 2004. Catch a selfie with the young king himself when you visit!
3. Tulip Fields, Netherlands

We know what you’re thinking and no, this fluorescent tulip field is not heavily manipulated with photo editing. It’s real! You can easily recreate this magic with a spring trip to the Netherlands ! In case this is the first time you’re hearing of the vast sea of colorful tulips that grace the fields of the Holland, here’s the scoop. Spring in the Netherlands is a long season with cool nights, making it the perfect tulip-growing location. Rainbow-like stripes of tulips grow from late March to mid May, but the best time to catch them is mid to late April. You can find most tulip farms in Noordoostpolder, in the province of Flevoland or along the coast of The Hague and Leiden, all the way up to Alkmaar in the north.
4. Chefchaouen, Morocco

Chefchaouen is a gorgeous seaside village located in the foothills of the Ka’ala mountain range, in northwestern Morocco . Every wall in Chefchaouen is coated in shades of blue, making the whole city a backdrop cobalt color! Whether your camera faces the sea or city, you can’t take a bad picture here.
We hope you have the time of your life traveling to these picture-perfect destinations and creating lasting memories! Please remember to respect the land and local communities so everyone can continue to enjoy the beautiful spots for decades to come.
Share Your Adventure
More places untraveled stories.

Best Oktoberfest Celebrations That Rival Munich

5 of the Best Places to Visit in Ireland

Summer Solstice Rituals to Celebrate the Longest Day of the Year

Affordable Adventure Travel Destinations

Cheap Tropical Vacations

Colorful Festivals Around the World
The more color the better at these diverse fetes found all around the world!

Journey Through Juneau: The Confluence of Alaskan Culture and Adventure

12 Islands Without Cars

National Parks in India

Experience the Magic of Winter in Val Gardena

Extraordinary Ski Trip Experiences at 3 Zinnen Dolomites

Spookiest Places in the World
Discover hidden gem destinations.
Hidden gems, incredible itineraries & sustainable travel tips right to your inbox!
PLUS discover the location of the hidden gem pictured below!
Agree Yes, I want to receive the Untraveled newsletter so I can get travel tips.
Thank you for signing up for the Untraveled newsletter!
*View the Untraveled terms and conditions .
Sprechen Sie Deutsch?
Sehen Sie sich die Seite auf Deutsch an
17 Proven Travel Photography Tips to Take Stunning Images

We take pride in providing authentic travel recommendations based on our own experiences, which is documented through our travel photography and writing only about places we have personally visited. We may earn a commission when you purchase a product or book a reservation. This has no influence on our recommendations. For more information, please read about our approach to travel publishing. Learn more ›

Written by Kyle Kroeger
Are you looking to take your travel photography skills up a notch? If so, you’ll want to read on for some pro tips straight from the experts. Here are proven techniques to help you take stunning images on your next trip.
Although we all have memories of a trip locked away inside our minds, those memories inevitably fade over time. That makes using photographs, souvenirs, and other items picked up during a journey so special! They help us remember the beautiful times we had with family and friends, or even if we took the trip ourselves.
Regarding photographs, it is very accurate that anyone can take a professional-quality image with today’s digital cameras and store, print, mount, or even place it on canvas as a wonderful reminder of a journey well taken.
This article will cover the basics of what makes a good travel photograph and why learning to take incredible images is important for travel photographers.
According to National Geographic , travel photography is an industry worth over $2.3 billion, and with good reason—as travel becomes more popular, people are looking for beautiful images to capture their memories. Learning to take stunning travel photos will improve your image quality and lead to a rewarding career.
Top Travel Photography Tips
1. find the right light.

Finding the right light is essential for taking amazing photos for a few reasons. It’s simply the best travel photography tip that anyone will tell you. Lighting is everything to capture the perfect shot.
First, the best time to take pictures is early morning or late evening when the sun casts a soft, warm light. This type of light creates beautiful, natural-looking images. Second, midday is generally not a good time to take pictures because the sun is so high in the sky, creating harsh shadows.
And lastly, taking pictures in low light can be challenging, but the results are often worth it. Low-light photography requires practice and patience but can lead to the perfect shot.
See Related : Best Day to Book Flights
2. Use a tripod

Using a tripod will help you get sharper images and will also allow you to experiment with different compositions. If you don’t have a tripod, look for something sturdy to lean your camera on, like a wall or a tree.
Taking a photograph together with our family of 6 has always been difficult. It usually entailed getting five people into the image, with the sixth person [me] taking the photograph.
That’s when I decided that investing in a cheap tripod I could take anywhere was a good idea. With the automatic settings in place, I could set the camera to a 10-second delay, and we could all be in a photograph together!
Seems like common sense, right? Except when did you last take a tripod to capture images at the beach ? Or to capture memories as you adventure forth into the unknown? The average person puts their camera around their neck, maybe utilizes the stabilization feature on the camera if they have one, and then calls it good.
You can certainly get decent photographs that way, but stunning travel photos come with a tripod because you have more flexibility to utilize the manual settings on your camera. That allows you to bring movement, prolonged light exposure, and other nuances to an image you normally wouldn’t get.
See Related : Must-Know Vacation Tips to Maximize Your Trip Experience
3. Get close to your subject

One of the best ways to take amazing travel photography is to get close to your subject. This will help you capture more detail and emotion in your images.
Think about what you want to capture in your photo, and get as close as possible while including everything you want in the frame. If you capture a person or animal, get close enough to see their features.
For landscape photography, get close enough to see the texture of the rocks or the leaves on the trees. By getting close to your subject, you can take truly stunning photos that will make your friends and family jealous. So don’t be afraid to get up close and personal with your camera—it’s the best way to capture amazing travel photography!
4. Be Patient

One of the most challenging aspects of taking stunning photos is that you often have to wait for them. Whether it is a sunrise or sunset, or you want to make that waterfall right in front of you look like cotton candy, it is rare for the perfect image to be taken the first time.
A great photographer knows that you need to be there when no one else is to make the image stand out from the crowd.
Give yourself plenty of time to enjoy the area where you want to take pictures. Keep an eye out for something special; undoubtedly, something special will happen!
So often, we hurry to each place on our itinerary and snap a few photos as we go. That can help us remember a hurried trip; sometimes, a stunning image can result. Still, increased patience must be had to consistently take stunning, memorable images of your travel adventures.
For this reason, our family often packs a picnic lunch, a change of clothes for the toddlers, and plenty of juice packs and extra drinks. With just a little extra time, that great image always comes on!
5. Experiment with different compositions

Traveling allows us to experiment with different compositions in our photos. One way to add interest is to frame your subject with a doorway or window. This can help create a sense of depth and perspective and highlight the architecture of a region.
Another composition technique is to include leading lines to capture a better photo. Leading lines can help direct the viewer’s eye toward your subject and create a sense of movement or flow.
You can add interest and variety to your travel photos by experimenting with different compositions.
See Related: Places to Take Pictures in Minneapolis
6. Use a polarizing filter

A polarizing filter can help reduce glare and increase the saturation of colors in your travel pictures. If you’re shooting near water, a polarizing filter can also help reduce the sun’s reflection on the water’s surface. Polarizing filters are particularly useful for landscape photography and nature photography.
If you’re traveling and looking to add a bit of flair to your photos, consider using one of the many creative effects filters available. These filters can add color, texture, or pattern to your photos.
Experiment with different filters to see their effect on your photos and make your travel photography stand out.
7. Shoot in RAW format

Any photographer will tell you that shooting in RAW format is one of the most important things you can do. RAW files are larger and take up more space on your memory card, but they contain all the data captured by your camera’s sensor.
This data includes the color and brightness information, the camera’s exposure settings, and the white balance. When you edit a RAW file, you can access all of this information and make subtle changes that can significantly improve the final image.
So, if your camera can shoot in RAW format, be sure to take advantage of it. You’ll be glad you did when you edit your RAW files later.
8. Edit your photos

As a traveler, you likely take hundreds of photos on each trip. Unfortunately, not all of these photos will be amazing. But don’t worry – with some editing, you can bring out the best in your photos and turn them into masterpieces.
Simple edits like adjusting the exposure or white balance can make a big difference. If you’re unsure how to edit your photos, plenty of tutorials and online resources help you get started.
With a little practice, you’ll be surprised at how quickly you can improve your skills as a travel photographer . Next time you look at a lackluster photo, remember that editing can transform it into something special.
8. Use a filter

Adding a filter to your travel camera can help give your photo a unique look. Filters can also be helpful if you’re trying to capture a long exposure or reduce the amount of light passing through the lens.
There are a variety of filters available, such as ND (neutral density) filters, which can help reduce the amount of light passing through the lens. This can be helpful if you’re shooting in bright conditions or trying to capture a long exposure.
9. Use the Rule of Thirds

If you’re a traveler, then you know that the Rule of Thirds is essential for taking better photos. For those who don’t know, the Rule of Thirds is a principle that suggests dividing images into nine equal squares.
The goal is to place your subject or interest on one of the squares or lines. This simple technique can make a big difference in the quality of your photos.
Most modern cameras have a Rule of Thirds function built into their displays, so it’s easy to use. The next time you’re out taking photos, try using the Rule of Thirds and see how it improves your ability to capture great shots.
10. Shoot in burst mode

Burst mode is a great way to capture multiple photos in quick succession. This can be helpful if you’re trying to capture a fast-moving subject or if you want to choose the best photo from a series of shots.
To shoot in burst mode, simply hold down the shutter button on your camera. If you keep the button pressed, the travel camera will continue to take photos. When you’re finished, release the button and review your photos. You can then choose the best one to keep and delete the rest.
Burst mode is a great way to ensure you never miss a shot. So, next time you’re out taking travel photography, be sure to give it a try.
11. Explore Places Where Others Dare Not Go

On a recent trip to San Francisco , we fought with the crowds to go down Lombard Street and see the sea lions by the piers. We even had to fight with the crowds to get a decent image of Alcatraz Island , deciding to eat lunch with a window view to get it because the crowd level was nine deep!
Iconic images can represent a journey, but what creates wonderful memories is a sense of adventure . Dare to explore places where other tourists may not consider going!
Whether you like getting dirty from an adventurous hike or discovering a hole-in-the-wall restaurant that no one knows about because it isn’t on Yelp yet, your sense of adventure will lend itself to automatic opportunities for stunning travel images.
Find a place where the road is less traveled, see what you might find in that journey, and your worst-case scenario is that you’ll have images that remind you of a quiet, peaceful time spent exploring on your own or with a loved one.
12. Don’t Be Afraid of Black & White

With just a flick of a menu button, my camera’s images can transform from chromatic color to black and white. Unfortunately, this dying photography medium captures some of our greatest moments.
The contrast and depth of color can still be seen in these images with stunning detail, with shadows and contrasts emphasized more than otherwise. The trick to capturing a good black-and-white image is to have great lighting that emphasizes something specific in the photo.
This creates the contrast that you need naturally, so you don’t have to spend tons of time trying to photoshop the image to make it look good!
13. Add Some Fill Light, Even During the Day

Over time, I’ve developed the habit of consistently using the flash on my camera, no matter how sunny or cloudy the day might be. Because it adds a level of fill light to the image, it helps decrease cumbersome shadows that might appear.
Now, if there is plenty of light and no real shadows being cast, disabling the flash function or detaching the flash [if you’re still old school] will create a better, stunning travel photo. Don’t underestimate the power of what the flash can do, however, even when the sun is shining down on you!
14. Backup your travel photography

Traveling is one of the best ways to explore new cultures and create memories that will last a lifetime. However, even the most well-planned trip can go awry. In order to protect your precious vacation photos, it is essential to have a robust backup plan in place.
Ideally, you should have both physical and online backups of your files. An external hard drive is a good option for physical storage, and many cloud-based solutions are available for online backup.
Google Photos is a popular choice, but there are many others. Whichever method you choose, ensure your backups are regular and reliable. That way, your photos will be safe even if something goes wrong on your trip.
15. Don’t obsess over camera equipment

Don’t obsess over your camera gear and equipment when traveling. Yes, it’s important to have a good camera but don’t let that stop you from enjoying your trip. A good travel photographer can use any kind of camera if they have the knowledge, experience, and creativity.
So don’t worry if you don’t have the latest and greatest DSLR camera. Just enjoy your trip, and take pictures along the way. Who knows? You might capture some amazing moments that you’ll never forget.
16. Never stop learning

If you want to continue learning travel photography, the best way to improve is by taking online courses, attending workshops, and having regular training sessions. This will help you use Instagram filters and advanced travel photography gear and understand the history and landscape behind your photos.
Additionally, portraits with strangers and wildlife photography are difficult but interesting areas to continue learning about your photography skills. However, you can get a leg up on understanding these concepts by completing free online courses.
17. Have fun!

One of the best things about travel photography is that it’s all about having fun and experimenting. Get out there and start exploring – you never know what you’ll find. Of course, there are a few basics that you should keep in mind.
First, always have your camera with you, and ensure it’s charged and ready to go. Second, take advantage of natural light whenever possible.
Finally, don’t be afraid to experiment—try different angles and compositions, and get creative. The most amazing travel photographers are often the unexpected ones. So have fun with it and see where your camera takes you.
What are some common mistakes people make when taking travel photos?
Some common mistakes people make when taking travel pho include:
Not doing enough research before their trip

Not being sure to plan can result in problems when taking travel photographs. Ensure you know where you’re going and what pictures you want to take before your trip.
Not packing the right gear

Pack the right gear for your trip. If you’re planning on taking a lot of pictures, make sure you have enough storage space and batteries. If you’re traveling to a remote location, ensure you have a backup plan in case your equipment fails.
Relying too much on technology

While technology can greatly help when taking travel photography, please don’t rely on it too much. Be prepared to take pictures without relying on your camera’s auto-focus or other features.
You don’t need a full manual mode or shutter speed, but you don’t need to rely solely on auto mode. Check your camera’s settings for a blend of both.
Failing to back up photos

Make sure to back up your photos before and during your trip. You won’t lose all your pictures if something happens to your camera.
Relying too heavily on post-processing

Don’t get too caught up in post-processing your photos. It’s important to get the composition and exposure right in-camera during golden hours and have a great starting point. Then you can worry about fine-tuning the details in editing and processing your images.
What are some post-processing tips for travel photos?
Here are a few general post-processing tips for travel photography.
Start with a basic edit to adjust things like exposure, white balance, and contrast

When you’re taking photos while traveling, it’s important to make sure they look their best. One way to do this is by starting with a basic edit in photo editing software like Adobe Photoshop or Adobe Lightroom.
This will help adjust things like exposure, white balance, and contrast to make your photos look more polished and professional.
Pay attention to detail, and don’t be afraid to spend time on small tweaks

When it comes to editing your travel photos, details are key. Make sure to spend time on small tweaks, like adjusting the brightness, contrast, and saturation of different photo parts. This can make a difference in the overall look and feel of the image.
Also, be sure to focus on cropping and framing your photos correctly. This can be especially important when photographing landmarks or other iconic scenes. Getting the composition right can make all the difference in the final image.
Lastly, remember basic adjustments like sharpening and noise reduction. These can help make your photos look their best.
When in doubt, less is more – don’t overdo it with the post-processing

When it comes to photography, one of the golden rules is to do less is more. This is especially true when it comes to post-processing your photos. It’s easy to go overboard and overdo it, but this will only make your photos look worse instead of better.
So try to keep your post-processing minimal and only use the tools necessary to enhance your photos. If you don’t need them, don’t use them.
Experiment with different creative techniques such as HDR or black-and-white conversion

Many photographers use different creative techniques to make their travel photos more interesting. HDR photography, for example, can create a fantastic effect by using multiple exposures to capture different parts of the scene.
This can then be merged to create a single image with more detail and depth than a standard photo. Black and white conversion can also be used significantly, giving a photo a more classic or timeless look. By experimenting with these and other techniques, you can create breathtaking images that stand out from the crowd.
One of the best things about photography is that there are no rules. You can experiment with different techniques and styles to find what works best for you.
So, what do all of these tips have in common? They’re all about capturing emotion. Whether it’s the joy of a child playing or the intensity of a musician performing, if you can capture the emotions behind your subject, you’ll create photos that are truly memorable.
As mentioned earlier, feeling is a key element separating great photos from good ones. If you want to learn more about photography and get tips on how to take great photos, be sure to subscribe to our free travel newsletter . We’ll send you regular updates with all the latest travel information.
How do I make my travel photos stand out?
You can do a few key things to make your travel photos stand out. First, avoid the typical tourist traps and seek more unique locations. Second, pay attention to your composition and framing, and third, don’t be afraid to experiment with different techniques such as long exposures or HDR photography.
What is the best time of day to take travel photos?
The best time of day to take travel photos depends on the type of photo you’re trying to capture. If you’re looking for softer, more natural light, early morning or late afternoon/early evening are typically the best time to shoot.
However, if you’re after something more dramatic, then shooting during the midday sun can also produce some stunning results. Ultimately, it’s important to experiment and see what works best for the scene you’re trying to capture.
What camera gear do I need for travel photography?
There is no one-size-fits-all answer to this question, as the best camera gear for travel photography depends on your preferences and shooting style. However, generally speaking, a DSLR or mirrorless camera with a versatile zoom lens is a good place to start. You might also consider investing in a tripod for night photography or long exposures.
Related Resources
- Best Food Presets for Photography
- Best Travel Photography Books
- Best Travel Lightroom Presets
Finding the Universe
Travel tales, photography and a dash of humor

Challenges Taking Photos When Traveling (and How to Overcome Them!)
Last updated: October 21, 2023 . Written by Laurence Norah - 2 Comments
As you would expect from a full-time travel photographer, I spend a great deal of my time taking photos when traveling. That includes everything from landscape photography in remote locations, through to food, portrait, wildlife, event, and architectural photography in destinations around the world.
Over the years of getting shots on the go, I have become familiar with the unique challenges facing travel photographers, which make it more difficult to get the shots we may want on a trip.
In this guide, I’m going to share with you the most common challenges you might experience when taking photos while traveling. I’m also going to share my tips on overcoming these challenges, to help ensure you get great photos when you travel.
Table of Contents:
Challenges of Travel Photography
All photography has its challenges, but when we travel we often face additional unique challenges which can impact our ability to get great photos.
When you’re taking pictures at home, you are likely familiar with the local area, you know about any photography restrictions, and probably know the type of gear to bring. If you are driving from home, you may be able to throw extra gear in the car in case you need it.
You also often have some flexibility to plan around weather conditions and crowds. Plus, if things don’t work out as planned, you can usually just come back another day.
However, when we travel we are often unfamiliar with the destination, have restrictions on how much photography gear we can bring, be shooting in poor weather or lighting conditions, and have time limitations on how long we’ll be in any one place. So it can be important to plan ahead in order to minimize these challenges.
Here are what I’ve found to be the main challenges facing travelers looking to get great photos on their trips, as well as some tips and ideas for overcoming them.
Limited time in destination
One of the biggest challenges we face when traveling is that we tend to be on a timetable. Whether we are traveling for work or pleasure, the majority of trips have a defined end date, meaning at some point the trip will be over and we have to head home.
What does this mean to the traveler looking for great photos? Well, it means that you have to get all the shots you want within the time you have available to you.
To ensure you do get the shots you want, the key is careful planning. W ithout proper planning, you might miss the shots you want because you run out of time.
My top tips are:
- Research your destination in advance so you know what places you want to visit and things you want to do. You might want to make a list of the types of photos you want to take.
- If you have flexibility in terms of when you visit, you might want to research the best times to visit in terms of weather, crowds, and events. Timing might be particularly relevant for wildlife photographers as certain species may be much easier to spot during certain seasons for instance.
- Plan your itinerary to include all the locations you want to visit for your shots. Note any relevant opening and closing times for the dates of your visit. Make sure to make bookings for any locations, such as museums or national parks, that require reservations to visit.
- There are a number of apps that can helpful in planning such as Google Maps , Instagram , and The Photographers Ephemeris . Guidebooks, blog posts, and online local event calendars can also be useful.
- If you are traveling to a destination as part of a guided tour or cruise, then there will be a fixed schedule that you will likely not have any control over. In those types of situations, doing your research and planning ahead can be even more important as you’ll likely have little flexibility. Knowing the itinerary details and time allowed in each place can be very helpful in planning realistic photography goals.
- For any special photos, plan extra time in case you need to return to the location due to variables outside your control, such as bad weather at a landscape shoot or an unexpected closure.
- Be realistic about your time, and ensure you give yourself enough time for all the shots you want to get.
I cannot stress enough how important advance planning is for getting great travel photos. When you are in the destination you want to be spending your time enjoying the destination and taking photos, rather than researching things you want to do, photography locations, and local events.
The majority of your planning activity can be done in advance, and doing so will get you much better results once you are on location.

Variables that you have Limited Control Over
When we travel, much like when we are at home, there are some things that we just have no control over. These might include, but are not limited to, things like the weather, unexpected closures, attraction opening hours, lighting conditions, and so on.
When we are taking photos locally, we usually have the luxury of time and returning to a place if the weather is bad or an attraction closes unexpectantly.
However, due to limited time in a destination, variables like bad weather can often throw a real spanner in the works. And often we have to just take the best photos we can in the circumstances.
Poor Weather
Poor weather can really affect our photography plans. They can make it difficult to get nice shots, affect our gear and comfort, and even lead to unexpected closures of attractions.
Like we mentioned earlier, if you have the flexibility, we recommend factoring in the weather of a destination into planning when to visit, and ideally planning to visit when the weather is best for photography and travel in general.
This may be particularly important with destinations that are known to have extreme weather conditions like typhoons and tropical storms during certain times of the year.
When you plan, check to see what the weather will be like in general when you visit, and remember also to check an up-to-date forecast as your trip nears.
Regardless of how well you plan, things like the weather and unforeseen circumstances can still affect your plans. Once you are at your destination, you just have to do your best with the weather conditions that present themselves.
Be prepared – you will want to be prepared for a range of weather conditions, regardless of the weather forecast, as these are not always accurate. So ensure you pack appropriate clothing as well as any protective equipment for your camera like a rain cover. Consider factors including rain, heat, dust etc. when planning what you bring.
Be flexible – The best option to handle the variable that is weather is to be flexible where possible. If the weather forecast shifts, maybe you can change your schedule around so as to take advantage of any better days for what you want to shoot.
If you can’t be flexible, try to work with what you have rather than giving up. You might have dreamed of a glorious blue sky and fluffy white clouds, but dramatic storm clouds might also work well in the scene.
Or, switch it up entirely, and switch your subjects. For instance, instead of shooting landscapes, focus on wildlife, people, indoor locations, or other types of images which are less weather dependent.
Finally, remember that you came on the trip to enjoy yourself, and don’t waste energy feeling bad about the shots you missed. Just enjoy the trip, and get the photos you can.
Crowds and Events
One thing that you are likely to encounter in any popular destination is crowds of people who are wanting to visit the same places as you. In terms of photography, this can make it challenging to get good photos of certain things without people in them.
One tip is to of course to plan to visit at a less popular time of the year. But even if you can do this, you are often still going to have to encounter lots of busy places.
You may also find yourself visiting when a popular event is going on, so even though you thought you were visiting at a quieter time, there are more people in the destination.
For example, if you visit Albuquerque during the International Balloon Fiesta , you are going to find most attractions are going to be a lot busier than you might expect for October in this part of the world.
As you plan your trip, first check w hen the most popular time to visit the destination is. This might for example be during school holidays or other national holidays, and might affect how crowded specific locations are.
Also check w hen there are major events happening in the destination. These might be events you want to shoot, or events that affect things like opening hours or how crowded a destination is.
The good news is that it is possible to overcome the challenges of visiting a popular destination.
First, plan to visit places when fewer people will be there such as the early morning or later in the evening. If shooting outside this can often be a better time of day for the light as well, so you will get better images as well.
Next, even if it is busy, be patient and just wait for opportune moments. Often a crowd of people will ebb and flow, and you might have moments when a location appears to be empty even at busier times.
Another option for a popular attraction is to book a special tour which allows you to visit privately or as part of a smaller group (e.g., this Vatican tour we did ).
If you don’t mind doing some editing, another option if you can’t get around the crowds is to take the photos and then edit the people out of the shots later. This takes time and skill but programs like Photoshop can help you do this with a lot of photos. You can also use neutral density filters so the people blur out with a long exposure.
Finally, instead of trying to fight the crowds, you might embrace the people and use them in your shots as part of the story.
Attraction Hours & Unexpected Closures
One limitation you will often find when you travel is that many places only allow you to visit during a set of hours. Some places may only be open a very limited time. And sometimes you’ll find unexpected closures as many travelers did across the world during the COVID-19 pandemic.
You will want to do your research ahead of time so you can maximize the time you have. Check opening hours and dates (and re-check them before your visit), and check local events and holidays that may affect opening hours,
Many people also miss out on visiting a place because they didn’t make reservations and arrive to find out that tickets are sold out in advance. Be sure to plan ahead and know if you need to pre-book an attraction or not.
You may also consider having flexibility in your schedule in case you need to return due to an unforeseen closure, especially if it’s a location you really want to get a photo of.
It’s also a good idea to have back-up plans for other places you’d like to visit in a destination in case your plans need to change.
Sometimes there will be situations you can’t get around, like a last-minute closure, that prevents you getting the shots you want. It can be useful to have a fall-back list of things you want to shoot, should this occur.
Poor Lighting Conditions
One thing you are likely to encounter on your trip is poor lighting conditions.
While this may be a factor for outdoor night shots, you’ll also likely experience poor or unflattering light in museums, restaurants, religious buildings, and other indoor venues.
You’ll also likely find yourself trying to shoot through glass, whether at a viewing tower or inside a museum.
The best thing you can do is to be prepared for this by knowing how to use your camera to its best ability in low-light conditions.
In general you’ll want to understand the key elements of the exposure triangle like ISO and aperture. If possible, you should also check out if you can use a tripod or flash, as this might resolve your lighting issues.
Here are a few tips to help you get better photos in some specific situations.
Getting better results with poor lighting
You will often find poor lighting inside a museum or restaurant. In this scenario, try to find the locations inside the venue with as much light as possible.
For example, in a restaurant pick a table close to the window if you can, to maximise the light available. In a museum, look for subjects which have lots of light.
If you are shooting inside a building where tripods are permitted, use one so you can use a longer shutter speed. Flash photography, if allowed, might also work to improve your images in some situations. For food photography, consider using the light in your smartphone to illuminate your food and give better results.
Shooting through glass
Many museums and viewing platforms require you to shoot through glass. This can introduce unwanted reflections that detract from the shot.
In these situations, you want to hold your camera as close to the glass as possible, ideally directly against it, which will cut back most of the reflections.
When shooting through glass make sure to disable your flash as this will just reflect off the glass and exacerbate the problem.
Outdoor evening conditions
When shooting outdoors at night there is normally less light available. The best way to get around this if possible is to use a tripod, as this will let you use lower ISOs and slower shutter speeds.
Of course, depending on what you are photographing, a lower shutter speed might not work. For a moving subject for example it will just result in a blur.
In these situations, ideally you’ll want a lens with a wide aperture and a camera with good high ISO performance. Then you can balance aperture and ISO to get the best results based on what you are shooting.
Safety Concerns
It is also important to check on any local security concerns and tips for staying safe in a destination. Local security concerns may affect the camera and photography equipment you choose to carry if there are heightened concerns related to theft, robbery, and other types of crime.
In some places around the world, it is not recommended to carry a big camera or display expensive equipment. knowing about these things – for instance we sometimes just carry a compact camera we can fit in a pocket or purse in places where we’d been advised not to carry a mirrorless or DSLR camera.

Limitations to how much gear you can take with you
One big difference between shooting around your home location and when on a trip is that you will likely have less photography gear available to you.
The amount of gear we take is often limited by the luggage allowances on our chosen method of transport whether that be airplanes, coaches, trains, cars, or ships.
This will of course vary depending on how much gear you have. If you only have one camera and a couple of lenses, then you may be able to travel with all your gear.
However, if like me, you have a collection of camera lenses, camera bodies, and accessories like tripods, then you will likely have to decide exactly what to take with you on a trip, and what to leave behind.
The first thing to consider is what is your luggage allowance. Be sure to consider whatever situation is going to have the strictest size and weight limits.
For instance, you may have fairly generous luggage allowances on an international flight but have much more restricted allowances on a safari plane or a tour bus. On a road trip, you may have more allowance and just be limited by your trunk size.
It is obviously difficult to get around restrictions like this. The main thing is to know what you plan to take photos of, and select your gear accordingly.
If taking a flight, you should consider if you are OK with packing your photography gear in the airplane’s checked hold luggage or want to ensure it can all fit into your carry-on luggage.
I personally never pack my camera body or lenses in the hold luggage on a plane or bus, opting instead to take it as carry-on. Most airlines have quite strict size and weight limits for carry-on luggage, so ensuring I stay within those requirements is obviously important to ensure I get to board the plane!
Next, you want to choose your gear based on where you are traveling and what types of photos you plan to take. Is your focus wildlife, landscapes, family photos, food, architecture, water sports, etc.? This is particularly important in selecting the type of lenses (if you have a mirrorless or DSLR camera ) and photography accessories that are going to be the most useful.
For a trip where you will be taking images of landscapes, then you will likely want to pack a wide-angle lens. Ideally, you might also consider a set of ND filters , and a travel tripod .
For a wildlife focused trip like a safari, then you’ll probably want a nice big telephoto zoom lens and a monopod.
Of course, the reality is that most trips tend to involve a variety of photography subjects which might include everything from wildlife to landscape to people to food.
As such, you’ll want to pick gear that covers everything you want to photograph. It also has to be gear which you are happy to carry with you in terms of weight, which meets any luggage restrictions, and which meets your budget if you are looking to buy for your trip.
I’d suggest reading my guides to the best travel camera and the best travel lenses for some tips if you are planning a purchase.
When planning for a trip, I nearly always have to plan my gear based around the limitations of my transport. Whilst a road trip in my home country allows me quite a lot of flexibility, an overseas trip with a flight normally restricts me.
For most travelers, I recommend trying to travel relatively light and to pick lenses that offer the most versatility. In my case, that’s invariably a wide-angle lens for landscape, cityscape and astrophotography work, and a telephoto lens for wildlife and portrait.
Normally I use and recommend zoom lenses rather than primes for the versatility they offer, although this decision is of course personal and depends on what you want to shoot.
For example, if I’m visiting a destination where there’s minimal chance of wildlife photography, then I might pack a prime portrait lens rather than a big heavy telephoto zoom lens that I’m unlikely to use.
The same principles apply to accessories. Whilst I am a bit more relaxed about packing things like tripods in hold luggage, I still only want to bring it if I’m likely to use it. As always, planning is key.
Don’t forget to pack extra batteries and memory cards as these will ensure you can keep on shooting even if a battery goes flat or a memory card fills up or fails.

Familiarity with Equipment
When I travel, I often see others struggling and having a hard time getting the type of shot they want. They may have a new camera or tripod, be using their equipment for a type of photography they’ve never done before, or just have little practice with their equipment.
The best thing you can do before your trip is learn as much as you can about your camera, basic photography principles like the exposure triangle , and get in lots of practice at home before your trip. Trying to learn as you go can be frustrating and wastes your limited vacation time.
If you’ve recently bought some new equipment for a trip, or only normally use your camera when you travel, then a lack of familiarity with your gear can cause issues when on the trip. This can also be the case if you rent your equipment in advance of a trip, which is common for situations like a safari, where you might need a specific piece of equipment you wouldn’t otherwise want to invest in.
For gear that you already own, my recommendation is that you read the manual and then practice with it on a regular basis. Photography is a skill, which we can improve with practice. It’s also a skill that can get a bit rusty if we leave it for a while.
Whatever camera you plan to travel with, be it a smartphone or a high-end mirrorless camera, it’s important to understand how it works and how to get the best out of it. You don’t want to miss a shot on a trip because you’re trying to remember how to change focus modes or adjust a setting like the shutter speed.
It is definitely a good idea to get into the habit of taking your camera out with you and using it on regular basis, even if only for practice. Not every photo has to amazing, the main thing is to know how to get the photos you want with the equipment you have.
You don’t need to go some place exciting to practice your photography. The birds in your garden and your neighbor’s cat can help you learn how to shoot wildlife. You can practice food photography at home with your own meals. Wander your local town or city for practicing architectural photography. Shoot landscapes along a local hiking trail, scenic viewpoint, or country park. Your kid’s soccer game can help you practice action and sports photography. Practicing at home means you will have more skills and experience to take better photos on your next trip.
If you are looking for some help and guidance, there are lots of resources online that can help. I personally run an online photography course for example, and I’ve helped over 2,000 people to date improve their photography. But there are plenty of resources out that, from local classes to online guides that can help you learn and challenge you to keep practicing.
If you are renting equipment for a trip, then it can be a good idea to ensure it arrives a bit in advance so you have time to check it is all in good working order, and also to practice with it a bit so you are familiar with it. I’d also recommend reading some online guides and the user manual in advance of receiving it, so you can hit the ground running when it arrives.

Taking Photos of People
Often when we travel we want to get photos of the people in the destination. This might be going about everyday life, such as in a market or other street scene, or during a more special event like a festival or cultural show.
The challenge of course is that not everyone likes to have their photo taken, and you obviously don’t want to upset anyone. There’s also the issue of privacy, which varies by country.
Knowing local privacy laws and customs is particularly important if you are planning to publicly share your photos. While it often is legal to take photos of people in public in most situations, it may be illegal to share, publish, or sell those photos without the person’s permission.
Generally, for non-commercial use, most countries allow photography in public spaces. However, the rules vary by country and jurisdiction. For example, Japan has fairly strict privacy laws. Wherever you travel you will also want to be particularly careful when taking photos of children as there can often be stricter rules compared to photographing adults.
In my experience, the best places to get photos of people are at public events such as festivals, where performers and the crowd normally have an expectation of their photo being taken. Of course, you will still need to check if there are any regulations in place regarding photography.
Another good option we have found for photographing people in a destination is to start with communication. It’s a lot easier to ask for someone’s permission for a photo if you talk with them first.
For example, if you want to take a picture of a market trader at a stall, if you chat with them about their products and buy something, then they will be much more likely to be willing to have their photo taken.
The main thing really is to ask for permission. The worst thing that can happen is that you are turned down, in which case you can move on. Not everyone likes to have their photo taken and it’s important to respect that.

How Much You Can Carry
When we travel, obviously we have to consider our mode of transport when it comes to selecting the photography gear we plan to take with us.
However, it is also important to consider how much you are physically willing to carry. Even if you are traveling from your home on a road trip in your own car, you are still going to need to actually carry your chosen camera gear from wherever you park your car to where you are taking pictures.
How long will you be carrying your camera each day? If you are going to be headed out to explore a city in the morning and not returning until evening to your hotel, do you feel OK carrying your equipment around all day?
If getting to those locations for the shot requires a bit of a hike, then you definitely need to consider the gear you are going to carry.
For example, instead of a heavy tripod, you might invest in a lighter travel tripod . Instead of a wide selection of lenses, you might carry only one or two lenses you are certain you will need.
You might also consider investing specifically in a camera for hiking or backpacking , if that is something you do a lot.
The main thing is to consider carefully the total weight of the equipment you are planning on bringing, as well as anything else you will be carrying with you when out and about like snacks or a drink. If it seems too heavy to carry, consider cutting back a bit so it is a manageable size that you will actually carry.
It is best to be honest with yourself and if you know you won’t lug your mirrorless camera around a city, it is better to just bring your smartphone and learn how to get the most of it rather than bringing along a camera you won’t use. After all, bringing photography equipment that you end up not using isn’t a worthwhile endeavour!

Photography Restrictions
Different destinations and locations will have different rules around what is and what isn’t allowed when it comes to photography. It is best to check these before visiting so that you will be prepared and can plan ahead.
It is important to note that there are a number of museums, religious buildings, palaces, government facilities, and other attractions that forbid photography all together. Some may not even allow you to bring in your camera so you will want to know this to see if there are on-site lockers available or if you will need to leave your camera at the hotel.
While most places in the world do allow photography, there are often restrictions of some kind related to photography. There are quite a few things to look out for, which can impact the photos you are able to get. Some common restrictions to look out for include the following.
- Tripod limitations at events and inside buildings. A tripod can be a great aid to photography , but they can also be a trip hazard and interrupt the flow of people, so many locations prohibit their use. If the majority of locations you plan on shooting don’t allow them, save some weight by leaving it behind.
- Drone restrictions. The rise in popularity of drones for photography has opened up a range of creative possibilities, but also an increase in legal restrictions around their use. Many locations, and even some countries, totally forbid the use of drones. Others have strict rules in place for their use and may require you to get a license. Don’t risk a hefty fine, always check the rules before you visit to ensure you are flying legally
- Security restrictions. Many locations around the world prohibit the use of photography of specific buildings or locations for security reasons. For example, government, military and financial buildings may not allow photography, even of the building exterior or surrounding property. Normally this will be clearly marked, but if in doubt it is always best to check in advance.
- Flash restrictions. Lots of attractions, especially indoor attractions with artwork, will restrict the use of flashes for photography. Many cameras, including smartphones, will automatically enable the flash if there isn’t sufficient light for an image, so knowing how to disable your camera flash is key so you can take photos without breaking any rules.
As you can see, there are quite a few different restrictions to be aware of that might impact your ability to take photos, or to use specific accessories like tripods or flashes. So do check in advance of your visit as you might save yourself bringing equipment you won’t be able to use.
On the flipside, you might assume a location doesn’t allow a photography accessory like a flash or tripod, and then learn that it does! This was the case when I visited Carlsbad Cavern in New Mexico, and to my delight when we visited tripods were allowed. I was glad as it meant I was able to get much better images in the low light conditions.
You can also plan your visit to get better results. For example, many museums have natural light, so if you visit in the middle of a sunny day there may be more light available compared to visiting when it is dark outside.

Travel Companions
If you are traveling with other people, you will want to make sure that your goals for the trip align so that everyone has a good time.
We all want something different from travel. If you are planning a photography specific trip with someone who doesn’t really enjoy photography for example, it is likely that you will have to reach some compromises between you so you are both happy.
As a common example, for landscape photography it is not uncommon to want to be out and about at sunrise and sunset. However, depending where you are in the world, the sunrise might be very early, and the sunset might co-incide with an evening meal time.
The key to a successful trip like this is communication. You and whomever you are traveling with need to make it clear what you want from the trip, and work on a plan together that ensures you all have a good time. So perhaps you skip the sunrise some days, or plan to go out on your own on those mornings and meet up for breakfast.
Of course, another option is to travel solo. Whilst Jess and I normally travel together, I have taken some trips on my own where I have wanted to get specific shots. For example, I did a seven-day winter trip to Finland to photograph the Northern Lights.
Jess loves Finland, but as we’d been before and I was visiting with a plan to stand outside in freezing temperatures for multiple nights on my own, we agreed we’d both likely be happier if I went on my own!
Finally, if you would rather travel in a group and still focus on photography, consider taking a specialist photography tour. These exist for destinations around the world, and will allow you to get great photos and travel with like minded individuals.
See this list of photography tours around the world for some inspiration.

Further Reading
That’s it for my guide to overcoming some of the most common travel photography challenges! If you found this useful, you might enjoy some of my other photography related content. Here are some articles to get you started.
- Thinking about going on safari? See our guide to the best cameras and lenses for safari for some tips on what to take. We also have tips on getting great photos on safari
- If you’re in the market for a new camera in general, we have a detailed guide to the best travel cameras , as well as specific guides for the best cameras for hiking and backpacking , the best compact camera , best bridge camera , best mirrorless camera and best DSLR camera . We also have a guide to the best camera lenses .
- If you want a camera or lens, but the prices are a bit high, see our guide to where to buy used cameras and camera gear for some budget savings options.
- We have a guide to why you need a tripod , a guide to choosing a travel tripod , and a round-up of our favourite travel tripods
- You don’t want to lose all your photos. See our guide to backing up your photos for tips on keeping all your work safe.
- Having lots of photos is great, but you also want to see them! See our guide to how to display your photos for lots of ideas.
- I have a guide to the best monitors for photo editing , as well as a guide to monitor calibration to ensure your screen is set up correctly.
- I have a guide to my favourite photo editing applications , as well as the best alternatives to Lightroom
- I have a guide to the best noise reduction software for some ideas on how to get the best out of your photos even when they might be a bit noisy
- We have a guide to how to use a compact camera , how to use a DSLR camera , and how to use a mirrorless camera . We also have a guide to how a DSLR works
- Knowing how to compose a great photo is a key photography skill. See our guide to composition in photography for lots of tips on this subject
- We have a guide to what depth of field is and when you would want to use it.
- We are big fans of getting the most out of your digital photo files, and do to that you will need to shoot in RAW. See our guide to RAW in photography to understand what RAW is, and why you should switch to RAW as soon as you can if your camera supports it.
- You’re going to need something to run your photo editing software on. See our guide to the best laptops for photo editing for some tips on what to look for.
- If you’re looking for more advice on specific tips for different scenarios, we also have you covered. See our guide to Northern Lights photography , long exposure photography , fireworks photography , tips for taking photos of stars , and cold weather photography .
- If you’re looking for a great gift for a photography loving friend or family member (or yourself!), take a look at our photography gift guide ,
Looking to Improve Your Photography?
If you found this post helpful, and you want to improve your photography overall, you might want to check out my online travel photography course .
Since launching the course in 2016, I’ve already helped over 2,000 students learn how to take better photos. The course covers pretty much everything you need to know, from the basics of how a camera works, through to composition, light, and photo editing.
It also covers more advanced topics, including astrophotography, long exposure photography, flash photography, and HDR photography.
You get feedback from me as you progress, access to webinars, interviews and videos, as well as exclusive membership of a Facebook group where you can get feedback on your work and take part in regular challenges.
It’s available for an amazing one-off price for lifetime access, and I think you should check it out. Which you can do by clicking here .
And that’s it! I’d love to hear about your thoughts on challenges you’ve faced when traveling as a photography, and am happy to answer any questions you have. Just pop them in the comments below and I’ll get back to you as soon as I can.

Enjoyed this post? Why not share it!
There are 2 comments on this post
Please scroll to the end to leave a comment
Meryl Issacman says
18th November 2022 at 12:12 pm
Hello Laurence,
Some great tips for travel photography here! Very useful and helpful advice for someone who is starting to take photography a bit more seriously on her travels. I am wondering if you have some practical tips or suggestions for suitcases or backpacks and packing. I want to travel carry-on only on a solo international trip.
Specifically I think I want to be able to take a camera, three lenses, a flash, small tripod, and some accessories for a trip I have coming up (photography tour in Spain – coming from the U.S.) – I have never traveled with so much photo stuff before. But also need to get in all my clothing, shoes, jacket, accessories, electronics, guidebook, etc….
Best, Meryl
Laurence Norah says
18th November 2022 at 1:24 pm
This is a great question. A lot of the answers will come down to budget and the size of your camera gear – if you are using a micro four thirds system for example your setup will likely be a lot smaller than if you are using a full frame system with big lenses.
Another thing to consider is carry-on sizes. I am guessing you will just be flying to and from the USA, in which case most carriers are fairly standard. However, if you are planning on flying on an European budget airlines, it’s worth being aware that they have different carry-on size standards which tend to be much more restrictive.
So personally I use Vanguard bags and am an ambassador for them. However, I am not sure to be honest if you are going to be able to get all your equipment in them. I’d say perhaps the Alta Sky 53 or Alta Fly 58T might be an option, but it will depend on the amount of clothing you want to bring. If you do decide on one of those, you can save 20% with the discount code FindingtheUniverse.
Another option to consider is the Nomatic Peter Mckinnon 35L backpack . That should be carry-on friendly and fit some of your clothing at least, but again it will all depend on how much gear you have and how much clothing you are taking!
I hope this helps a bit at least, let me know if I can offer any more input. Have a great time in Spain!
Leave a Reply Cancel reply
Your email address will not be published. Required fields are marked *
Let me know when there's a reply to my comment (just replies to your comment, no other e-mails, we promise!)
Subscribe to our monthly Newsletter where we share our latest travel news and tips. This also makes you eligible to enter our monthly giveaways!
We only ask for your e-mail so we can verify you are human and if requested notify you of a reply. To do this, we store your data as outlined in our privacy policy . Your e-mail will not be published or used for any other reason other than those outlined above.
Get travel inspiration sent straight to your inbox, plus 20% off!
By clicking ‘Sign Up,’ I acknowledge that I have read and agree to Hachette Book Group’s Privacy Policy and Terms of Use
Site Preferences
Get 20% off your purchase when you sign up for the Moon Travel Guides newsletter!
By clicking “Accept,” you agree to the use of cookies and similar technologies on your device as set forth in our Cookie Policy and our Privacy Policy. Please note that certain cookies are essential for this website to function properly and do not require user consent to be deployed.
Instaworthy Route 66: 10 Great Photo Ops
You’re not the only one doing it for the ‘gram. Earlier this year, Hertz surveyed British travelers, asking them which road trips were the most Instagram-worthy in the world. Guess which one nabbed the top spot? Route 66. The 2,448-mile adventure from Chicago to Santa Monica is chock-full of sights—from kitsch Americana to stunning natural landscapes—that tempt photographers from all over. Here are a few of my favorite Route 66 photo ops.
1. Cloud Gate, Chicago, IL
Affectionately known as “the bean,” this stainless steel sculpture is selfie central. You’ll find it in Chicago’s Millennium Park, usually with a crowd of tourists surrounding it. Angle your camera just right and you’ll capture the city’s famous skyline in the sculpture’s mirror-like surface.
2. Muffler Man, Atlanta, IL

He’s strong. He’s stoic. He’s 20 feet tall and he’s holding a hot dog. Meet the Muffler Man, a towering fiberglass statue watching over the small town of Atlanta. During Route 66’s heyday, dozens of these statues dotted the highway, acting as eye-catching advertisements for businesses.
3. Blue Whale, Catoosa, OK

Where else can you snap a pic from inside the mouth of a whale? This pipe-and-concrete structure in the shape of a friendly-faced whale stretches over a tranquil pond; in the 1970s, it served as a dock and diving board for the once-popular swimming hole.
4. Cadillac Ranch, Amarillo, TX

You can’t miss Cadillac Ranch. This public art installation celebrates the Mother Road’s car culture in a surreal way: 10 big-finned Cadillacs stick straight up from the ground, noses buried in a wheat field and the Texas horizon looming beyond.
Newsletter Signup
5. blue swallow motel, tucumcari, nm.

Retro neon signs abound on Route 66, and this is one of the best. The Pixar film Cars even featured Blue Swallow’s “100% Refrigerated Air” slogan in the movie’s Cozy Cone Motel sign.
6. Abandoned Shell Station, Tucumcari, NM

After the Mother Road’s decommission in 1985, many of the businesses along Route 66 were forced to shutter their doors. Today you’ll encounter abandoned storefronts, empty gas stations, and weathered signs—frozen-in-time relics of Route 66’s past.
7. Standin’ on the Corner Park, Winslow, AZ

There’s no better on-the-road photo than that of the Route 66 sign painted on the pavement at this Arizona spot made famous by The Eagles song, “Take It Easy.”
8. Wigwam Motel, Holbrook, AZ

This 1950s motel is made for Instagram. The perky teepees stretching skyward, vintage cars in the parking lot, and a neon sign that blinks all night. If you arrive at dusk, capture the glow of the Arizona sunset, a perfect photo backdrop.
9. Roy’s Motel & Café, Amboy, CA

The Googie-style sign of Roy’s pops against Death Valley’s bleak landscape, and its bold colors and geometric lines beg to be photographed.
10. End of the Trail, Santa Monica, CA

On the busy Santa Monica Pier that juts out over the Pacific Ocean, proud Route 66’ers clamor for a selfie in front of this sign. Proof of an epic journey now concluded.

Jessica Dunham
About the author.
Learn more about this author

Moon Route 66 Road Trip
by Jessica Dunham
by Moon Travel Guides
- ebook (Revised)
Also available from:
- Barnes & Noble
- Books-A-Million
Pin it for Later

7 Editing Tips to Improve Your Travel Photographs

Today, professional photographer Laurence Norah of Finding the Universe finishes his five-part series on taking better travel photos. Here, Laurence gives some simple post-processing techniques that you can use to make your travel photos wow your friends and family! Editing your photos is just as important as how you compose them, so I hope you’re ready to take some notes!
One of the most misunderstood parts of digital photography is what happens after you take the shot: editing your photos, aka post-processing. This is where you edit the images you have taken, to create the final product.
Post-processing is the equivalent of the darkroom from the days we shot in film.
In today’s post, we’re going to be covering some ideas for editing your photos, from the basics (cropping and leveling) to more complicated actions, like recovering shadow and highlight information.
Editing Photos: 7 Editing Tips for Your Travel Photos
1. How to Crop Your Photos The crop tool allows you to change the size of your image, and also to change the aspect ratio. For example, you can crop an image from a rectangular shape to a square shape. There are many reasons you would want to crop, including for publishing in different formats and aspect ratios.
Let’s take a look at the first photo from this post, a lightning shot I took on a recent trip to the Florida Keys. Here’s the original version without cropping:
And the edited version, post-crop:

Compared to the original, I have cropped the image to remove the dark part of the pier on the right-hand side of the image and recomposed using the rule of thirds, so I have one-third land and two-thirds sky. This makes the lightning bolt more the focus of the shot.
You might wonder why I didn’t just compose properly when taking the shot. Well, in this case, I was doing a long-exposure shot without a tripod, so had the camera balanced on the edge of the pier for stability. That very much limited my ability to perfectly frame the moment, so I just shot wider, knowing I’d be able to crop the shot appropriately after the fact.
Let’s look at what cropping looks inside a couple of the tools available.
Here’s an example of cropping in Snapseed:

And the same thing in Lightroom:

In both cases, cropping is very simple: it just involves you selecting the crop tool and then selecting the area you want to keep with your mouse or finger. Then you apply the changes, and voilà, your new cropped image is ready to go.
As you see from this and later examples, the tools look similar across different platforms, so it’s easy to apply what you know from one tool to another.
2. How to Level Your Travel Photos One of my personal petty annoyances in photography is when the horizon line in a photo isn’t level. Sometimes when we’re caught up in the moment, this basic compositional rule is forgotten — but the good news is that editing your photos to make them level is also very easy.
I’ll use the lightning shot as my example again. Balancing the camera on the edge of the pier meant that the shot wasn’t level — this is particularly noticeable to the eye when the image has a clearly defined horizon line, such as the sea.
If we look at a zoomed-in version of the image in its original form, with a line overlaid near the horizon, we can see that it’s not level — the line is closer to the horizon on the right-hand side than the left.

In Lightroom, the level tool is part of the crop tool, and you can just rotate the image to suit. When you use the level tool, a grid will appear to help you get the alignment correct. Here’s a screenshot of that in action in Lightroom.

And here’s the same procedure in Snapseed, where the level tool is called “Rotate”:

Leveling an image is a really simple task that will take just a few seconds of your time, resulting in a much more visually pleasing image.
3. Vignetting Your Photos Vignetting is about making parts of the image darker or lighter than other parts, in order to make it clearer what the subject of the shot is.
Some tools restrict your vignette to the corners, but in applications like Snapseed and Lightroom, you can selectively darken and lighten areas of the image — you don’t need to restrict yourself to the corners.
Taking the lightning shot above, let’s load up the vignette tool in Snapseed:

Here we have options for how big to make the “center size,” i.e., the area to be edited. Inside this area, everything can be made brighter (inner brightness) and everything outside the area can be made darker (outer brightness). We can also do it in reverse, making the inner darker and the outer brighter.
Let’s apply the vignette tool to the lightning bolt, to give you an idea of the effect:

Above are the settings I chose for outer brightness and inner brightness, while below is the size of the vignette itself, which is based on the center size setting.

Vignetting is particularly good for portraits, and anywhere where you really want to make the subject of the image more clearly obvious to the viewer.
4. How to Change Shadows and Highlights in Your Photos Sometimes when we take a photograph, parts of the shot might end up being darker or brighter than we want. We refer to the dark areas of the shot as shadows, and the bright areas of the shot as highlights.
We can fix this by changing the brightness of the shadow and highlight areas specifically, using either the “Shadow” or “Highlight” tool. This is a tool that works particularly well on RAW files, as they retain more information on the shadow and highlight areas of an image compared to a compressed JPG, which discards most of this information in order to reduce the file size.
Let’s take a quick look at adjusting shadows and highlights using Lightroom. (In Snapseed, shadow and highlight adjustment can be found under the “Tune Image” setting.)
Here’s a shot of a couple enjoying a bonfire and fireworks display in Edinburgh during Hogmanay:

As you can see, the fireworks and bonfire are clearly visible, as are the torches the couple is holding, but the rest of the shot is dark. Let’s adjust the settings and see what we can get.

In this version of the image, the couple is much more visible, as are the hill the fireworks are on and the surrounding crowd.
To achieve this, I increased the overall exposure of the image, making the whole image brighter, including the shadows and the highlights.
Then, as the shadow areas were still a little dark, I increased those a little more.
Finally, as the global exposure adjustment made the fireworks and bonfire too bright, I reduced the highlights a little bit to give the final result.
Shadow and highlight adjustment is useful in a wide range of scenarios to help balance the image out — bringing overexposed areas down in brightness, and helping to boost the shadows. Just be aware that a light touch is recommended — increasing the brightness of the shadows too much can result in a lot of noise being revealed, which might look unnaturally green or purple.
5. How to Adjust the Contrast Contrast is about accentuating the difference between the light and dark parts of the image. Increasing the contrast of an image can dramatically improve the visual impact that has, by making the boundaries between those light and dark parts clearer.
Let’s take a look at a shot of people jumping against the sunset in the Sahara, for example, which I’ll be editing in Snapseed.

There is nothing too wrong with this shot, but it lacks the visual impact that I wanted. Ideally, I would want the shapes of the people to be in full silhouette against the sun, but as it was shot the camera picked up some skin tones and clothing color.
Using the contrast tool, we can make the dark areas stand out against the bright areas.

And here’s the result:

As you can see, this made the jumping figures and the dune more silhouetted against the sky. In most shots, you only want to tweak the contrast a little bit to get the desired effect, normally no more than +20 or so, but in this case, the higher number gave the best result.
6. How to Adjust Colors Color adjustment is another important piece of the editing toolkit. We can adjust image color in all sorts of ways, from changing the overall “warmth” of the image (how blue or yellow it appears), to individually changing the hue and saturation of specific colors inside of an image.
For this post, though, I just want to cover some very simple color changes you can use to make your images just a little more visually impactful.
The fastest way to adjust an image’s color is with the “Saturation” tool. This changes the appearance of every color in an image to make it more or less saturated. We can use the saturation tool to desaturate an image, eventually resulting in a black-and-white image with no color:

Or we can go all the way to the other end of the spectrum, and make the color incredibly saturated:

As with many edits, the key is to find a good balance — oversaturated images tend to look rather unnatural. Desaturated images can be very effective, and of course black-and-white is an excellent choice for all sorts of situations, in particular portraits, architecture, and certain landscape scenes. But generally, you would want to find a happy midpoint: not too oversaturated and not too undersaturated.

Saturation is adjusted on a sliding scale and is found on the basic adjustments panel in Lightroom or the “Tune Image” option in Snapseed.
7. Blemish Correction The last area I’m going to touch on today is blemish correction, or “image healing.” Sometimes there will be something in an image that you really don’t want to be there, like an inconvenient pimple on someone’s face. This is easy to remove in all the major editing tools.
You can, in theory, remove any object from a scene, but the healing tool works best on distinct, small objects that are surrounded by uniform colors. This is because the heal tool has to replace the area you wish to remove with something else, and this works best when it has an area nearby that looks similar. So for example, a pimple on a face is surrounded by a lot of similarly colored skin, so the heal tool can easily calculate what to replace the pimple based on the surrounding area.
For this example, I’m going to show how Snapseed can be used to replace an object in a scene. Here’s a group of people sitting on a sand dune in the Sahara:

Let’s say for some reason I only wanted to have people sitting in my shot, and I need to remove the standing person. She is a good candidate for removal as she is separate from the rest, and the surrounding scenery is not too complicated.
In Snapseed, we load up the healing tool, then we zoom in on the object to be removed with the standard “pinch to zoom” gesture.

Next, we use our finger to draw the area to be removed. It’s important to be as precise as possible because the tool is most accurate with small objects.

Once we have drawn the area, Snapseed will edit it out, replacing it with the best guess of what is behind the object.

As you can see, the result is impressive, with no real evidence that there was anyone standing there at all.
The healing tool is perfect for all manner of fixes, from editing out unwanted background strangers in your shot, to removing skin blemishes in portraits or power lines in landscape shots.
Best Photography Editing Software
Here is a list of the best editing tools out there:
- Adobe Lightroom (PC or Mac) – Lightroom is the industry standard tool for photography professionals. But this post doesn’t focus on Lightroom, or cover everything you can do in Lightroom, as it’s a massively complex tool, covering both photo management and photo editing.
- Photos (Mac) – I list iPhoto here mainly because it’s a commonly used tool among Apple users. However, I personally never recommend using it. While it will let you do everything that I cover in this post and is better than nothing, the way it manages your photos makes it hard to migrate to a more sophisticated system further down the line if you choose to do so.
- Snapseed (iOS or Android) – Another free Google tool, Snapseed is the best mobile image-editing app for both iOS and Android. It’s an incredibly powerful tool that, while simple to start using, has a great many features that take time to fully master. I use it for 95% of my mobile editing needs.
Editing your photos is a crucial step that far too many people skip. As you can see from this lesson, there is much more to editing your photos than just picking a filter and posting your picture on Instagram. By incorporating some of these tips and techniques into your post-processing routine, you’ll be able to improve your travel photography by leaps and bounds.
So get out there and start taking pictures!
Laurence started his journey in June 2009 after quitting the corporate life and looking for a change of scenery. His blog, Finding the Universe , catalogs his experiences and is a wonderful resource for photography advice! You can also find him on Facebook , Instagram , and Twitter .
Travel Photography: Learn More Tips
For more helpful travel photography tips, be sure to check out the rest of Laurence’s series:
- Part 1 – How to Take Professional Travel Photos
- Part 2 – How to Shoot the Perfect Travel Photograph
- Part 3 – The Best Cameras & Travel Photography Gear
- Part 4 – How to Take the Perfect Photo: Advanced Techniques
- Part 5 – 7 Editing Tips to Improve Your Travel Photographs
Book Your Trip: Logistical Tips and Tricks
Book Your Flight Find a cheap flight by using Skyscanner . It’s my favorite search engine because it searches websites and airlines around the globe so you always know no stone is being left unturned.
Book Your Accommodation You can book your hostel with Hostelworld . If you want to stay somewhere other than a hostel, use Booking.com as it consistently returns the cheapest rates for guesthouses and hotels.
Don’t Forget Travel Insurance Travel insurance will protect you against illness, injury, theft, and cancellations. It’s comprehensive protection in case anything goes wrong. I never go on a trip without it as I’ve had to use it many times in the past. My favorite companies that offer the best service and value are:
- SafetyWing (best for everyone)
- InsureMyTrip (for those 70 and over)
- Medjet (for additional evacuation coverage)
Want to Travel for Free? Travel credit cards allow you to earn points that can be redeemed for free flights and accommodation — all without any extra spending. Check out my guide to picking the right card and my current favorites to get started and see the latest best deals.
Need Help Finding Activities for Your Trip? Get Your Guide is a huge online marketplace where you can find cool walking tours, fun excursions, skip-the-line tickets, private guides, and more.
Got a comment on this article? Join the conversation on Facebook , Instagram , or Twitter and share your thoughts!
Disclosure: Please note that some of the links above may be affiliate links, and at no additional cost to you, I may earn a commission if you make a purchase. I only recommend products and companies I use. Opinions, reviews, analyses & recommendations are mine alone and have not been reviewed, endorsed, or approved by any of these entities. This page does not include all card companies or all available card offers.
Related Posts

GET YOUR FREE TRAVEL STARTER KIT
Enter your email and get planning cheatsheets including a step by step checklist, packing list, tips cheat sheet, and more so you can plan like a pro!

Capturing the Essence: Travel Photography Portfolio
Explore landscapes, people, culture, and unique moments through our lens.
Travel Photography
Capture the essence of landscapes, people, culture, and unique moments.

Explore New Horizons
Discover hidden gems.

Cultural Immersion Tours
Immerse yourself in local traditions and customs.
Capturing Essence
Explore our gallery showcasing landscapes, people, culture, and unique moments.

Capturing the essence of a place through travel photography is truly magical. Highly recommend!
Photo Op Travel Agency helped me capture unforgettable moments during my trip. Amazing experience!
Essence of a place—its landscapes, people, culture, moments.
info@ photooptravelagency.com
(407) 733-0015
© 2024. All rights reserved.
205 ABBOTSBURY DRIVE KISSIMMEE, FL 34758
The Most Popular Photo Ops in America

All products featured on Condé Nast Traveler are independently selected by our editors. However, when you buy something through our retail links, we may earn an affiliate commission.
14,450,240: that’s how many prints the site ScanMyPhotos.com digitized in the fourth quarter of 2015. While printed photos hold their own allure, many individuals are turning to services like ScanMyPhotos.com to ensure their memories last forever. But this year, the service noticed an interesting trend: nearly seven out of ten of those photos were travel related, says CEO Mitch Goldstone. Those over nine million travel scans made up for more photos than family snapshots, holiday photos and special occasion images. The company itself has been around for over two decades and scanned more than 300 million pictures for photo enthusiasts around the world, sending users a flat rate box to fill with photos to be digitized and returned for $145.
This year, taking in all of the photos the company had scanned in at the end of 2015, ScanMyPhotos.com uncovered the most photogenic and photographed spots around the nation. The most popular destination? Disney resorts , which showed up in 28.4 percent of travel snapshots. The iconic Magic Castle featured in most photos, followed by the big man mouse himself, Mickey. Runner-ups for most popular locale included Las Vegas , which featured in 27.9 percent of photos (a whopping 1.05 million images) and New York City (12.2 percent). Rounding out the top five picks throughout the ages were particularly patriotic destinations. Coming in fourth were national parks, from Yellowstone to the Statue of Liberty, and Washington, D.C. followed closely behind.

Picture This: 5 Ways to Create IG-Worthy Photo Ops at Your Event
If an event takes place and no one posts a photo of it on their ig story, did it really even happen dci breaks down the best ways to create memorable (and shareable) photo ops at your next event.
Let's Connect Looking to enliven your event experiences? You’re in the right place.
our guests will be armed and ready to snap a selfie at your next event, whether you have a photo-worthy setup or not. Creating sharable photo stations keeps attendees engaged and takes a bit of pressure off marketing from having to capture the night. Here’s how we take a photo op from concept to creation.
Camera Ready
As part of an elegant, high-end event designed by DCi, the team wanted to create a seamlessly integrated photo op that pulled inspiration from the natural surroundings – a lush and luxurious garden park. The team designed and produced a swing covered in greenery, complete with a working chandelier that mirrored the environment and matched the rest of the decor. The photo op turned into an engaging, interactive component where guests could swing, snap, and post away!
Effortless Integration
Another way to create an IG-worthy moment is by using entertainment as part of the photo setup. For a travel industry showcase, DCi crafted a series of photo ops that captured the essence of key California destinations. For example, as part of the San Diego photo op, the team incorporated a Maverick look-a-like to capitalize on the popularity of the recently released film Top Gun: Maverick. The setup was a hit. Attendees flocked to the station to grab a photo with Tom Cruise’s doppelganger all evening long.
It’s All in the Elements
The key to creating a successful photo setup is to make it a purposeful part of the entire event experience. In other words, these set-like backdrops and experiences should attract the same amount of attention as the rest of the entertainment and decor. The most successful events are ones that cultivate a feeling of harmony and surprise between all parts of the experience. The challenge of creating elaborate photo setups comes with social media and its constant evolution. DCi stays on top of social media trends to make the final product successful. With the rise in video content (looking at you, TikTok), it’s becoming more and more important to factor in a video component into the social media experience.
Tying it Together
Adding attention-grabbing features like neon signs or balloon art is an easy way to spice up your insta-worthy moments. Even a simple, plain background can turn into an elaborate photo spot; all that’s required is a little creativity! Props can also help tie a theme together – guests can’t turn down sparkly disco balls, bejeweled cowboy hats, or delicate flower crowns.
Reusing & Reconstructing
Staying in line with DCi’s sustainability initiatives and cost-saving strategies, the design team often augments items used for photo ops to fit the client’s brand so that they can repurpose the props for other events. For example, a rustic wood wall or lush hedge wall can be recycled and customized with creative signage featuring the client’s branding, glowing neon statements, or eye-catching floral arrangements to create shareable moments.
by: DCi Inc.
Let’s Connect
Looking to enliven your event experiences you’re in the right place..
- Emails? Sign me up!
Corporate Office 2620 Financial Court Suite 101 San Diego, CA 92117
All Offices 800 272 3775
© Copyright 2024 Destination Concepts Inc.
website: Hawthorn Creative
- Brand Immersion
- Logistics Management
- Event Design & Production
- Destination Management
- Virtual Events
- The DCi Difference
- Creative Solutions
Corporate Office 2620 Financial Court , Suite 101 San Diego, CA 92117
All Offices 800 272 3775
- Northern California
- Southern California
- San Francisco
- Napa Valley
- Laguna Beach
- Newport Coast
- Huntington Beach
- Los Angeles
- Palm Springs
- Santa Barbara
- Scottsdale & Phoenix
Re-invigorating your inbox starts here.
- Student Successes
- My Learning
7 Best Travel Apps for Photographers in 2024 (Updated)

You can also select your interests for free access to our premium training:
Travel apps for photography can help you with anything from finding the best photo spots to editing while on the move. Here are a few of the best apps for travel photography options you need to download before exploring beautiful destinations on your bucket list.
7 Best Travel Apps for Photographers
We list travel apps for both iOS and Android. And there is a mix of free and paid apps.
7. Snapseed

- App Type : Photo editor
- Price : Free
- Platform : iOS and Android
This is one of the best photography apps out there because of its features. It lets you do anything from color grading to adding all sorts of effects to make your travel photos look professional. Snapseed may be from Google, but it also supports iPhones . That means you don’t have to worry about any compatibility issues. And the good news is that all the tools it offers on Android are also available on the iPhone. Like any other editing app , Snapseed has all the basic tools you need, from adjusting exposure to correcting the white balance . But what differentiates it from the rest is the plethora of effects that it features. For instance, it has dozens of presets that let you create anything from retro film effects to classic black and white images . It also has advanced editing tools such as HDR . This lets you create vivid pictures even in challenging lighting conditions. Apart from the editing tools, Snapseed also includes frames and text tools to personalize your images. Using it allows you to create scrapbook-style images by adding borders and captions .

- Price: Free but has in-app purchases
While traveling, you don’t want to spend too much time on your phone editing your images. That’s why VSCO is one of the best apps for photographers because it’s so easy to use. Unlike Snapseed, VSCO doesn’t offer a lot of tools for advanced editing. Instead, it offers a streamlined experience. It lets you add presets and tweak basic exposure settings quickly. To use VSCO, all you have to do is tap a preset you like and adjust the sliders to alter the amount of effect you like on your images. You can also use sliders to change the brightness, contrast, saturation, highlights, and other exposure parameters. VSCO’s main selling point is its ability to recreate a film look . Its presets are based on real film stocks, making the result authentic. Apart from basic adjustments, you can also add fade and grain, among other effects, to help you customize the vintage style of your photo.
5. Pro HDR X (Discontinued)

- App Type : HDR ( high dynamic range ) camera and editor
- Price : $1.99
When you’re doing travel photography, a big chunk of photos are landscapes. And Pro HDR X is what you’ll need to make your images look more vivid and alive. HDR, or High Dynamic Range, is a technical term that describes the ability of an image to faithfully display shadows and highlights. Your phone cannot accurately capture the darkest and brightest elements, especially in bad lighting conditions. That’s why you’ll need Pro HDR X to make calibrations and ensure that your final image has rich blacks and bright whites. To create vivid landscapes, Pro HDR X captures three images with different exposures. It then automatically combines those pictures into one that has all the correct shadows and highlights. Just remember to only use Pro HDR X for static shots, preferably on a tripod . If you include moving subjects in your frame, they’ll end up blurry since the app sandwiches the three photos it takes into one image.

- App Type : Photo sharing and social media
Looking for the best locations when traveling can be intimidating, even for veteran travelers. When you’re in a place you haven’t been, it’s easy to get lost and miss the beautiful gems you want to capture. Spot helps you locate picturesque destinations while traveling. Consider it a social media platform where photographers can share the local spots they discover in the areas they visit. Apart from featuring well-known destinations such as Paris , Spot showcases places that other people may not know about at all. This cool app even has maps to help you locate where the photos were shot. It’s for planning your shoots, especially if you want to include unique places in your portfolio . Spot also lets you share the places you discovered on your travels. When you upload your photos to the app, you get to add locations and even include tips to help your fellow photographers track the exact spot where you took the pictures.
3. Citymapper

- App Type : GPS
When you’re doing travel photography, your ability to navigate places is just as crucial as your ability to take pictures. Knowing how to get there in the quickest way possible allows you to cover more areas. You can always use Google Maps to help you figure out where to go. But it doesn’t have all the information you need to get there. Citymapper shows you everything from routes to various transportation options to reach your destination. One of the biggest features of Citymapper is that it shows you the nearest train and bus stations. And it guides you on how to get there. It even shows the arrival and departure times, so you don’t miss your bus or train. Citymapper is available in major cities from Asia to Europe . The only catch is that it won’t be much use if you happen to be in lesser-known destinations. But if you happen to find yourself shooting around New York or Paris , this app is definitely for you.
2. PhotoPills

- App Type : Sun and moon tracker, photography assistant, and calculator
- Price : $10.99
Think of PhotoPills as your photography instructor and assistant. It has all the tools you may need, from taking photos of the stars to calculating your depth of field . One of its main features is the sun/moon/ star tracker . It helps you figure out where the sun or the moon will be at your location at any time of the day. If you want to know where the moon will rise and set, you have to get your phone out. What’s great about PhotoPills is that it uses augmented reality to show you where the sun or moon will be in a real environment. Even if you use the app in the middle of the day, you can see a digital rendition of the moon on your screen like it’s there. PhotoPills is also perfect for tracking the Milky Way . You can use it to figure out its location so that when the night comes, you can go to the exact spot where you expect it to appear. Apart from the tracker, it also has calculators for DOF, FOV, Hyperfocal Table, Long Exposures , Time Lapse and Star Trails . So if you don’t like fumbling around to get your settings correct, you’ll find this app useful.
360° Panoramic Creations:

We create high-quality stabilized video having 8k and 4k resolution, 48 or 24 frames per second together with high-quality post-processing. Videos are supported by the most advanced technologies, such as virtual reality headsets (including Samsung Gear VR), different electronic devices and YouTube channels.
We use different types of moving and fixed objects (tripods, monopods, cars, helicopters, building cranes, etc.) to record videos. For aerial shooting we usually use drones with fully gyro-stabilized unique suspension. Panoramic video covers up all the space around the camera 360x180 degrees without black spots at both nadir and zenith viewing angle.
360° videos are available in any format you choose: .mp4, .avi, .mov, etc. All the videos are made and kept in frames, making it possible to encode them into any available format and bitrate with the resolution up to 8k.
360° PHOTOGRAPHY
Our team creates high-quality 360° photo-panoramas with 35000x17500 pixels resolution (in the equidistant projection) and carries out professional post-processing and corrections of any complexity. We develop virtual tours which are suitable for all browsers, support both Flash and HTML5 technologies and are compatible with different mobile devices and virtual reality headsets (including Samsung Gear VR).
We use different types of moving and fixed objects (tripods, monopods, cars, helicopters, building cranes, etc.) to record videos. For aerial shooting we usually use drones with the fully gyro-stabilized unique suspension. Panoramic video covers up all the space around the camera 360x180 degrees without black spots at both nadir and zenith viewing angle.
Ready 360° photo-panoramas cover up all the space around the camera 360x180 degrees without black spots at both nadir and zenith viewing angle.
Info-points (description buttons that can be placed in the panorama), embedded pictures, video and audio can be added to the virtual tour.

360° GIGAPANORAMA
Our team creates high-quality 360° photo-panoramas with resolution from 1 to 3 gigapixel and carries out professional post-processing and corrections of any complexity. We develop virtual tours which are suitable for all browsers, support both Flash and HTML5 technologies and are compatible with different mobile devices and virtual reality glasses (including Samsung Gear VR).
Info-points (description buttons that can be placed in the panorama), embedded pictures, video and audio can be added to the ready virtual tour.
360° TIMELAPSE
We can make panoramic timelapses with the given viewing angle and resolution up to 12k with professional post-processing and without black spots at both nadir and zenith viewing angle. 360° timelapses are supported by the most advanced technologies, such as virtual reality glasses (including Samsung Gear VR), different electronic devices and YouTube channels.
360° timelapses are available in any format you choose: .mp4, .avi, .mov, etc. All the timelapses are made and kept in frames, making it possible to encode them into any available format and bitrate with the resolution up to 12K.
Content sales:

VIRTUAL TOURS
On the basis of 360° panoramas we create virtual tours of any complexity, branded with logos and design elements of the company’s website together with embedding interactive elements, such as photos, slideshows, videos, descriptions, switch-points to other panoramas, audio descriptions, 3D sounds.
Our clients receive a fully functional virtual tour developed in HTML5 and supported by any computer or mobile device (iOS, Android, Windows Phone).
360° Photo Price List
STOCK PHOTOS
For almost 10 years of travelling around the world our team has gathered an extensive stock of pictures, taken from both flying devices and the ground.
Any picture presented at our stock can be licensed for any kind of possible use. We can also offer the photos of ultra-high quality (the longer side up to 103,000 pixels).
You can also take a look at the spherical panoramas published on the website www.airpano.ru . Any of the 360° panoramas represented on the website can be converted into a printed image of very high quality.
Photogallery Price List

STOCK 360° VIDEOS
By filming 360° video since 2011, our team has gathered an extensive stock of clips, taken from both flying devices and the ground.
Any video presented on our website can be licensed for any kind of possible use.
360° videos are available in any format you choose: .mp4, .avi, .mov, etc. All the videos are made and kept in frames, making it possible to encode them into any available format and bitrate.
360° Video Price List
APPLICATIONS
We are one of the software developers of applications based on 360° photos and videos. Currently, there are 7 applications in our portfolio. One of them was top-rated in 84 countries and listed among the best applications of the year 2014 according to App Store.
These applications can also be used for demonstration of panoramic content with the help of virtual reality devices, such as Samsung Gear VR, Google Cardboard and analogues.
Exhibition installations:

EXHIBITION INSTALLATIONS
AirPano team has the experience of creating panoramic cinemas and video-walls, making it possible to demonstrate our panoramic content at different kinds of events, exhibitions and in museums. The size is only defined by the premises, the quality of projector and the dimensions of plasma screens. Such solutions usually make a deep impression on visitors.
The control is carried out by a tablet or Kinect devices.

TOUCH SCREENS
We are ready to create applications with panoramic content working on touch screens of any size. Both AirPano panoramas and the client’s material can be the basis for this kind of software.
We create virtual tours of any complexity, branded with logos and design elements of the company’s website together with embedding interactive elements, such as photos, slideshows, videos, descriptions, switch-points to other panoramas, audio descriptions, 3D sounds.

VR HEADSETS
Our virtual tours and 360° videos are supported by all the types of virtual reality headsets (VR): Google Cardboard, Oculus Rift, Samsung Gear VR, Sony Morpheus and others.
We can also develop special software for operating on Samsung Gear VR, if required.
AirPano in cooperation with Polden Studio carries out the installation of the binocular usage of the client’s or our own content. With the help of binoculars, the client can present the panoramic content at different kinds of events, exhibitions and in museums. This kind of devices usually attract a lot of visitors and leave a deep impression on them.


28 Magical Photo Spots at Disneyland + California Adventure
By: Author Caroline Ikeji
Categories California , Disney , Photo Guides , USA
Disneyland is not only one of the most visited (if not THE most visited) attractions in Orange County , it’s one of the most photogenic . There are tons of Instagram-worthy Disneyland photo spots to help you commemorate your magical visit to the park!
With everything from a fairytale castle, futuristic rides, retro route 66 vibes, and even lands inspired by Star Wars and Marvel’s Avengers, there is plenty of fun to be had (whether you’re a kid or even as an adult !) along with endless photo ops inside both Disneyland and California Adventure. Seriously, you’ll find plenty of opportunities to snap away with your camera!
But what are the best places to take pictures in Disneyland? As a photography enthusiast, content creator, and Magic Key (annual pass) holder who frequently visits the parks, I’ve been on the mission to uncover all of the best and most Instagrammable places in Disneyland.
Sure, we all know about those iconic Disneyland photography locations, such as the Sleeping Beauty Castle, the Mad Tea Party ride, the floral Mickey at the Disneyland entrance, and the Pixar Pier skyline over in California Adventure. You can’t go wrong with any of those spots – they’re iconic for a reason!
But I’ve also got plenty of secret photo spots in Disneyland for you as well, including hidden doorways, nooks, and murals that you might miss otherwise.
Keep on reading for all of the best Disneyland photo spots to add to your itinerary in the parks!
This post contains affiliate links. This means that if you make a purchase or booking, I may receive a small commission at no additional cost to you. Pictures & Words is a participant in the Amazon Services LLC Associates Program, an affiliate advertising program designed to provide a means for us to earn fees by linking to amazon.com and affiliated sites at no cost to you.
Good-To-Know Disneyland Photography Tips

– Shoot early (or late): Early in the morning in the hour or so after rope drop is when you’ll find the least amount of crowds and the best chance to take the best photos! Late at night around closing is an ideal time as well, but you’ll need to know night photography (or have a flash) to get the best shots.
– Play around with angles and aperture. Chances are, it’s going to be BUSY! Even on a quiet day at Disneyland, it’s rare that you’ll get a photo without other people in the background. My way around this is to play around with your angles – if you shoot from the right angle (try shooting from below), you’ll block out some of the other people in your shot. Likewise, play around with aperture (the f stop on your camera lens), or portrait mode on your phone – if you blur them out, they’ll be far less distracting.

– Be patient. And on that note, even if an area is swarming with people, if you are patient and wait a little bit, chances are it’ll clear out somewhat.
– Know your equipment . Whether you’re using a camera phone, a dSLR, or anything in between, knowing all the ins and outs of your equipment ahead of time will help you capture the best Disneyland photography! Play around with the settings and all of the bells and whistles of your camera before your Disneyland visit so you can shoot with confidence.
– Pack light . Lugging around a ton of heavy camera gear gets tiring and cumbersome too fast. Opt for lightweight equipment that is multi-purpose. Honestly, I usually end up just bringing my iPhone to take pictures in the parks, otherwise I use my trusty Sony a6000 . I love it has all the benefits of a dSLR but is so lightweight – it’s my favorite travel camera as well.
– Bring extra batteries (or a power bank)! If using your phone, taking tons of photos and videos (+ using the Disneyland app, which is a must when visiting the parks) drains your battery fast! Bring a power bank so you never run out of juice.
– Avoid shooting midday . This is when the sun is highest in the sky and when lighting is the most unflattering, creating squinty eyes and tons of unflattering shadows. It’s also when it tends to be the hottest, and your subjects may be at their crankiest because of the heat! Try to take your photos earlier in the day, when the sun isn’t so high in the sky, or during golden hour, aka that magical hour before sunset when lighting is at its best.

– You can bring a tripod, but not a selfie stick . Disneyland allows visitors to bring a tripod that folds up and fits into a standard backpack. It does not allow selfie sticks. I’m actually not sure what constitutes a “tripod” vs. a “selfie stick” as I tried to bring my small phone tripod and they wouldn’t let me in because it was considered a selfie stick because it extends. However, my friend was able to bring hers in, and I’ve seen other people with regular tripods.
– Consider purchasing Genie Plus for the Photo Pass . This is ideal if you are visiting in a group and you’d rather have someone else take photos of the whole group. There are photographers located at many of the Disneyland photography locations I list below (but not all because I also have some secret Disneyland photo spots up my sleeve!). Keep in mind only one person in your group needs to purchase to get the photos (but you might consider getting it for the group if you want to use the Fast Pass privileges). You get all your ride photos this way as well!
The Best Disneyland Photography Locations
Magical disneyland photo spots.

Sleeping Beauty Castle
Ahhh, the good ‘ol castle. This is hands-down the most popular of the Disneyland photo spots (and one of the best castles in California ), and one look at it and it’s easy to see why – it’s absolutely magical, especially during the holidays.
Even after going to Disneyland so many times, I still HAVE to get a photo of the castle almost every time I go – it’s just one of those super iconic Disneyland photography locations! It’s perfect for any kind of photos – family portraits, Disneyland couple photos, with friends, or just yourself.
Pretty much EVERYONE has the same idea and wants a photo with the castle, so you’ll usually find a crowd around it at any given time. You’ll need to have some tricks and tricks up your sleeve to get a good photo of it, but don’t worry – you can *definitely* get some amazing photos here!
Many people try to get a photo with the castle straight-on, but unless you run here first right after rope drop, there will be 3284729374 other people in your shot. Same goes for trying to get a photo right on the walkway – unless you literally run here first thing in the morning, forget about it (I’ve never gotten a shot here – I’ve literally never tried, I’m too lazy lol).

Instead, my insider tip is to take a photo from the side of the castle – either the left side or the right side work really well! You’ll find that it’s much quieter there and it will be much easier to get an amazing photo without a million people in it.
Another awesome photo spot is from the benches that are right in front of the castle – while there are usually people here, there is usually enough space that you can still pose and get some good shots. You’ll probably want to get up a bit closer to your subject(s) in order to cut out all the white space and background clutter. Have them sit up on the ledge for the best photo ops!

And if all else fails, play around with angles – place your subject in the shot where they can block out other people in the background. Using a shallow aperture (a low f stop) or portrait mode on your phone can work wonders as well – the background clutter looks much less distracting when it’s blurry!
Try to take photos with the castle in the morning , as it tends to be the least crowded then (the early bird gets the worm, especially at one of the most popular Disneyland Instagram spots!). Otherwise, come right before sunset – you can’t go wrong with the lighting then.
The castle is also beautiful when it’s all lit up at night, but it can sometimes be difficult to get a good shot! Try the night mode on your phone camera. If you are taking a photo with your dSLR or mirrorless camera, an external flash would be ideal – but if you don’t have one, try shining the light from your phone’s flashlight towards the subject to add light.
Otherwise, there are usually PhotoPass photographers standing outside the castle and they can capture a great photo for you!

The pink door on Main Street
The pink door is a popular Disneyland Instagram spot amongst the Disney bloggers and it’s easy to see why – who doesn’t love pink?! This is one of those Disneyland photo spots that is super cute, but it can be hard to miss if you aren’t looking for it (it’s one of the best secret photo spots in Disneyland), so be sure to keep your eyes peeled.
You’ll find the pink door under the Refreshment Corner sign on Main Street.

Many of the photos I’d seen of the pink door were up close and of just the door and the frame, so I was looking for an all pink facade. While you can take photos of just the door, I also love the pastel colors on the rest of the Refreshment Corner facade, plus the retro vibes so I think it’s fun if you zoom out a bit and capture a bit of that as well!
Play around with angles here – straight on, from the side, etc. – for some fun shots.

Main Street flower carts
Main Street is just teeming with some of the best places to take pictures in Disneyland, if you know where to look for them!
I loved these flower carts that were standing in a little nook just off Main Street, as I waited for my friend to grab some stuff from the lockers here. You’ll find it in between the Market House and the Disney Clothiers.
I loved the pretty flower carts (they kind of reminded me of the flower trucks in Nashville !), along with the buildings in the background – they make for some cute photos!
It also tends to be relatively quiet in this area, so it’s a great spot to snap some photos!

The Outside of It’s a Small World
I absolutely LOVE the outside of It’s a Small World – it’s one of the classic Disneyland Instagram spots. It’s also one of the prettiest – I’ve always loved the geometric patterns, and the white, gold, and pastel blue colors.
You can capture some lovely photos from right out front, before you get in line for the ride. The facade makes a beautiful backdrop for all your photos, and is one of the best Disneyland photography locations.

However, if you want a different take on this shot, one of my favorite places to take pictures in Disneyland is from the side , where the turnstiles are coming out of the ride. I love the blue of the turnstiles and think it complements the photo so well!
Do note that It’s a Small World is often used as the start or end point for parades, and is where the fireworks go off every night. If you want to take photos here, avoid these times, otherwise you will encounter a large crowd of people standing in front and it will be impossible to get a good shot.

The Small World wall
While the outside of It’s a Small World is one of the most well-known Disneyland photo spots, this one kind of gets passed over unless you are specifically looking for it.
The Small World wall stands across from the ride (if you’re looking directly at It’s a Small World, the wall is to your left), and is one of the best secret photo spots in Disneyland. However, it’s a popular spot among Disneyland bloggers and those in the know (which is now you!) – it even has its own Instagram account .

The wall actually has a huge door that leads to a backstage area, and you’ll often find Cast Members (and even characters!) going in and out of it. You’ll find that the wall features a similar design to the facade of the ride, just in a bigger scale form.
P lay around with the shapes on the wall, and perspectives. I love zooming out to capture the entire design of the wall, but I’ve seen others zoom in to just bits and pieces of the wall, playing around with the individual shapes in it.
So many possibilities here, which makes it one of the most fun Disneyland Instagram spots!

Mad Tea Party
The Mad Tea Party (aka the teacups) is not only one of the most classic rides in the park, it’s also one of the most Instagrammable places in Disneyland.
I mean, how can one not resist the bright colors of the teacups, as well as the lanterns hanging above it? It’s just so whimsy and colorful and make the perfect photo ops for your Instagram feed!
While you can certainly get some fun photos from the rail with the teacups and lanterns in the background, my favorite place to photograph the Mad Tea Party is directly ON the ride !
Have your photographer sit across from you on the ride. I had them take the phone above with my iPhone at 1x on portrait mode. They might have to lean back a bit and move their arms back in order to achieve the perfect composition.
I find that using portrait mode cuts down on the background distractions, while still managing to capture lots of color! For a similar photo on a dSLR camera, use a wide angle lens and shoot at a shallow aperture (a low f stop number).

Another fun effect is to use the wide angle mode on your phone – it adds a bit of distortion, which perfectly fits the Alice in Wonderland theme and adds an additional touch of whimsy to the photos!
You can also play around a bit with motion blur on the ride – simply set your shutter speed to a lower number (I recommend around 1/30). Be sure to keep still though and focused on the subject! If you move, the subject is going to be blurry as well.
Personally, I think the best time of day to take photos on this ride is in the mornings or late afternoon, before the ride ends up being in the shade. I’ve always thought that it would be fun to take photos here when the lanterns are all lit up, but it might be a bit difficult with all the movement. Let me know if you try it though! 🙂
Bonus Disneyland photo spot : If you absolutely cannot get a good shot on the spinning teacups, there is also a Photo Pass spot of a single pink teacup located in front of the Mad Hatter shop, near the ride.

Another classic Disneyland ride that makes some picture perfect photo ops!
Like with the Mad Tea Party, I think the best way to get some photos here is directly ON the ride . However, do note that it will take a bit of coordination to get the shot! I actually found it much more difficult to get good photos on the ride than I anticipated.
You’ll want your photographer to sit in the car in front of you (if you want your face in the shot – if you want your back, have them sit behind). Keep in mind that the ride moves up and down, so it is likely that you and your photographer won’t be level with each other most of the time. They’ll have to shoot up or down in order to get shots of you.
Using portrait mode is also the way to go here (or shooting with a shallow aperture – low f stop – on a dSLR) to cut out all the background distractions. It creates more of a magical photo!
You can also take a photo standing in front of the rail, with the ride behind you. A fun Disneyland photo idea would be to play around with motion blur here . You want there to be just enough blur, but not too much. Using a shutter speed of around 1/30 should do the trick. STAY STILL – be sure not to move too much when taking the shot, otherwise the subject is going to be blurry as well.
If you want similar photos with more of a space vibe, another one of the best Disneyland Instagram spots is the Astro Orbitor in Tomorrowland. The ride works in a similar way, so all of the tips above apply here as well.

Space Mountain
Space Mountain has always been one of my favorite rides, and nowadays it’s home to one of my favorite Disneyland photo spots as well!
This is a ride that almost always has a long line, but why not take advantage of your time in line by snapping some photos? I love the outside area of the line, with the dock (it’s got a cool design on the floor) and the spaceport in the back.
I imagine that it would also create some fun photos if you used wide angle mode and shoot from the bottom, angling upwards!

Millennium Falcon
Galaxy’s Edge (aka Star Wars Land) may just be my favorite land in all of Disneyland! Not only is it the newest area of the park (even though it’s a few years old now), every single detail is so well thought out and it’s just so completely immersive that you’ll feel like you’ve transported yourself into a scene from the movies.
Perhaps the highlight of Galaxy’s Edge is the replica of the Millennium Falcon starship, one of the coolest and best places to take pictures in Disneyland. Obviously, it goes without saying that taking some photos here is a must for all Star Wars fans!
This is the perfect opportunity to try out your best Star Wars-inspired poses, or take some pictures with your light sabre (especially cool when they’re lit up at night!).

New Orleans Square
New Orleans Square is one of my favorite areas in Disneyland because it actually DOES remind me of being in New Orleans , with its pastel-colored facades and wrought iron balconies (they even hang up beads around Mardi Gras!). It’s also one of the prettiest, which makes it one of the best Disneyland photo spots.
It’s a bit busy in and around New Orleans Square unless you come to take some photos in the morning.
However, I was pleasantly surprised to find this little corner, nearby the entrance of the Blue Bayou restaurant, which was still relatively quiet even in the middle of the day which meant that I had to stop to snap some photos. It’s definitely one of the best secret photo spots in Disneyland!

Disneyland Entrance
This is just one of those iconic Disneyland photo spots, a must to commemorate your visit to the park. The floral Mickey emblem, made up of seasonal flowers, welcomes everyone into the park and is picture perfect with the Disneyland railroad station in the background.

It’s the perfect spot to snap a photo of you and your group as you enter the park and begin your day at the happiest place on earth.
There is usually a Photo Pass photographer here and a giant line of people waiting to get their picture taken. If you want to skip the line (hey, you’ve got a full day and no time to waste!), simply just take your photos off to the side.

With some balloons
So, the above photo was taken back in 2019, when the Cast Members let you pretend to hold onto the giant bouquet of balloons for a photo op (don’t worry, they held the end of the ribbons so they don’t fly away). Being able to hold the balloons was kind of a childhood dream of mine, so basically, this was the happiest day of my life (for reals tho!).
Unfortunately, since then, we’ve gone through a global pandemic, and well, things have changed. Being able to “hold” the balloons is not a thing anymore. BUT! That doesn’t mean that you can’t still take a photo with them.
They will still let you take a photo with the balloons as a background – the Cast Member will hold them out for you and you can stand in front of them. While not the same, I still think this is a fun alternative Disneyland photo idea!
Just be sure to ask really nicely! Also catch them when they’re not busy.
Another fun Disneyland photo idea is to purchase a balloon and use it as a prop when taking photos at some of the Instagram spots on this list, i.e. the castle or Pixar Pier!
Best California Adventure Photo Spots

Pixar Pier skyline
The Pixar Pier skyline is the most iconic Disneyland Instagram spots on the California Adventure side. You can’t do better than the giant Mickey on the Pixar Pal-Around ferris wheel combined with the Incredicoaster – it just gives off those classic Disney vibes.
You have a few options of where to take photos of the Pixar Pier skyline. The first is across the pier, where the World of Color viewing area is (across from the Little Mermaid ride). You’ll be able to photograph the ferris wheel and roller coaster with the lagoon in front of it. This area has plenty of space so you’ll find plenty of spots to take photos from.
During the seasonal food festivals (Festival of the Holidays, Lunar New Year, Food & Wine Festival, Halloween), this is near where many of the vendors are set up, and it makes a perfect location to take photos of your yummy food!

Another option is to head up the ramp towards the Pixar Pier entrance sign (near Lamplight Lounge) and snap a photo on the rail . This is a Photo Pass location, so you know you’re gonna get some awesome shots here!
Lastly, sit down for a meal or some drinks at Lamplight Lounge, and snap a few photos of the skyline from there. It’s also an excellent place to watch and take photos of the World of Color show (look into getting a dining package).
I personally love taking photos of the Pixar Pier skyline around sunset time – I love seeing it against the magical sky. It’s also one of the best Disneyland photo locations to do some night photography – be sure to know how to work that night mode!
But really, you can’t go wrong taking photos at ANY time of the day at one of the most popular Disneyland photography locations.

Pixar Pier entrance
With the bright colors and fun details, the Pixar Pier entrance sign is one of the best places to take pictures at Disneyland on the California Adventure side. It’s just so fun!
One side of the sign has “Pixar Pier” written out on it, while the other side says “adventure is out there” – a line from UP , one of my all-time favorite Disney movies! I think it’s an awesome photo op for travel enthusiasts (like me!), don’t you?
This area tends to get busy as the day goes on, so your chance to capture the best photos here is going to be earlier in the day, on a slower day (on a weekday, if possible). You can try to find a break in the crowd, but during busier times, this is going to be impossible.
I took this photo around lunchtime on a Friday afternoon in January and as you can see, there are still plenty of people around. However, it’s not so many people that it’s not super overwhelming.

Web Slingers mural
If you’ve been around here awhile, then you probably know that I’m crazy for murals and that I have to take a photo with them every time I see one.
So it’s no surprise that this one ended up on my list of best Disneyland photo spots – I loved the combination of graffiti and bright colors here. It’s such a fun wall!
You can find it on the side of the Web Slingers building – if you’re at where the line starts, it’s on the left side, on the way out of the Avengers Campus.

Cars Land mural
Cars Land is probably my favorite land in California Adventure, simply because every little detail is so well thought out and on theme. It’s also got a ton of fun Instagram spots, including this mural that is inspired by the postcard murals you see in various cities.
I love this mural because it changes based on season. There’s one for the holiday season, one for Halloween, and another version that’s for when there are no special celebrations. It’s a fun way to have multiple photo ops throughout the year!
You can find the mural at the entrance of Cars Land, next to Mater’s Junkyard Jamboree.

Flo’s V8 Cafe sign
One thing I LOVE about Cars Land are the retro vibes seen all around, reminiscent of vintage Route 66. One place that perfectly encapsulates these vibes is the Flo’s V8 Cafe.
The vintage typefaces and motifs + the neon lights makes Flo’s perfectly Instagram-worthy!
My favorite time to shoot here is right after sunset, when the lights start to come on but the sky isn’t completely dark yet. You’ll still get a bit of the sunset sky with the fun lights for a picture-perfect shot!

Flo’s gas pumps
Flo’s is also home to another one of my favorite California Adventure photo spots – the gas pumps in the seating area. I love the vintage look, plus the bright turquoise – so fun and perfect for photos!
Many of the gas pumps have tables in front of them, but there is one that does not, which is the best one for taking pictures.

Radiator Springs Racers
Another reason why I love Cars Land? (Do I really need to give more reasons?). The beautiful red rocks that make me swear I’ve been transported somewhere in Utah .
Seriously, the red rocks that are part of the Radiator Springs Racers ride are just so breathtakingly scenic. I love going through them as I’m on the ride, but I love taking photos of them too – it’s one of the best Disneyland Instagram spots in California Adventure!
The best place to photograph the rocks are just to the side of the ride, on the walkway behind Flo’s and as you head back towards the Pacific Wharf area. Come around golden hour or sunset for the best shots – seeing the rocks against an orange sky is absolutely magical.

Radiator Springs Curios
This is another fun photo spot that has some retro Route 66 vibes. I love all of the vintage license plates and highway signs that are tacked onto the wall here.
The best part? This is one of those Disneyland picture spots that tend to be quiet throughout the day, so it’s an awesome spot to snap some shots no matter the time of day. That’s a win in my book!

Sunset Boulevard + the Hollywood Backlot
This area of California Adventures has got their Hollywood vibes down – it does actually remind me of walking down the real Sunset Blvd. in Hollywood!
It’s also got one of my favorite photo ops – the forced perspective wall at the end of the Hollywood Backlot. It’s super fun and wonky looking, and makes for some really fun shots!

Getting up close with it and using the wall itself as a backdrop will create some cool photos (it’s also a Photo Pass spot). However, I also love zooming out a bit and taking a photo from halfway up Buena Vista Street – I love how the shot becomes framed with the palm trees and creates some sunny California vibes!

Buena Vista trolley
The Buena Vista trolley is modeled after the trolley cars of the Pacific Electric Railway and is full of vintage vibes. Inside California Adventure, it travels from the main entrance to the Hollywood Backlot.
Definitely pose with the charming trolley for some fun photos! I love seeing it with the facades of Sunset Blvd. in the background.
It’s also one of the best Disneyland photo spots during the holidays, when the cars become decked out with seasonal decorations!
(note: the trolley will be returning to the park in summer 2022)

Monsters Inc door
The giant pink door at the entrance of the Monsters Inc. Mike & Scully to the Rescue ride makes such a cute backdrop for photos! The florals on it also create just the perfect touch of whimsy for some adorable shots.
This is a great time to create some fun shots and play around with perspective, since the door is so huge.
Seasonal Disneyland Instagram spots

Mickey pumpkin (Halloween)
I love how the park becomes all decked out in orange, candy corn, and pumpkin everything in September and October in celebration of Halloween. Disney does holiday inspired decor right, and Halloween is no exception!
Perhaps one of the best places to take pictures at Disneyland during Halloween is the giant Mickey pumpkin that stands at the entrance of Main Street. It’s a perfect backdrop for all of your Halloween photos!
There is usually a Photo Pass photographer here, and a long line to accompany it. If you don’t want to wait in line, take a shot from off to the side.

Disneyland Christmas tree
Once Halloween is over and November rolls around, the giant pumpkin is replaced with a giant Christmas tree. Disney knows how to do the holidays right, and one of the most breathtaking sights in the park is the spectacular Christmas tree that stands at the entrance of Main Street.
It makes a perfect backdrop for your holiday photos! I love seeing it all lit up at night, but it’s really beautiful any time of the day.
I took a close up shot with just a bit of the tree, but if you want to capture more of it in its entirety, use a wide angle lens or the panoramic mode on your phone.

California Adventure Christmas tree
You’ll find a smaller, but equally pretty Christmas tree inside California Adventure (seriously, there are trees everywhere you look in the parks + Downtown Disney). I love the colors in this one!
This one usually has fewer people waiting to take photos than at the main one in Disneyland, so if you don’t feel like waiting around, this is a good option.

Sleeping Beauty Castle holiday edition
The Sleeping Beauty castle is always breathtaking, and is one of the most popular Disneyland picture spots year-round. However, it is truly magical during the holiday season, especially when it is lit up at night!
You’ll see no shortage of people trying to get their Christmas card photos in front of the castle, and for good reason – it’s one of the prettiest sights in the park during the holiday season! You’ll have to be patient to get your shot – there will usually be a break in the crowd if you wait just a bit.

The castle is especially breathtaking at night, as it is covered in tons of string lights that resemble snow. Be sure to illuminate some light on the subject (via an external flash or even a flashlight), use night mode, and shoot at a shallow aperture (low f stop) – the blurred lights in the backdrop makes for some truly magical photos.

It’s a Small World holiday facade
While the It’s a Small World facade makes a pretty backdrop for photos at any time during the year, it is extra magical during the holidays – especially at night!
The designs and shapes of the facade are outlined in colorful lights, and it’s absolutely magical! For the best shots, use night mode on your phone, or bring something to illuminate your subject (an external flash and/or using a flashlight).
Have you been to Disneyland? What are some of your favorite Disneyland photography locations?
You might also like: The Ultimate Orange County Bucket List Most Instagrammable Places in Los Angeles The Adults-Only Guide to Disneyland Most Instagrammable Places in Orange County
Like this post? Save these Disneyland photo spots to Pinterest for later!

Caroline is a Southern California based traveler, writer, and photographer. She travels all around California, the US, and the world in search of the most colorful places, the most delicious food, and bucket-list adventures. Her aim is to inspire other travelers discover how to add more adventure and joy to their lives. On Pictures & Words, you’ll find detailed guides + itineraries, along with vibrant photos to help you plan the the most epic trips. When she’s not traveling, Caroline also runs half marathons.
Wednesday 24th of May 2023
Very helpful tips! Thank you!
- Destinations Itinerary
- New Resident Resources
- Custom Publications
- Top 75 Restaurants
- Restaurant Reviews
- Pizza Bracket Challenge
- Patio Bracket Challenge
- Burger Bracket Challenge
- Arts & Entertainment
- Theater + Dance
- Visual Arts
- Business + Politics
- Giving Guide
- Contests & Giveaways
- Rhythm & Brews
- Food & Wine Experience
- Fine Spirits Classic
- Midwest Home Events
- 12 Weeks of Fall
- Attractions
- Entertainment
- Top Doctors Directory
- Best Dentists Directory
- Best Chiropractors Directory
- Top Lawyers Directory
- Best Real Estate Professionals Directory
- Insurance Agents
- Mortgage Professionals
- Temporary Housing Directory
- Residential Developments Directory
- Newsletter Signup
- Purchase Single Issues
- Where to Find
- Top Doctors Digital Issue
- Chiropractors
- Real Estate Professionals
- Insurance Professionals
- Temporary Housing
- Residential Developments
- Holiday Gift Guide

13 Overlooked Photo Ops in Minnesota

I came to college in Minnesota because I wanted to get out of good ol’ Wisconsin, fast. I wanted to experience something new, and I needed some skyscrapers nearby to accomplish that. Minnesota turned out to be the perfect place for me. I’m an artistic person, so I needed a state that could be just as colorful as me, and Minneapolis lived up to my expectations. I immediately found myself trying to capture as much of the city streets as I could on my tiny smartphone. I tried to absorb everything, and for a girl with dreams bigger than the city itself, that posed a challenge. As I ventured in and out of the city, I found that Minnesota had treasures scattered throughout. The wanderlust doesn’t stop at the city lines, and St. Cloud and Duluth offer some great photo ops, too.
1. Aria Event Center
105 n. first st., minneapolis.
At the beginning of the year, I attended a fashion show at Aria Event Center called Fashionapolis. Located on First Street, this award-winning structure is in the Minneapolis North Loop. Not only did I get to walk my first red carpet while attending the fashion show, but I was able to witness the beauty inside Aria. It’s every Tumblr lover’s fantasy apartment. The combination of brick, greenery, and delicate chandeliers all conspire to create a beautiful, hipster aesthetic, and ancient gears and industrial equipment against modern, bright-colored accents provide a steampunk atmosphere. The decor plays on the way brights can harmonize with a dark atmosphere, which also gives it an emo vibe. Close to the front doors of Aria, there’s a wall completely made out of colored pieces of chopped wood. Obviously, my friend and I had to snag a picture.

2. The Amber Box
818 s. second st., minneapolis.
Minneapolis has its fair share of art scattered throughout its streets, but I have to say that the Amber Box room inside of the Guthrie Theater is one of the coolest places to take pictures. The Amber Box earned its name from the yellow windows that wrap around the room. Constructed by Jean Nouvel, he said his inspiration for the Amber Box came from his yellow-tinted ski goggles. He liked that the golden tint made the world seem as if it was sunny indefinitely, and enjoyed seeing the world infinitely “sparkle.” The Amber Box is open to the public, which allows for limitless picture possibilities. Let’s just say I wouldn’t mind living in a yellow world.

PHOTO BY ERIC BURLING
3. Hard Times Café
1821 riverside ave., minneapolis.
While having a Saw movie marathon with a friend at midnight, I decided I wanted coffee. Well, in St. Cloud, no coffee shop is open that late—so that took us to the Twin Cities. An hour’s drive later, I found myself at Hard Times Café, the most interesting cafe I’ve ever been thanks to its odd array of artwork. Pictures of birds with human faces covered the patterned walls of the building. Strangely, I didn’t find this aspect weird at 1:44 in the morning. Instead of judging the oddity before me, I took a bunch of artsy pictures of my caramel macchiato against the “bird woman” background to capture my 2 a.m. adventure.

4. Graffiti Window
On a remote island amid the Mississippi River stands a shooting-range window that’s covered in graffiti, with a single opening that reveals the simple world on the other side of the busied wall. Located on Sportsman Island, which is part of the Beaver Islands in St. Cloud, this abandoned piece of art stands alone in a browning field while its vibrant colors distract onlookers from the dullness of the surrounding area. If you capture it right, the image turns out to be quite distorting, confusing the viewer on what exactly is real.

Photo by tyler thomas
5. Highpoint Center for Printmaking
912 w. lake st., minneapolis.
A simple coffee run turned into a night of art as my friend and I wandered the streets of Uptown, Minneapolis. Our travels took us to an art show, featuring prints. All the art for sale was created by students and local artists. The displayed prints came in different forms: some were abstract, impressionistic, minimalistic, or contemporary. One unique aspect of Highpoint Center is that all the art is not only showcased but also created there. A large printmaking studio sits in the middle of the facility, with huge windows so visitors can witness artists making the magic happen. It wasn’t long before I became disappointed due to the fact that my empty wallet prevented me from purchasing a print. I really wanted a piece of that night to bring home with me, but I guess I’ll have venture back.

photo by victoria volkmann
6. Secret Room Behind Spyhouse Coffee Roasting Company
907 n. washington ave., minneapolis.
Spyhouse Coffee Roasting Company may be the one of the hippest coffee shops in Minnesota, but the average person might not know that one of the best picture places in the city is tucked just behind the Spyhouse back door. An empty, windowed room is connected to Minneapolis’ most popular coffee hotspot. With walls for windows, and the city as its backdrop, the picture possibilities are endless. My friend found this place originally, and I fell in love with it immediately. It has earned its title as one of Minneapolis’s “hidden gems.” If you’re feeling adventurous, just head to the back of the coffee shop and go through the back door. It’s like Narnia!

photo by karlie ray
7. Black Coffee & Waffle Bar, Saint Paul
2180 marshall ave., st. paul.
Most everyone has heard of the Black Coffee and Waffle Bar in Minneapolis—and if you haven’t, you need to experience its pure waffle bliss. Many take an artsy picture in front of the black brick wall that displays the waffle bar logo. As Pinteresty as that photo wall is, it’s becoming overplayed. Get your waffles at the same establishment, but be more original. The Black Coffee and Waffle Bar in St. Paul is just as artsy but has a bohemian vibe. The St. Paul location’s dark oak tables, simple, single-bulb hanging lights, and strategically placed cacti create an airy, freeing atmosphere. I found it to be much more my speed. I felt like a classy brunch woman, “a wedge of lemon and a smart answer for everything.” It was great. Not to mention, I took cute pictures that could beat out the black brick wall any day.

Minneapolis location, photo by grace sautner

St. Paul Location, Photo by Parker Hunstiger
8. Vikre Distillery
525 s. lake ave., duluth.
Located right next to the scenic Aerial Lift Bridge in Duluth, Vikre Distillery is a beautiful place, stumbled upon by one of my adventurous friends. The establishment is best known for its craft alcohol. Many people visit Duluth to experience the beauty of nature, but you shouldn’t overlook the artistic buildings scattered throughout the picturesque scenery downtown. The distillery’s vintage-looking brick against the industrialized metal bridge provides a hard and soft contrast that’s perfect for photo practice.

photo by tyler thomas
9. Giant Stairs in Minneapolis
One below-freezing night in Minneapolis, my girlfriends and I decided it would be a good idea to wander the city streets. With the naive notion that “when you’re in the city, things just happen,” we wanted to tough the night out. After almost getting hit by a train, crashing my car, and turning down a one-way street, my friends and I stumbled upon these giant stairs located in the middle of towering skyscrapers. It was almost Christmas, so the stairs were illuminated by the twinkled lights atop the trees standing along the stairwell. Upon this discovery, we needed to take a unique city picture to commemorate our very cold nightlife experience. The stairs reminded me of the red stairs located in New York City’s Times Square. The design was similar, but the stairs were concrete and people weren’t crowding around to take pictures. Even though this staircase is located in downtown Minneapolis, people underestimate the artistic potential of it. With the stubs of skyscrapers lingering in the background, the Minneapolis staircase is a kooky spot from which to capture the city.

photo by claire breitenbach
10. Xcentric Goods
3252 lyndale ave. s., minneapolis.
While strolling the streets of Uptown, I came across an old White Castle building. Thinking that I could grab a quick bite to eat, I found that the wafting smell of fast food was replaced with the scent of dust and wood. What was once part of the White Castle fast food chain is now a small store called Xcentric Goods. This historic White Castle No. 8 building has been transformed into a vintage and antique business. How could a person not snag a pic in front of this iconic building? I’ve seen some interesting, artistically designed buildings while in Minneapolis, but this ironic little remnant has won me over.

Earl leatherberry/ Flickr
11. Gold Medal Flour Sign
700 w. river pkwy., minneapolis.
The Gold Medal Flour sign atop the historic Washburn Crosby Milling Complex is not only iconic but a great place to showcase your photography skills. As you drive into the city, the Gold Medal Flour sign rises prominently in the sky, hearkening back to the late 19th century, the days of Minneapolis’ award-winning flour production. Made of steel frames and galvanized iron, this sign has old-time charm, and I’m even planning to have my next photoshoot there.

photo by eric burling
12. Quarry Park and Nature Reserve
1802 county rd. 137, waite park.
When I got shipped off to college, my mom told me one thing. She said, “Don’t go to the quarries in St. Cloud; it’s too dangerous.” So, as any teenager would do, I went to the quarries for a swim with a group of friends. Besides the fact that I spent most of my time cliff jumping and swimming in a bottomless pit, I was able to enjoy the beauty of the rocky interior of the St. Cloud quarry. The turquoise water and the chiseled rock spiking out everywhere captured the dangerously alluring aspects of the sinkhole. As the life-threatening activities at the quarry literally took my breath away, the view did, too. Sadly, I’ve only had time to pay the quarries a single visit, but when Minnesota’s winter ends (so approximately at the end of May) I will definitely be going back to snag more images of its incredible views.

photo by summer white
Minneapolis Sewer Drain Covers
During my 1 a.m. adventure to the cities for coffee two weeks into college, I found the Minneapolis manhole covers unusually creative. Of course, to be artsy, I took a picture with my converses on one of them. But after some internet digging, I found that, on 6th and 7th Streets, the manhole covers were designed by 12 artists from the 1980s and ’90s. These works used to be among the city’s most recognized pieces of art but over time have blended into the city, long forgotten. The cover that I took a picture of has a sailboat on it, and other covers display a grill top, a splattered water design, a woven pattern of fruit and oats, a cartoon character displaying the “mini-apple” logo, and a cover that has an X in the middle that provides the latitude and longitude of the exact location of the manhole cover. Fascinating that a sewer cover I happened to stand on one night in the city had such an interesting past.

RELATED ARTICLES MORE FROM AUTHOR

Puttshack Coming to Edina

Best Bets: Sept. 23-29

Minneapolis Cultural Districts: 38th Street
Newsletters.

Majestic Nature Photography
Sharing the cultures of the world through my lens for all to experience., more about majestic nature photography, travel & nature photographer based in moscow, idaho.
Majestic Nature Photography, a travel photography business located in Moscow, Idaho, has traveled worldwide. My specialty is bringing people around the world together, no matter their background, through my photography. I offer photography services that ...
What I Do and My Story
My journey started long ago. At the beginning of 2017, I was commissioned by the Pullman Chamber of Commerce to do photos for their travel guide. This was the start of my unrelenting drive to create photography capable of opening eyes to the beauty of ...
Travel Services
Trip planning - iceland, availability, satisfied customers, get in touch with majestic nature photography.
Thank you for your interest in Majestic Nature Photography! If you have any questions, inquiries, or would like to discuss photography services, please fill out the form below. I look forward to hearing from you and will respond as soon as possible.
- Merchant Policies
- Legal Notice
Touropia Travel
Discover the World
17 Top Tourist Attractions in Moscow
By Alex Schultz · Last updated on May 4, 2024
The capital of Russia is an incredible place to explore. Visitors to Moscow come away spellbound at all the amazing sights, impressed at the sheer size and grandeur of the city. Lying at the heart of Moscow, the Red Square and the Kremlin are just two of the must-see tourist attractions; they are the historical, political and spiritual heart of the city – and indeed Russia itself.
A fascinating city to wander around, stunning cathedrals, churches, and palaces lie side-by-side with bleak grey monuments and remains from the Soviet state. In addition to its plethora of historical and cultural tourist attractions, Moscow is home to world-class museums, theaters and art galleries.
Renowned for its performing arts, fantastic ballets and amazing circus acts, catching a show while in Moscow is a must. The wealth of brilliant restaurants, trendy bars, and lively nightlife means there is something for everyone to enjoy.
See also: Where to Stay in Moscow
17. Tsaritsyno Palace

Once the summer residence of Catherine the Great, the stunning Tsaritsyno Palace is now a museum-reserve. The architecture is magnificent and there is a lovely park surrounding it for visitors to explore.
Located in the south of Moscow, the palace was commissioned in 1775 and recent renovations mean its lavish interior looks better than ever before with its elegant halls and beautiful staircases.
The exhibits on display look at the life of the empress as well as the history of Tsaritsyno itself. The huge palace grounds are also home to some other delightful buildings with the elegant opera house and wonderful brickwork of the Small Palace being particularly impressive to gaze upon.

Starting out in 1935 as the ‘All-Union Agricultural Exhibition’, VDNKh has slowly morphed over the years into the fascinating open-air museum of today. Remarkably, over 400 buildings can now be found within its confines.
The huge park complex has numerous pavilions representing former Soviet republics on show, such as those of Armenia and Turkmenistan and the distinctive architecture of each of the buildings is always interesting to gaze upon. In addition to this there is the fascinating Memorial Museum of Cosmonautics which is dedicated to space exploration and the fun Moskvarium aquarium even offers you the chance to swim with dolphins.
With lots of eateries scattered about and numerous entertainment options such as horse-riding and zip-lining, there is something for everyone to enjoy; the Friendship of Nations fountain truly is wonderful.
15. Kremlin Armoury

One of the oldest museums in the city, the Kremlin Armoury has a wealth of treasures; highlights include the ornate Grand Siberian Railway egg, the historic Cap of Monomakh and the stunning Imperial Crown of Russia which often has a crowd of tourists around it, jostling to take a photo.
Once the royal armory, there are loads of fascinating objects on display. Perusing the many sabers, jewelry, armor and more is as interesting as it is educational and entertaining and the swords are so finely crafted that you’ll almost wish you could pick up one and wield if yourself.
Established in 1851, the museum is situated in the Moscow Kremlin.
14. GUM Department Store

Standing for ‘Main Universal Store’ in Russian, GUM is stunning. Its wonderful skylights and beautiful facades mean it doesn’t look out of place alongside its illustrious neighbors on Red Square.
With over 200 shops, boutiques and upmarket eateries inside, it is a shopaholic’s heaven and concerned partners will be glad to find more affordable options alongside luxury brands such as Dior and Prada.
The main department store in the city, GUM was opened in 1893. The stunning architecture makes it well worth a visit even if shopping isn’t your thing.
13. Moscow Metro

It’s not often that public transport looks like a work of art. So many stops on the Moscow Metro will astound visitors with their beauty and elegance.
Decked in marble and with frescoes covering the walls, the stations are amazing to gaze upon and are part of one of the longest metro systems in the world, with the first stations opened in 1935.
Using the metro is the quickest and easiest way to get around Moscow and braving the crowds of commuters is well worth it for the beauty all around you.
12. Arbat Street

An elegant yet lively street, Arbat is full of impressive architecture and was once a popular place to live for aristocrats, artists, and academics.
A historic place, it is down Arbat Street that Napoleon’s troops are said to have headed on their way to capture the Kremlin.
Nowadays, there are many cafes, restaurants, and shops, as well as various monuments and statues to former residents such as Alexander Pushkin who was reputed to be a lover of the Russian Empress due to his massive influence in court.
11. Novodevichy Convent

Drenched in history, the Novodevichy Convent is located in a striking building that was once a fortress. This captivating place is well worth visiting when in Moscow.
Founded in 1524, the convent houses four cathedrals; Smolensk Cathedral is the undoubted highlight due to its delightful 16th-century frescoes.
Wandering around the grounds is like stepping back in time. The Novodevichy Cemetery is where many famous leaders of the Soviet Union are buried, such as Yeltsin and Khrushchev.
10. Pushkin Museum

Despite its name, the Pushkin Museum of Fine Arts actually has no connection at all to the famous poet other than that it was named in his honor after his death. A delight to visit, its extensive collection focuses on European art with masterpieces by Botticelli, Rembrandt, and van Gogh all featuring.
Sculptures, graphic art, paintings and more can be found in its beautiful galleries; various sections look at themes and epochs such as the Renaissance, the Dutch Golden Age, and Byzantine art.
Among the many highlights are the clownish characters which can be found in Cezanne’s Fastnacht (Mardi Gras) and the twirling ballerinas who look so elegant in Degas’ Blue Dancers. Picasso’s Young acrobat on a Ball is also well worth checking out for its interesting use of shapes and colors.
9. Christ The Savior Cathedral

This gorgeous Russian Orthodox cathedral is located on the banks of the Moskva River, just a stone’s throw away from the Kremlin.
The church as it stands today was consecrated in 2000, as the original church that stood here was destroyed on the command of Josef Stalin in 1931 due to the anti-religious campaign.
With its delightful golden dome, spires and dazzling white facades, the Christ the Savior Cathedral is stunning. The interior is just as captivating to wander around, with its beautifully tiled floors and impressive altar.
8. Lenin Mausoleum

Opened to the public in 1924, Lenin’s Mausoleum is one of the most popular tourist attractions in Moscow. The red granite structure is located at the heart of the city in Red Square.
Lenin’s embalmed body lies in a glass sarcophagus; it is a somewhat eerie experience walking past the former leader of the Soviet Union but is well worth doing as you understandably can’t do it anywhere else in the world.
After visiting the mausoleum, head to the Kremlin wall right next to it for more graves of important communist figures such as Stalin and Brezhnev.
7. Tretyakov Gallery

Home to the most extensive and impressive collection of Russian fine art in the world, the State Tretyakov Gallery is definitely worth visiting when in Moscow for the wealth of amazing art pieces that it has on display.
Having started out as the private art collection of the Tretyakov brothers, there are now over 130,000 exhibits. Highlights include the iconic Theotokos of Vladimir which you will almost certainly recognise despite probably not knowing the name and Rublev’s Trinity which is considered to be one of highest achievements in Russian art.
An absolute must for art lovers, the State Tretyakov Gallery will delight visitors with all that is has to offer.
6. Kolomenskoye

Once a royal estate, Kolomenskoye is now a museum-reserve and lies a few kilometers outside of the city center. A captivating place to visit, there is a plethora of history on show and the site overlooks the Moskva River.
Consisting of four historical sites, there are extensive gardens for visitors to explore, as well as loads of interesting old buildings, the former village of Kolomenskoye itself and the impressive Palace of the Tsar Alexey Mikhailovich – once considered the Eighth Wonder of the World by contemporaries.
Among the many stunning sights, it is the brilliantly white Ascension Church that is the undoubted highlight – dating back to 1532.
5. Gorky Park

Lying alongside the Moskva River, the huge Gorky Park is a lovely place to visit. Its extensive gardens are home to numerous cultural institutions and visitors should definitely check out the Garage Museum of Contemporary Art and while the eclectic exhibits may not always feature such incredible sights as a balloon-covered rider on a zebra; they certainly always succeed in pushing back the boundaries of art.
Pop-up exhibitions and festivals can be found from time to time in the park itself and there is an open-air theatre and numerous eateries alongside a plethora of leisure activities.
Whether it’s cycling, table tennis or yoga that you are after or beach volleyball and rowing, Gorky Park certainly has it. In winter, there is a huge ice rink for visitors to enjoy.
4. Bolshoi Theatre

The Bolshoi Theatre is the main theater in the country. The amazing opera and ballet performances it has put on over the centuries go a long way in explaining Russia’s rich history of performing arts.
While the Bolshoi Ballet Company was established in 1776, the theater itself was opened in 1825. The glittering, six-tier auditorium is lavishly and decadently decorated; it is a fitting setting for the world-class performances that take place on its stage.
Spending a night watching a performance of such classics as The Nutcracker or Swan Lake at the Bolshoi Theatre is sure to be a memorable experience and the beauty all around you only adds to the sense of occasion.
3. Moscow Kremlin

This famously fortified complex is remarkably home to five palaces and four cathedrals and is the historic, political and spiritual center of the city. The Kremlin serves as the residence for the country’s president. It has been used as a fort, and this fact is made clear by its sheer size. The Kremlin’s outer walls were built in the late 1400s.
Under Ivan III, better known as Ivan the Great, the Kremlin became the center of a unified Russian state, and was extensively remodeled. Three of the Kremlin’s cathedrals date to his reign that lasted from 1462-1505. The Deposition Church and the Palace of Facets were also constructed during this time. The Ivan the Great Bell Tower was built in 1508. It is the tallest tower at the Kremlin with a height of 266 feet (81 meters).
Joseph Stalin removed many of the relics from the tsarist regimes. However, the Tsar Bell, the world’s largest bell, and the Tsar Cannon, the largest bombard by caliber in the world, are among the remaining items from that era. The Kremlin Armory is one of Moscow’s oldest museums as it was established more than 200 years ago. Its diamond collection is impressive.
The Kremlin’s gardens – Taynitsky, Grand Kremlin Public and Alexander – are beautiful. The Kremlin has also served as the religious center of the country, and there is a tremendous number of preserved churches and cathedrals here. The collections contained within the museums include more than 60,000 historical, cultural and artistic monuments. Those who enjoy the performing arts will want to consider attending a ballet or concert at the State Kremlin Palace. Completed in 1961, it is the only modern building in the Kremlin.
2. Red Square

Lying at the heart of Moscow, Red Square is the most important and impressive square in the city. It is one of the most popular tourist attractions due to its wealth of historical sights and cultural landmarks.
Drenched in history, the huge square is home to incredible sights such as the Kremlin, St. Basil’s Cathedral and Lenin’s Mausoleum, among others. Consequently, it is not to be missed when in Moscow as it really is home to the city’s most stunning monuments.
It is here that many important moments in Russian history took place; the former marketplace has hosted everything from Tsar’s coronations and public ceremonies to rock concerts and Soviet military parades. Wandering around the massive square is a humbling experience and undoubtedly one of the highlights the city has to offer.
1. Saint Basil’s Cathedral

Located in the impressive Red Square, St. Basil’s Cathedral is gorgeous; its delightful spires appear as if out of a fairytale. The most recognizable building in the country, the cathedral is very much a symbol of Russia. No visit to Moscow is complete without having taken in its unique and distinctive features.
Ivan the Terrible ordered the cathedral’s construction in the mid-16th century, and legend holds that Ivan put out the architect’s eyes so that he would be unable to build another cathedral more glorious than St. Basil’s. Designed to resemble the shape of a bonfire in full flame, the architecture is not only unique to the period in which it was built but to any subsequent period. For various reasons, both Napoleon and Stalin wanted to destroy the cathedral but fortunately did not succeed.
Known for its various colors, shapes and geometric patterns, St. Basil’s Cathedral houses nine different chapels that are all connected by a winding labyrinth of corridors and stairways. On the lower floor, St. Basil’s Chapel contains a silver casket bearing the body of St. Basil the Blessed.
Throughout the cathedral are many beautiful murals, frescoes, wooden icons and other art works and artifacts. Outside the cathedral is a lovely garden with the bronze Monument to Minin and Pozharsky, who rallied an all-volunteer Russian army against Polish invaders during a period of the late 16th century known as the Times of Troubles.
Share this post:

15 Top Tourist Attractions in Saint Petersburg, Russia
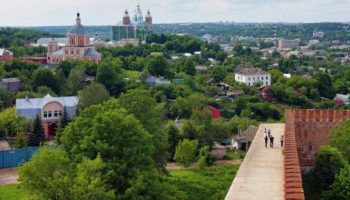
15 Best Cities to Visit in Russia

14 Most Scenic Small Towns In Russia
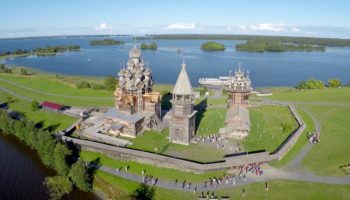
10 Top Tourist Attractions in Russia
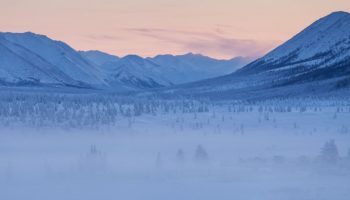
10 Most Amazing Destinations in Eastern Russia

10 Best Places to Visit in Russia

9 Most Beautiful Regions in Russia

23 Most Beautiful Islands in Asia

10 Best Places to Visit in Kazakhstan

Top 10 Things to Do in Yerevan, Armenia
IMAGES
COMMENTS
How to Take Great Travel Photos as a Solo Traveler Set Up a Tripod Bringing a tripod is a tip for amazing photos even if you're not traveling solo, but if you want steady photos, they're a must. Tripods will help you avoid the blur and warp of out of focus or unsteady shots. For smaller cameras, the Gorillapod line and similar flexible tripod products are great for keeping your camera ...
Here are our best travel photography tips for beginners and intermediates, based on our experience of going from complete beginners to professional travel photographers, and now working in the industry for 8 years.
Looking to improve your travel photography? I've spent 10-years shooting photos from destinations around the world. Here are my favorite travel photography tips for beginners.
Some of the best photo-ops in the world are hidden in plain sight, while others require a bit of adventure!
Tips To Take Your Own Stunning Travel Images. Photographs are stunning reminders of the wonderful memories we make on a journey into the unknown.
Make the best of any photo op that presents itself. It's amazing how a single photo opportunity can transform your day.
A guide to taking photos when traveling. Common issues and challenges you'll face when taking photos on a trip, and how to overcome them
Route 66 is chock-full of sights—from kitsch Americana to stunning natural landscapes—that tempt photographers from all over. Here are 10 great Instaworthy spots.
May 17, 2021 - Must-get photos when traveling. See more ideas about travel, travel inspiration, travel photos.
These tips on how to edit your travel photography will ensure that you're able to tweak your pictures and adjust them to perfection.
Explore the world through our travel photography portfolio, showcasing landscapes, people, culture, and unique moments captured by Photo Op Travel Agency. Let our images inspire your next adventure.
Find popular photo locations around the world with ShotHotspot. Whether its for landscapes, holiday snaps or photo tours, we map millions of photographic hotspots.
Where to Go Travel Bucket List Ideas: 14 Must-See Photo Spots in Hawaii Whether you're an iPhone amateur or a travel photo pro, you'll capture some of the best travel photos with this list
The Most Popular Photo Ops in America ScanMyPhotos.com has the top five places spotted in nearly 15 million scanned family vacation snapshots.
The photo op turned into an engaging, interactive component where guests could swing, snap, and post away! Effortless Integration Another way to create an IG-worthy moment is by using entertainment as part of the photo setup. For a travel industry showcase, DCi crafted a series of photo ops that captured the essence of key California destinations.
Travel apps can help you with anything from finding the best photo spots to editing while on the move. Here's the best apps for travel photography options!
AirPano is a VR project created by a team of Russian photographers focused on taking high-resolution aerial 360° photographs and 360° video. Today AirPano is the largest virtual travel resource in the world -- by geographical coverage, number of aerial photographs, and artistic and technical quality of the images — featuring 360° panoramas and 360° videos of the highest quality shot from ...
The most magical Disneyland photo spots, with can't miss photo ops + secret locations. Also with lots of Disneyland photography tips!
The wanderlust doesn't stop at the city lines, and St. Cloud and Duluth offer some great photo ops, too. 1. Aria Event Center. 105 N. First St., Minneapolis. At the beginning of the year, I attended a fashion show at Aria Event Center called Fashionapolis. Located on First Street, this award-winning structure is in the Minneapolis North Loop.
Grenada's Underwater Sculpture Garden Is More Than a Photo-op — It Tells the Nation's Story. The newest additions to Molinere Underwater Sculpture Park pay tribute to Grenada's history.
Discover the beauty of our planet through the lens of Majestic Nature Photography. Contact us for travel and nature photography services in Moscow, Idaho.
Independent Travel to Moscow and St. Petersburg. My wife and I have traveled independently to many European countries and, after reading many of the comments in this forum, feel like we may be able to do so in Moscow and St. Petersburg as well, although we feel somewhat less comfortable than the other countries where we have traveled in Europe.
A fascinating city to wander around, stunning cathedrals, churches, and palaces lie side-by-side with bleak grey monuments and remains from the Soviet state. In addition to its plethora of historical and cultural tourist attractions, Moscow is home to world-class museums, theaters and art galleries.
TEXTURE OF DREAMS Personalized Photo Life-Size Cardboard Cutout, Upload Your Own, Custom Picture Cutouts with Cardboard, Personalized Birthday Party Supplies (3 feet) 450. $3799. FREE delivery Jan 11 - 17. Or fastest delivery Jan 10 - 16.
529 Birchwood Dr, Moscow Mills, MO 63362 is pending. Zillow has 1 photo of this 3 beds, 2 baths, 1,601 Square Feet single family home with a list price of $329,863.