- Free Practice Tests

Commercial Driving
- Introduction
- Getting a CDL
- Fees and costs
- CDL Types & Permits
- Endorsements & Restrictions
- Written exams
- Skills test
- Pre-trip inspection
- TSA background check
- Retake policy
- CDL Maintenance
- ELDT Training & Certification
- CDL how-to guides
Mastering the CDL Pre-Trip Inspection Exam: A Complete Guide
Learn how to conduct thorough pre-trip inspections with our guide, a critical component for commercial vehicle safety.

Written by Andrei Zakhareuski. With over 16 years of expertise, Andrei leads Driving-Tests.org, a top online resource for driver education. His leadership has established vital partnerships with over 2,600 libraries, educational bodies, and state agencies.
The CDL Pre-Trip Inspection Exam is an integral part of obtaining your commercial driver’s license. This guide covers Class A and Class B pre-trip inspections, provides a checklist, and offers tips for memorizing the inspection process.
Start a free Pre-Trip Inspection practice test:
- Alabama - AL - Alabama Pre-Trip Inspection Practice Test
- Alaska - AK - Alaska Pre-Trip Inspection Practice Test
- Arizona - AZ - Arizona Pre-Trip Inspection Practice Test
- Arkansas - AR - Arkansas Pre-Trip Inspection Practice Test
- California - CA - California Pre-Trip Inspection Practice Test
- Colorado - CO - Colorado Pre-Trip Inspection Practice Test
- Connecticut - CT - Connecticut Pre-Trip Inspection Practice Test
- Delaware - DE - Delaware Pre-Trip Inspection Practice Test
- District of Columbia - DC - District of Columbia Pre-Trip Inspection Practice Test
- Florida - FL - Florida Pre-Trip Inspection Practice Test
- Georgia - GA - Georgia Pre-Trip Inspection Practice Test
- Hawaii - HI - Hawaii Pre-Trip Inspection Practice Test
- Idaho - ID - Idaho Pre-Trip Inspection Practice Test
- Illinois - IL - Illinois Pre-Trip Inspection Practice Test
- Indiana - IN - Indiana Pre-Trip Inspection Practice Test
- Iowa - IA - Iowa Pre-Trip Inspection Practice Test
- Kansas - KS - Kansas Pre-Trip Inspection Practice Test
- Kentucky - KY - Kentucky Pre-Trip Inspection Practice Test
- Louisiana - LA - Louisiana Pre-Trip Inspection Practice Test
- Maine - ME - Maine Pre-Trip Inspection Practice Test
- Maryland - MD - Maryland Pre-Trip Inspection Practice Test
- Massachusetts - MA - Massachusetts Pre-Trip Inspection Practice Test
- Michigan - MI - Michigan Pre-Trip Inspection Practice Test
- Minnesota - MN - Minnesota Pre-Trip Inspection Practice Test
- Mississippi - MS - Mississippi Pre-Trip Inspection Practice Test
- Missouri - MO - Missouri Pre-Trip Inspection Practice Test
- Montana - MT - Montana Pre-Trip Inspection Practice Test
- Nebraska - NE - Nebraska Pre-Trip Inspection Practice Test
- Nevada - NV - Nevada Pre-Trip Inspection Practice Test
- New Hampshire - NH - New Hampshire Pre-Trip Inspection Practice Test
- New Jersey - NJ - New Jersey Pre-Trip Inspection Practice Test
- New Mexico - NM - New Mexico Pre-Trip Inspection Practice Test
- New York - NY - New York Pre-Trip Inspection Practice Test
- North Carolina - NC - North Carolina Pre-Trip Inspection Practice Test
- North Dakota - ND - North Dakota Pre-Trip Inspection Practice Test
- Ohio - OH - Ohio Pre-Trip Inspection Practice Test
- Oklahoma - OK - Oklahoma Pre-Trip Inspection Practice Test
- Oregon - OR - Oregon Pre-Trip Inspection Practice Test
- Pennsylvania - PA - Pennsylvania Pre-Trip Inspection Practice Test
- Rhode Island - RI - Rhode Island Pre-Trip Inspection Practice Test
- South Carolina - SC - South Carolina Pre-Trip Inspection Practice Test
- South Dakota - SD - South Dakota Pre-Trip Inspection Practice Test
- Tennessee - TN - Tennessee Pre-Trip Inspection Practice Test
- Texas - TX - Texas Pre-Trip Inspection Practice Test
- Utah - UT - Utah Pre-Trip Inspection Practice Test
- Vermont - VT - Vermont Pre-Trip Inspection Practice Test
- Virginia - VA - Virginia Pre-Trip Inspection Practice Test
- Washington - WA - Washington Pre-Trip Inspection Practice Test
- West Virginia - WV - West Virginia Pre-Trip Inspection Practice Test
- Wisconsin - WI - Wisconsin Pre-Trip Inspection Practice Test
- Wyoming - WY - Wyoming Pre-Trip Inspection Practice Test
CDL Class A Pre-Trip Inspection
Engine Compartment Inspection
Includes checking for leaks, belt tension, and the condition of hoses, among other components.
Cab Check/Engine Start
Involves inspecting the cab’s interior, gauges, and starting the engine to check for abnormalities.
Brake Check
Focuses on air brake systems, including air brake checks and the parking brake test.
CDL Class B Pre-Trip Inspection
Vehicle Overview
Begin with a general overview of the vehicle, checking for obvious signs of damage or issues.
External Inspection
Inspect all external components, including tires, lights, and mirrors.
Internal Inspection
Check all internal controls, ensuring everything is functional and within reach.
Pre-Trip Inspection Checklist
- Lights and reflector s: Ensure all are clean and functional.
- Engine oil and coolant levels : Check for adequate levels.
- Steering mechanism : Ensure it’s secure and functioning.
- Horn : Test for functionality.
- Windshield wipers : Check for operability and condition.
- Mirror s: Adjust for optimal visibility.
- Emergency equipment : Ensure presence and accessibility.
- Air brake system : Test for leaks and proper pressure.
Tips for Memorizing the Pre-Trip Inspection for CDL
- Create a Routine : Develop a consistent order in which to conduct your inspection.
- Use Mnemonics : Create acronyms or phrases to help remember the steps.
- Practice Regularly : Hands-on practice is the most effective way to memorize the inspection process.
- Visual Aids : Use diagrams or checklists as visual reminders.
Pro Tip : Practice the pre-trip inspection in a real-world setting. The more you perform the inspection in a practical environment, the more natural it will become.
Remember, the pre-trip inspection is not just a test requirement – it’s a fundamental safety practice every commercial driver should master. For more resources and detailed guides, visit Driving-Tests.org .
Secure your CDL with confidence!
Our exclusive CDL Premium program offers comprehensive online training with an ELDT certificate, authentic exam questions, and a solid Pass Guarantee, starting at only $69. Ideal for first-time applicants, seasoned drivers, and those new to the U.S. road rules.
Explore CDL Premium
Was this page helpful?
- Start a free Pre-Trip Inspection practice test:
- CDL Class A Pre-Trip Inspection
- CDL Class B Pre-Trip Inspection
- Pre-Trip Inspection Checklist
- Tips for Memorizing the Pre-Trip Inspection for CDL
CDL Pre-Trip Inspection Checklist
Studying this Class-A CDL pre-trip inspection checklist is an important part of truck driver training. Before getting your Class-A CDL and finding an entry level truck driving job , most states will require students to pass a DOT (department of transportation) pre-trip inspection test and a general knowledge test .
Each company’s pre-trip inspection varies slightly. Most likely you will have to do the coupling system, light check and in-cab inspections plus one of the remaining three sections.
Pre Trip Inspection Checklist
Download free and print it! Printable Pre Trip Inspection Checklist (PDF)
There are many sections to learn but the test is not as difficult as it may seem. Studying our simplified Class-A pre-trip inspection checklist and taking classes at your local CDL training school will get you prepared.
Engine Compartment
Driver door fuel area, coupling area, light check, in-cab inspection and brake tests, belt driven alternator, belt driven water pump, brake chamber, brake lining, caste nuts and cotter pins, coolant reservoir, gear box and hoses, gear driven air compressor, gear driven power steering pump.
- General Hoses
Leaf Springs
Power steering fluid reservoir, shock absorber, slack adjuster and push rod, spring hanger, steering column, what to check for:.
When checking the engine compartment, you will always want to make sure the following components are properly mounted and secured. You should also make sure they are not cracked, bent or broken. The items you will need to check for include:
- Make sure all of the wires are connected. The belt should not be cracked or frayed and the free play on the belt should be between ½ to ¾ of an inch.
- The free play on the belt should be between ½ to ¾ of an inch. Also check all the hoses running to and from the water pump to make sure nothing is leaking.
- The brake chamber should not be leaking air.
- The brake drum should be properly mounted and secure.
- The brake hose is rubber, so it is important to make sure it is not leaking air.
- Check for oil or debris on the lining. There should be at least ¼ of an inch of friction material.
- Make sure all three caste nuts and cotter pins are present.
- The reservoir should not leaking and must be filled to the manufacturer’s specifications.
- Make sure the drag link is properly mounted and secure, and not cracked, bent or broken.
- The gear box and hoses should have no abrasions, bulges or cuts, and should not be leaking.
- Although the air compressor is hard to see, you must make sure it is properly mounted and does not leak.
- The steering pump is located in the same place as the air compressor and is also gear driven. Ensure the steering pump is not leaking.
General Hoses (Passenger and Driver’s Side)
- The hoses should be secure at both ends. There should be no abrasions, bulges or cuts. Fluids run through these hoses, so it is important to make sure they are not leaking.
- The hub seal (or axle seal) should not be leaking and should be filled to the manufacturer’s specifications.
- Make sure none of the leaf springs have shifted.
- Check for leaks under the truck.
- There should be no lug nuts missing. Look for rust trails, powder residue and cracks around the bolt holes.
- The oil level should be filled to the manufacturer’s specifications.
- Make sure the pitman arm is properly mounted and secure. It should be not cracked, bent or broken.
- Make sure this reservoir is not leaking and filled to the manufacturer’s specifications.
- The rim cannot have any unauthorized welds.
- Make sure the shock absorber is not leaking. If it is leaking, the leak will be at the point where the top and bottom portion of the shock meet.
- With the brakes released and pulled by hand, the push rod should never move more than one inch.
- The spring hanger should be properly mounted and secure.
- Make sure the steering column is properly mounted and secure. It should not be cracked, bent or broken.
- Look for abrasions, bulges or cuts on the tread or sidewalls. Tread depth should have a depth no less than 4/32 of an inch. Tires must be properly filled to the manufacturer’s specifications. This can be checked with an air gauge.
- Make sure the tie rod is properly mounted and secure, not cracked, bent or broken.
- Make sure all are accounted for.
Back to top of Engine Compartment
Catwalk and Steps
Door and hinges, drive shaft, exhaust system, frame and cross members, spring mount.
Again it is important to make sure these items are properly mounted and secure. Look for cracks, bends, and breaks.
- The actual airbag is rubber, so it is important to check for abrasions, bulges, cuts and leaks, in addition to any missing mounting bolts.
- The axle seal should not be leaking and should be filled to the manufacturer’s specifications.
- Make sure to mention the brake chamber is not leaking air.
- Make sure the brake drum is secured properly. Also look for cracks, bends and breaks.
- Check the brake hose at both ends to make sure it is not leaking air.
- There should be no oil or debris on the brake lining. There should be at least ¼ of an inch of friction material.
- The cat walk and steps should be clear of any loose objects.
- Physically demonstrate that the doors open, close and latch properly. Door seals should not be worn, torn or rotten.
- The drive shaft should not be twisted and the u-joints should be free of any debris.
- The tread and sidewalls should have no abrasions, bulges or cuts. The tread depth should be no less than 2/32 of an inch. Tires should be properly filled to the manufacturer’s specifications. This can be checked with an air gauge.
- The exhaust system should show no signs of leaks.
- There should be no unauthorized holes or welds. Bundle up the cross members to ensure none are missing.
- Fuel should not be leaking from the tank and the cap should always be on tight.
- Rust trails could indicate loose bolts, while powder residue and racks around the bolts could mean the bolts have been over-tightened.
- Mirrors should be clean for best visibility.
- Make sure the mud flap is secured properly. Also look for cracks, bends and breaks.
- Make sure to mention there should be never be any unauthorized welds.
- The shock absorber should be secure at both ends and not leaking. If it does leak, it will leak in the middle.
- With the brakes released and pulled by hand, the push rod should not move more than one inch.
- If you are equipped with duals, check to see there is proper spacing between the tires and there is nothing stuck.
- The spring arm should be secure at both ends.
- The spring mount should be secure at both ends.
- Make sure the torque arm is secured properly. Also look for cracks, bends and breaks.
- Make sure to check and mention that no U-bolts are missing.
Back to top of Driver Door Fuel Area
Electric Line
Locking jaws, mounting bolts, release arm, sliding fifth wheel locking pin.
- Air lines should be secure at both ends with no abrasions, bulges or cuts. They should not be leaking, dragging or tangled.
- Make sure the apron is properly mounted and secure. Look for cracks, bends and breaks.
- Make sure there is enough space between the tractor mudflap and the trailer landing gear so that they don’t hit each other when making a turn.
- The electric line should be secure at both ends. There should be no abrasions, bulges, cuts or exposed wires.
- The gap is not an actual item, however there should be no space between the apron and the skid plate.
- The seals should be in good condition with no cracks, signs of rotting, or leaking air.
- Make sure the king pin is properly mounted and secure. Look for cracks, bends and breaks.
- You must physically check that the locking jaws is fully locked around the king pin.
- No mounting bolts should be missing.
- Make sure the platform is properly mounted and secure. Look for cracks, bends and breaks.
- The release arm should be in the fully locked position.
- The skid plate needs to be properly lubed.
- The pin must be in the fully locked position.
Back to top of Coupling Area
Header Board
Landing gear, rear door and hinges.
- Shock Absorbers
Tandem Frame and Release
Trailer tire.
- Again make sure the airbag has no abrasions, bulges, cuts or leakings. The airbag should not be missing any mounting bolts.
- The brake chamber should be properly mounted so that is does not leak air.
- The brake hose should be secure at both ends with no abrasions, bulges, cuts or leaks.
- Check for oil or debris on the brake lining. There should be at least ¼ of an inch of friction material.
- There cannot be any missing cross members.
- The header board cannot have any holes or missing rivets.
- The landing gear must be fully raised and the cradle handle secure.
- Rust trails indicate loose bolts. Powder residue and cracks around the bolt holes could be an indication of over-tightened bolts.
- The rims cannot have any unauthorized welds.
- The rear door should open, close and latch properly. Door seals should not be worn, torn or dry rotten.
- The shock absorber should be checked at both ends for leaks.
- When the brakes are released and pulled by hand, the push rod should not move more than one inch.
- Release handle and locking pins should be in the fully locked position.
There should be no abrasions, bulges or cuts to the tread or sidewalls. Tread depth should be no less than 2/32 of an inch. The tire should be properly filled to manufacturer’s specifications and checked with an air gauge.
- Front of the truck
- Both sides of the truck
- Rear of the truck
- Both sides of the trailer
- Rear of the trailer
Back to top of Trailer
The five functions are:
- Left turn signal
- Right turn signal
- Four way flashers
- High/low beams
- Brake lights
Back to top of Light Check
- Airbrake Test
Air Pressure Gauges
Emergency equipment, heater and defroster, lighting indicators, oil pressure gauge, parking brake, service brake check, water temperature gauge, windshield and mirrors, windshield wipers and washers.
The last section is In-Cab Inspection and Brake Tests. For the In-Cab Inspection you will once again want to make sure all of the following components are properly mounted and secure. As well as the following:
Air Brake Test
There are three stages to an air brake test:
- Applied Pressure Test – When doing the Applied Pressure Test, you will want to build the air pressure to governor cut out. Put the truck in the lowest gear, turn the engine off and immediately turn it back on. Push in the tractor and trailer valves which will then release the parking brakes. Push and hold the brake pedal, allowing the gauges to stabilize. When the gauges have stabilized, announce the Primary and Secondary PSI. Listen for air leaks while doing this.
- Warning Light and Buzzer – Pump down on the brake pedal until the warning light and buzzer comes on. This is typically at or before 60 PSI.
- Tractor/Trailer Protection Valve Pop Out – Pump down on the brake pedal until the tractor and trailer protection valves pop out, this will be between 20 and 40 PSI.
- The air pressure gauges should build to governor cut out.
- Your truck should have a fire extinguisher, three red reflective triangles and spare electrical fuses.
- Demonstrate both the heater and defroster are working properly.
Horns (Air Horn and City Horn)
- Blow both horns to make sure they are working.
- Check the left turn, right turn, four way flashers and high beams; also point these out on the dashboard.
- Make sure transmission is in neutral and then fully depress the clutch. Turn the key on, check the ABS light, announce when it comes on and off, and start the engine.
- The seat belt should not be ripped or frayed and should adjust and latch properly.
- The engine oil pressure gauge should rise to normal operating range.
- Trailer Parking Brakes – Set the trailer brake, release the tractor brake, then tug lightly on the trailer.
- Tractor Parking Brakes – Set the tractor brake, release the trailer brake and tug lightly on the trailer.
- Release both the tractor and trailer brakes. Drive at idle speed. Apply the service brake to make sure you come to a complete stop and that it doesn’t pull to the left or right when applying the brakes.
- The voltmeter should be charging between 13 and 14 volts.
- The water temperature gauge should also rise to normal operating range.
- The windshield and mirrors must be clean, with no obstructions and in proper adjustment.
- Demonstrate the wipers and washers are working properly by spraying the windshield.
Back to top of In-Cab Inspection and Brake Tests
During a CDL pre-trip inspection, truckers inspect many aspects of their commercial vehicle, including the overall safety of the vehicle; major hoses, fluid levels, and vehicle belts; the clutch or gear shift; and emergency equipment. The driver demonstrates their knowledge by walking around the vehicle, checking various safety components and explaining why each part should be checked for safety.
Reference and practice tests:
- Printable Pre Trip Inspection Checklist (PDF)
- CDL General Knowledge Practice Test
- Pre Trip Inspection Practice Test
- CDL HAZMAT Endorsement Practice Test
Edited for 2024 on 12/5/23

CDL Pre-Trip Inspection Learning Center
The Pre-Trip inspection test is an important part of the CDL test – and one of the toughest state tests to master. It involves memorization of many parts of a commercial motor vehicle (CMV). CMV drivers are required to explain to the examiner each step in the inspection process. Even more importantly, mastering the Pre-Trip will be a skill that helps you throughout your truck driving career.
New: To help you remember key parts of the Pre-Trip, check out our new Pre-Trip Inspection Practice Tests.
Learn How to Perform a Proper CDL Pre-Trip Inspection.
There are lots of videos on pre-trip inspections. Many are well done, some not so much. We’ve decided to narrow it down to one so you can focus. The video we selected had to be easy to hear, see, and understand. It couldn’t be too complicated, but at the same time had to be thorough and cover everything. The instructor also had to have a logical system of doing things that would help you quickly master the inspection. The following video accomplishes all this.
Watch this video from Apex CDL Institute on a Class A Pre-Trip Inspection. Just sit back and take it all in the first time. Then, go back and watch again, this time pausing the video at key points and taking notes.
Note: Not all parts mentioned in this video will be located in the same place. It depends on the truck you’ll do the pre-trip on. Truck and engines vary greatly, so you must first get familiar with where these parts are on YOUR truck.
Quick tip: Work in a routine. Develop a personal system of doing things. Left to right, top to bottom, etc. This will prevent you from missing anything as you’ll check the same things every time.
This is NOT just about passing the Pre-Trip portion of the CDL test. Mastering this process will:
- Keep you and others safe – and alive!
- Keep you on the road – and not out of service because of vehicle violations
- Keep you making money . That’s ultimately why you’re doing all this, right? You’re really only making money when the wheels are turning.
- Fleet Training
- CDL Training
- Insurance Discount
- Court Diversion
- Our Courses
- What is the SPIDER Method?
Pre-Trip Inspection: An Essential Guide for Commercial Drivers
Why are pre trip inspections essential, and how can they make a difference in the daily lives of truck drivers? With safety, regulatory compliance, and preventative maintenance on the line, pre trip inspections are a crucial aspect of ensuring smooth and efficient operations on the road. In this blog post, we dive into the critical components of pre trip inspection and provide valuable tips and resources to help drivers stay ahead of potential hazards and costly repairs.
- Pre-trip inspections are essential for promoting safety, compliance, and cost savings while on the road.
- The pre-trip inspection process should take approximately 10–15 minutes and include items such as braking systems, steering & suspension systems, emergency equipment & engine compartment.
- Establishing a routine for pre-trip inspections with sufficient time to check all components is key to ensuring vehicle safety and regulatory compliance. Accurate records must also be kept.
The Importance of Pre-Trip Inspections

- Lessen accident risks
- Comply with regulations
- Maintain the vehicle’s condition
- Avert expensive repairs and downtime
Frequent inspections, such as periodic inspection, are important for maintaining safety and preventing costly issues.
The benefits of conducting pre-trip inspections include:
- Ensuring safety and compliance with regulations like DOT inspections
- Preventing fines, penalties, and potential harm to the driver’s or company’s reputation
- Acting as preventative maintenance, catching minor issues before they escalate
- Saving time, reducing repair costs, and minimizing downtime
Safety Concerns
Ensuring the vehicle’s safety is of paramount importance when conducting pre-trip inspections. A thorough examination of various components is necessary, including:
- Fire extinguishers
- Brake lights
This enables drivers to spot potential hazards and affirm the vehicle’s operational readiness, ultimately reducing the risk of accidents, in line with the goals of the Commercial Vehicle Safety Alliance.
However, the consequences of neglecting a thorough pre-trip inspection can be severe. Overlooking potential hazards may render the vehicle unfit for operation, increasing the risk of collisions. An inspection focused solely on the vehicle can spot these hazards and confirm the vehicle’s safety, underlining the significance of a thorough pre-trip inspection.
Regulatory Compliance
The Federal Motor Carrier Safety Administration mandates pre-trip inspections as part of DOT inspections for commercial motor vehicles, requiring drivers to acknowledge and certify that appropriate repairs have been made before commencing a trip. Non-compliance with pre-trip inspection regulations can result in fines, penalties, and harm to a driver’s or company’s reputation. Conducting periodic inspections can help maintain compliance and ensure the vehicle’s safety.
A Driver Vehicle Inspection Report (DVIR) is an essential tool to guarantee regulatory adherence. Watching a pre-trip inspection video can help drivers understand the process and ensure they follow the correct procedures, further emphasizing the need for thorough pre-trip inspections.
Preventative Maintenance
Preventative maintenance is an essential aspect of vehicle upkeep, aiming to prolong the lifespan of corporate assets, equipment, and infrastructure. By inspecting, cleaning, lubricating, adjusting, and replacing parts as necessary, drivers can detect minor issues before they escalate into major problems, saving time and money on repairs and reducing downtime.
The advantages of preventative maintenance include enhanced safety, increased efficiency, and minimized downtime. By incorporating pre-trip inspections into a regular maintenance routine, drivers can ensure their vehicles remain in optimal condition and avoid unexpected breakdowns or costly repairs.
Pre-Trip Inspection Process

Conducting pre-trip inspections at the start of each shift and each time a trailer swap occurs is integral. Such regularity aids in upholding the vehicle’s safety, roadworthiness, and regulatory compliance while also acting as preventative maintenance. The average inspection should last between 10-15 minutes, allowing enough time for a thorough examination of all components.
Engine Compartment
Inspecting the engine compartment is a critical part of the pre-trip inspection process. Drivers should examine the engine for leaks, fluid levels, belts, hoses, and other critical components to ensure optimal performance and prevent breakdowns. This includes checking the water pump, power steering pump, and alternator for any signs of leakage, fraying of belts, and ensuring that all components are securely mounted.
Additionally, drivers should verify the location of the dipstick and the appropriate oil level, as well as inspect the coolant system for proper levels, hose conditions, and secure mounting at both ends. By carefully examining each part of the engine compartment, drivers can maintain their vehicle’s performance and avoid unexpected issues on the road.
Exterior and Tires
A thorough inspection of the vehicle’s exterior and tires is crucial for ensuring its safety and roadworthiness. This includes checking the lights, reflectors, fuel tank, battery, and tires for any damage or wear that could impact safety or performance. Tires should be inspected for adequate tread, cuts, bubbles, or gouges, and to make sure there are no foreign objects, such as stones or large debris, between the wheels and no space between tires and rims.
Moreover, it is vital to check and maintain the appropriate air pressure in the tires to ensure optimal performance and prevent tire-related accidents. By carefully inspecting the exterior and tires, drivers can guarantee a safer and more efficient driving experience.
cabin and Controls
The cabin and controls of a commercial vehicle play a crucial role in the driver’s safety and comfort on the road. During a pre-trip inspection, drivers should examine the cabin for proper functioning of:
- other essential equipment
They should also ensure the availability of emergency equipment.
In addition to checking seatbelts, mirrors, seat position, steering wheel, pedals, windshield, lights, turn signals, ABS lights, gauges, windshield wipers, and horns, it’s essential to verify that all required emergency equipment, such as fire extinguishers, warning devices, and first aid kits, are present and in good working condition.
By thoroughly inspecting the cabin and controls, drivers can ensure a safe and comfortable driving experience.
Essential Items on a Pre-Trip Inspection Checklist

In addition to the aforementioned items, a pre-trip inspection checklist should also include the engine compartment, exterior and tires, and cabin and controls, as previously discussed. Combining all these components in a well-structured checklist ensures a thorough and effective pre-trip inspection that promotes safety and compliance.
Braking System
The braking system is a vital component of any vehicle, and a thorough inspection is necessary to ensure proper functionality and safety. During a pre-trip inspection, drivers should examine all components of the braking system, including air brakes, parking brakes, and hydraulic systems.
Specifically, drivers should inspect the following parts of the service brake system for any signs of wear or damage:
- Brake chamber
- Slack adjuster
By carefully examining each part, drivers can guarantee the vehicle’s safe operation and prevent potential accidents due to brake failure.
Steering and Suspension
A vehicle’s steering and suspension systems play a significant role in ensuring proper handling and a smooth ride. During a pre-trip inspection, drivers should inspect the steering components, suspension system, and wheel alignment to guarantee the vehicle’s optimal performance.
Specifically, drivers should examine the following components of the steering and suspension systems:
- Ball joints
- Tie rod ends
- Strut mounts or shock towers
- Steering effort for both manual and power systems
By thoroughly inspecting these components, drivers can maintain the vehicle’s handling capabilities and provide a comfortable driving experience.
Emergency Equipment
Ensuring the presence and proper functioning of emergency equipment is a crucial part of a pre-trip inspection. Drivers should verify that all required emergency equipment, such as fire extinguishers, warning devices, and first aid kits, are present and in good working condition.
In addition to these items, drivers should also be familiar with the location and operation of any other emergency equipment required by law or their specific company. By confirming the availability and functionality of emergency equipment, drivers can be prepared for unforeseen situations and enhance the overall safety of their vehicle.
Digital Tools and Resources for Pre-Trip Inspections

- Mobile apps that provide checklists and guides for conducting pre-trip inspections
- Online videos and tutorials that demonstrate best practices for inspecting different parts of the truck
- Websites and forums where drivers can stay updated with the latest regulations and requirements for pre-trip inspections
By leveraging these digital tools, truck drivers can enhance their knowledge and efficiency when it comes to pre-trip inspections.
These digital resources not only simplify the pre-trip inspection process but also help drivers maintain compliance with regulations and support preventative maintenance efforts. By leveraging technology, drivers can enhance their pre-trip inspections and promote safety and efficiency on the road.
Mobile Apps
Mobile apps designed for pre-trip inspections can greatly benefit truck drivers by creating checklists, tracking progress, and storing records digitally for easy access and compliance. Some popular mobile apps for pre-trip inspections include iAuditor, Whip Around DVIR software, Teletrac Navman Pre-trip Checklist tool, and Titan GPS Digital Pre-trip Inspection.
By utilizing these apps, drivers can:
- Generate checklists tailored to their specific vehicle and requirements
- Monitor their progress throughout the inspection
- Maintain digital records for future reference and compliance purposes
This not only simplifies the driver only inspection process but also ensures that drivers are following a thorough and effective routine.
Online Videos and Tutorials
Online videos and tutorials serve as valuable resources for truck drivers looking to enhance their pre-trip inspection skills and knowledge. By accessing these resources, drivers can learn best practices for conducting pre-trip inspections and stay updated on regulations and requirements.
Drivers can find online resources on websites, YouTube channels, and other digital platforms that provide informative and instructional content on pre-trip inspections. By staying informed and utilizing these resources, drivers can ensure they are conducting thorough and effective pre-trip inspections that promote safety and compliance.
Tips for a Successful Pre-Trip Inspection
To ensure a thorough and effective pre-trip inspection, truck drivers should establish a routine, take their time, and keep accurate records. Following these tips allows drivers to boost safety, comply with regulations, and bolster preventative maintenance efforts.
Adopting a consistent routine for pre-trip inspections helps ensure that all components are checked and nothing is overlooked. Here are some tips to follow:
- Allow sufficient time for a thorough inspection, typically between 15-30 minutes, to prevent missed issues and potential safety hazards.
- Check all essential components, including tires, brakes, lights, mirrors, and fluid levels.
- Keep detailed records of the inspections, including any issues identified and actions taken.
Regularly review and update your inspection checklist to ensure it covers all necessary items. By following these tips and maintaining a consistent pre-trip inspection routine, you can demonstrate compliance and support preventative maintenance efforts.
Establish a Routine
Developing a consistent routine for conducting pre-trip inspections is crucial for ensuring all components are checked and nothing is overlooked. Adhering to a systematic process lets drivers ensure the vehicle’s safety, roadworthiness, and regulatory compliance.
Some recommended components to include in a pre-trip inspection routine are:
- The engine compartment
- Exterior and tires
- Cabin and controls
- Braking system
- Steering and suspension
- Emergency equipment
By incorporating all of these components into a well-structured routine, drivers can guarantee a thorough and effective pre-trip inspection.
Take Your Time
Allowing sufficient time for a thorough pre-trip inspection is essential to prevent missed issues and potential safety hazards. An average inspection should last between 15-30 minutes, giving drivers enough time to examine all components in detail and ensure the vehicle’s safety and roadworthiness.
Allocating time for pre-trip inspections helps drivers reduce the risk of missing critical issues and affirm the vehicle’s operational readiness. Remember, a thorough vehicle only inspection is not only essential for safety but also for compliance with regulations and preventing costly repairs down the line.
Keep Accurate Records
Maintaining detailed records of pre-trip inspections is essential for demonstrating compliance with regulations and supporting preventative maintenance efforts. Drivers should document any issues identified during the inspection, along with the actions taken to address them.
Maintaining accurate records enables drivers to easily refer back to past inspections and monitor the vehicle’s maintenance history. This not only helps ensure compliance with regulations but also supports proactive maintenance initiatives that can prevent major issues and costly repairs.
In Conclusion
Pre-trip inspections are an essential aspect of ensuring safety, compliance, and preventative maintenance for truck drivers. By following a systematic process, utilizing digital tools and resources, and implementing practical tips, drivers can guarantee thorough and effective inspections that promote safety and efficiency on the road. Remember, a well-executed pre-trip inspection not only minimizes risks but also contributes to a smoother and more enjoyable driving experience.
Frequently Asked Questions
Which of these items should be checked in a pre-trip inspection.
A pre-trip inspection should include thorough safety inspections of the coupling system, vehicle lights, engine compartment, tires and brakes, chassis, fuel tanks, and an in-cab inspection, and must be logged in your logbook as “on duty not driving.” This inspection should be done before every trip to ensure the safety of the driver and other motorists. It is important to check the coupling system for any signs of wear or damage, as well as the vehicle lights, engine compartment, tires and brakes, chassis, and fuel tanks. Additionally, an in-cab inspection should be conducted to ensure that all safety requirements are met.
What is the first step in the pre-trip inspection?
The first step of the pre-trip inspection is to check under the hood, starting at the front of the vehicle and inspecting the various components of the truck’s engine compartment. Begin by checking the oil level, coolant level, and power steering fluid level. Make sure all hoses and belts are in good condition and that all fluid levels are at the proper levels. Check the battery terminals and cables for corrosion and make sure the battery is connected and functioning.
What are the ABSC in a pre-trip inspection?
Pre-trip inspections involve inspecting all parts of a truck and trailer for abrasion, bruises, cuts, bent, broken or cracked parts, and ensuring all air and liquid-holding parts are not leaking. It’s recommended to do the inspection in order, starting with the truck and then the trailer, touching each part and working from the top down and from the center out while wearing gloves.
Which is not checked during an exterior pre-trip inspection?
The reservoir sight glass of the coolant level is not checked during an exterior pre-trip inspection, whereas the oil pressure gauge, wiper arms and blades, horn and heater/defroster should all be checked.
What does DOT mean in inspection?
DOT stands for U.S. Department of Transportation and a DOT inspection is conducted to ensure that commercial motor vehicles are up to standards and safe for public use.

Everything You Need to Know About CDL Medical Requirements

CDL Hours of Service Regulations – Everything You Need to Know
Join 100,000+ Drivers
- Sponsorship
- Thinking of Becoming a Truck Driver?
- Getting a CDL License
- Trucking Driving Jobs Guide
- Trucking Company Guide
- Trucker Life
- Paid CDL Training
- CDL Schools
- Professional Driving Skills + Knowledge
- Owner Operator
- Latest Articles
- Truck Driver Skills
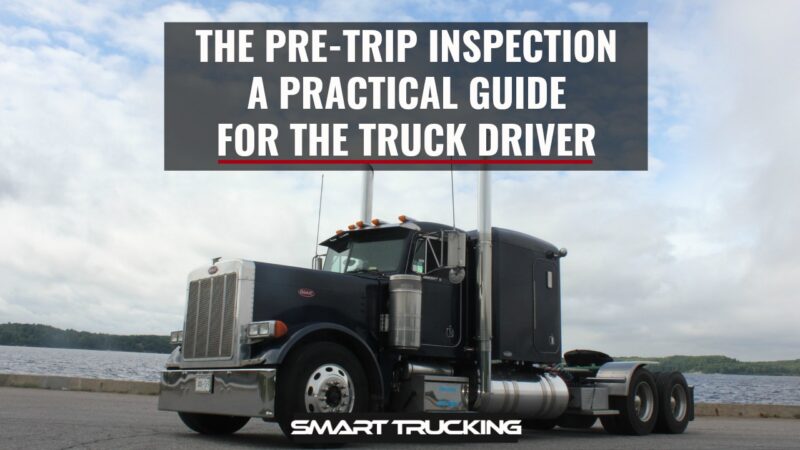
The Pre-Trip Inspection: A Practical Guide For the Truck Driver
Updated February 24th, 2022

- Facebook 426
- Pinterest 1
The pre-trip inspection is an integral part of every road trip for a trucker.
It’s probably the most disliked and most often overlooked part of the job of the professional truck driver in the trucking industry.
This inspection is meant to be a thorough check of the truck, trailer and load.
The check is to ensure that everything is in correct working order, prior to the truck and driver, departing on a trip.
Any damage or issues found during the pre-trip inspection which needs attention, must be addressed before departure.
CDL Test Pre-Trip Inspection
If you just came through the process of getting your CDL, you can breathe a sigh of relief.
You don’t have to check all 500 or so items that you had to memorize for the test every single day.
Out on the road, a thorough pre trip shouldn’t take more than 10 to 15 minutes.
DVIRs – Daily Vehicle Inspection Report
According to federal law ( FMCSR Section 396.11 ), every day, a driver must submit a Daily Vehicle Inspection Report (DVIR) for each power unit he operates. Multiple trailers can go in one report.
DVIRs are either paper or electronic.
Not every trucking company (ahem) enforces this policy, so some truck drivers can go months or years without submitting a DVIR.
Minimum DOT Pre-Trip Inspection Requirements
- Service brakes including trailer brake connections
- Parking brake
- Steering mechanism
- Lighting devices and reflectors
- Windshield wipers
- Rear vision mirrors
- Coupling devices
- Wheels and rims
- Emergency equipment
Your trucking company’s DVIR might be more thorough.
This is a thorough Q&A on DVIRs which you can refer to.

Inspecting a New Truck
When you are assigned a new truck (either daily or just once), there are a few additional things you need to check for on the pre-trip inspection.
Truck Compliance
- Cab card and book – This is a book containing the registration, inspection, permits, cab cards, IFTA paperwork, and any other important papers for the truck. Make sure it is in the truck and all the paperwork is up to date.
- Inspection sticker – This is outside the truck. Find it and make sure the truck is not overdue.
- IFTA stickers – These are the fuel tax compliance stickers. They are on both sides of the truck. Make sure the current year is displayed.
- Elog device – Most trucks are required to have a working elog device.
- Required permits – These are in the cab card book. The most common permits are Heavy Motor Vehicle Trip Permit (Oregon) and the Weight Distance Tax Permit (New Mexico).
- New York HUT sticker – This is usually on the front of your truck. It’s a type of permit.
- License plate – Make sure the license plates on the front and back of the truck match.
- FMCSA Safety Regulations and Hazardous Materials book – These will be given to you by your company. They must stay in your truck within arms reach from the driver’s seat.
- Paper logbook – If your e-log stops working, you must log your hours in a paper logbook, which must be kept in your truck.
- Medical card – You must keep your current medical card in your truck. Always have your CDL on you as well.
- Orange triangles – You must have 3 triangles for when you break down.
- Fire extinguisher – Must be charged and secured to the truck. No rolling around on the floor.
- Extra fuses – If your truck doesn’t use circuit breakers, you must have spare fuses.
- Load bars and/or straps
- Extra oil, coolant, and windshield washer fluid
- Line antifreeze and diesel anti-gel
- Chains and bungees
- Gladhand seals
- Hammer, wrench, wire cutters, cable cutters, knife with glass-breaker
The Class A Pre-Trip Inspection Process
Unless I have to bobtail to pick up my trailer, I inspect my truck and trailer together.
The best way to memorize a thorough pre trip is to do it the same way each time.
Your process will look different from mine, but as long as you are consistent, you will be less likely to miss anything.
I do the inspection first thing each morning as well as every time I swap trailers.
Paperwork and Trailer
- Check the paperwork. It should be the first thing checked when you get to your truck.
- Match the trailer number to your paperwork. If your trailer has a seal, make sure it matches too.
- Unsealed trailer. If your trailer does not have a seal, open it and confirm the product matches the bills. If you are picking up an empty trailer, open it and make sure it’s actually empty.
- Confirm your destination. Ensure the destination is the same as on your trip sheet or load assignment. If there is a discrepancy, call your dispatcher.

I personally like to start with checking under the hood of the rig. Not everyone does, but I do.
Under the Hood of the Truck
I walk around the front of the truck, making sure all the lights work. Then I open the hood.

- Fluid levels – Check all fluids: coolant, oil, power steering fluid, and windshield washer fluid. Make sure caps are tight for the rad, oil filler, power steering fluid and the dip-stick is seated properly.
- Alternator, water pump, power steering pump –Make sure these are in good working order, and the belts are not worn or have too much slack.
- Observe at the engine block. Check for leaks, fluid running down the side of the engine. Check for wear, cracking or fraying. Inspect fan belts for proper tension and signs of wear.
- Hoses – Check all hoses for leaks, cracks, and tears.
- Wiring – Check wiring for wear.
- Steering linkage – Check linkage for worn or missing parts.
- Tires – Tires should be properly inflated and have decent tread. If there are flat spots on the tire, it needs to be replaced.
- Hub seal – Make sure it’s not leaking and wiped with oil if transparent.
- Brakes – Brake chambers should not be out of round and should be free of grease. Shoes should not be worn down too much.
- Slack adjusters – Pull slack adjuster. If it travels more than an inch, it needs to be adjusted.
- Suspension – Shocks should be in good condition, and not covered in grease or oil.
Back of the Truck
Next, I check the back of my truck because it’s easier to check this before hooking to a trailer.
- Tires – Tires should be properly inflated and have decent tread. If the tires have flat spots, the tire needs to be replaced.
- Suspension – Shocks and airbags should be in good condition, and not covered in grease or oil.
- Drive shaft – Driveshaft should be undamaged and free of grease. Make sure there is no debris in the u-joints.
- Frame – The frame should not have any welds and not cracked or significantly rusted.
- Fifth wheel – The fifth wheel should be properly greased and not broken.
- Fuel tanks – Fuel tanks should not be leaking.
- Stairs and catwalk – Stairs and catwalk should be free of debris and not broken.

Tires should be checked with a tire gauge.
Tip . This is especially if you are slip seating. Tire thumpers aren’t very accurate. If you use a tire thumper, still check with a tire gauge from time to time.
Drives and tandems should be inflated to 100-110 psi and have a minimum tread or 2/32in. Steer tires should be inflated to 110-120 psi and have a minimum tread of 4/32in.
Tires under 50 psi should be replaced, as they can’t retain enough air pressure.
Flat spots can occur from dragging tandems in the winter or when trying to slide the tandems. Tires with flat spots should be replaced.
Check tires for damage, nails, and punctures.

Next, I jump in my cab and start my truck.
- Gauges – Make sure air, oil, and water temperature gauges rise to normal levels.
- Mirrors – Adjust mirrors before moving your truck.
- Windshield wipers – Make sure they work and sit flat against the windshield.
- Horn – Make sure the city and air horns both work.
- Heat and A/C – Check to see if heat and/or air conditioning is working.
- Seat belt – Seat belt should not be frayed and should move freely.
Coupling and Air Lines
This is what could happen if you don’t do the tug test.
The pre-trip inspection is a pretty important thing to do.
Learn your pre-trip procedure and do it when required.
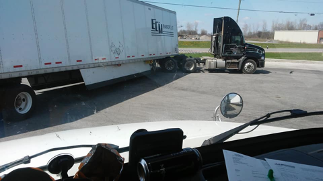
This is why you should always do a tug test when picking up a trailer. The passenger side of the front of the trailer is resting on the frame of the truck and NOT hooked up to the 5th wheel.

The front left corner of the trailer is supported by retracted landing gear only. (Not good!)
The truck driver in this photo (hopefully) learned how critical a pre-trip is. Don’t end up in a pickle like this guy.
Next, I hook up to my trailer.
- Tug test – I back under my trailer until I hear a click, and then immediately do a tug test.
A tug test tests both your coupling and your brakes. If you pull away from your trailer, you aren’t hooked properly.
If you pull your trailer with you, your trailer brakes are out of adjustment. Be absolutely sure to write it up and have it corrected before departure.
- 4 Ways + Headlights. I also turn on my four-way flashers and headlights.
- Airlines and pigtails – Next, hook up airlines and pigtails (electrical connection). Inspect to make sure they aren’t leaking or ripped.
- Visual check of Fifth wheel – Look at the fifth wheel arm under the trailer to make sure it is coupled. The arm should be in.
- Landing gear – Raise the landing gear and check for damage.

Next, I check the bulkhead (front of the trailer).
- Wall – Make sure the wall is not damaged.
- Inspection sticker – Check the DOT inspection sticker to make sure it’s not out of date.
- Registration paperwork – Check the front trailer box to make sure the registration is good.
- Reefer unit – If you are pulling a reefer, select the pre trip function on the unit and run it. It should be completed by the time you are finished your pre trip inspection.
Next step for the pre-trip inspection is to check the side of the trailer and the tandems.
- Lights – Lights should be on and flashing.
- Suspension – springs or airbags should be in good condition, and not covered in oil or grease.
- Tandem pins – Tandem pins should be locked in position, and slider arm should be in its cradle.
- Cables – Make sure the tandem cables aren’t dragging on the ground.
- Underbelly – Make sure there are no damaged beams under the trailer. Check the entire length.
- Mudflaps – Mud flaps should not be torn and hanging.
Back of Trailer
Next, I check the back of the trailer.
- Doors – Doors and hinges should not be damaged.
- Door latches – Doors should be closed and secured.
- Seal – Seal should be intact and match paperwork.
- DOT bumper – DOT bumper should not be damaged
- License plate – Check for the license plate. They tend to wear out and fall off.
Passenger Side
Next, I check the passenger side.
- Brakes – Brake chambers should not be out of round and should be free of grease.
- Suspension – Springs or airbags should be in good condition, and not covered in grease or oil.
- Mudflaps – Mud flaps should not be torn.
Ready to Roll

Finally, I jump in my truck and double check my paperwork and destination.
I release my air brakes, roll forward, and push the service brake.
If everything is good, I’m ready to roll.
Post-Trip Inspection
When I’m done for the day, and every time I swap trailers, I do a post-trip inspection. If I am swapping trailers, I do a pre-trip on the new trailer as well.
A post-trip includes:
- lowering the landing gear
- removing the airlines
- uncoupling, and walking around the trailer checking tires, lights, seal, and mudflaps
Then I finish my paperwork and go home.
Slip Seating
If you slip seat (meaning you are in a different truck each shift), your pre- trip check should be more thorough than if you are permanently assigned a truck.
This also applies to the first inspection after being assigned a truck.
Please be courteous and write up any problems or issues found, so the next driver of the vehicle doesn’t have to deal with it.
Side Note: Clean out your truck and throw away any trash. Common courtesy goes a long way in trucking, between drivers.
Pre-Trip Inspection F.A.Q.
Most breakdowns can be avoided with proper preventative measures, such as daily inspections.
Thorough inspections should be done at the start of each shift. Inspections of trailers should be done every time you swap trailers.
Each driver should do a thorough pre-trip every time they swap drivers.
It should take about 10-15 minutes to perform a pre trip inspection.
The DOT. Make sure you stay in compliance so you don’t end up with hefty fines and an out of service.
The best way to memorize your pre trip inspection routine, is to do it the same way every time. That way you’re less likely to miss something. If you have questions, ask your safety team at your company.
Fluids in the engine, engine hoses and wires, brakes and suspension, mudflaps, trailer registration and inspection paperwork, and license plates.
A Few Trip Planning Tips

- Buy and learn to read a trucker’s atlas. It’s useful to plan routes and avoid restricted roads. I find this road atlas a necessity as a professional truck driver.
- Buy a decent trucking GPS , but don’t rely on it 100%. Use common sense.
- Don’t use the GPS in your elog device. It will put you in a lake.
Please note that minimum requirements for the inspection are established by the FMCSA.
But these may vary by state, trucking company, truck type, and trailer type.
It is your duty as a professional truck driver to perform a thorough pre-trip inspection before each trip and before you drive.
You’ll save yourself from headaches, fines and unnecessary accidents.

More Articles You May Like
- Trucking Terms – A Guide to Our Industry’s Lingo
- The 18 Wheeler – A Comprehensive Guide to Big Rigs
CDL Truck Driver Skills – Tips, Tricks + Knowledge to Kick Your CDL Skills Up a Notch!
- The D.O.T. Physical- A Guide For the Truck Driver

Everything You’ll Want To Know About Paid CDL Training
Learn how to talk cb lingo like a trucker, c’mon.

Best Truck Engines + The Worst Truck Engines: A Trucker’s Guide
What you need to know about owner operator vs company driver jobs, twice a month we email you the best tips and new articles to help you better navigate the trucking industry..

10 Truck Driving Safety Tips Every Professional Driver Should Follow
A veteran 40+ years truck driver shares 10 of the all time, tried and true truck driving safety tips ALL professional truckers should know AND follow! If every driver of EVERY vehicle on the road followed these safety tips, our roads would be SO much safer.

Trucker Tips Master Guide: Expert Advice From Experienced Truck Drivers
A collection of trucker tips from million milers and experienced drivers. These are gold nuggets for the new truck drivers!

Instruction, clear advice, videos and photos for truck driver skills, maneuvers and information for all professional truck drivers.
A practical guide to paid CDL training programs. Recommended Company Sponsored Schools, Requirements, pros + cons, what to expect from company-sponsored cdl training programs.

How Witnessing a Fatal Accident Can Affect You: Forever
Truck driving can be a great career. But like any career, there are downsides and sometimes even a dark side. […]

10 Reasons Why Truck Drivers Quit Their Jobs
In the trucking industry, retaining drivers is a constant challenge for trucking companies. Understanding why truck drivers quit is essential […]

The Big Rush For More Truck Drivers To Put Behind the Wheel
It never ceases to amaze me how many regulations govern and control nearly every move we make as truck drivers. […]

Big Rigs, Bigger Dreams: The Best Heavy Haul Trucking Companies, U.S.
Heavy haul trucking is a specialized sector of the trucking industry. It’s a much more challenging driving job than hauling […]

The Fight Against Criminal Record Bias in the Trucking Industry
Truck driving is more than just a job. It’s a lifeline for our communities, delivering goods and keeping the wheels […]
Follow Smart Trucking

- Register / Login
- Trucker's Forum
- Paid CDL Training
- Truck Driving Jobs
- CDL Practice Tests
- High Road Training
- Truck Driver's Career Guide Chapter 5
- Truck Driver Pre-Trip Inspection
The Complete Guide To A Career In Trucking
What does the pre-trip inspection exam include.

You will be expected to be able to perform a complete pre-trip inspection on your vehicle, including both in-cab & external features, as well as the engine compartment.
Fluids, belts, brakes, air brakes, and lights are some of the main components to the test.
The pre-trip inspection will ensure that the vehicle that you are operating is safe and road-worthy to drive.
The In-cab pre-trip inspection:
This section will demonstrate that you know how to check that all in-cab functions are operational, including lights, gauges, etc., and ESPECIALLY the air brakes.
Pre-Trip Inspection - My Way! A must see!: In-Cab Pre-trip Inspection
This Pre-Trip is done on my truck and trailer. I physically took the pictures and edited them to my liking. It is a complete Pre-Trip Inspection and features everything you'll need to know.
Video - PreTrip Inspection - Interior Cab
This video shows how to do an in-cab pre-trip inspection
Video - Srtda in cab pre trip and brake test
This video shows how to do an in-cab pre-trip inspection and brake test.
The External pre-trip inspection:
You will be expected to check lights, tires, rims, fluids, belts, etc. Generally, all the components on the outside of the truck & trailer, including the engine compartment.
Forum - Daniel B.: Pre-Trip Inspection - My Way! A must see!
As stated, these are solely based off of how I like to do the Pre-Trip. I give my personal opinions as well as some helpful tips. Your Instructors advice may vary. In the end, just do it the way your Instructor wants you to do it.
Pre-Trip Inspection Video By Apex CDL Institute
This is a complete Pre-Trip inspection video by Apex CDL Institute
Pre-trip checklist, practice exams, and memory aids:
Pretrip Inspection Study Guide
The purpose of the Pretrip Inspection is to be able to do a thorough safety inspection on a commercial vehicle before heading out onto the highway.
Pre-Trip Inspection Free CDL Practice Tests
Our free Pre-Trip Inspection cdl practice questions are designed to help test your knowledge of the CDL Manual and sharpen your skills for taking the CDL permit and endorsement exams.

Why Join Trucking Truth?

- The High Road Training Program
- The High Road Article Series
- The Friendliest Trucker's Forum Ever!
- Email Updates When New Articles Are Posted
Apply For Paid CDL Training Through TruckingTruth
Did you know you can fill out one quick form here on TruckingTruth and apply to several companies at once for paid CDL training? Seriously! The application only takes one minute. You will speak with recruiters today. There is no obligation whatsoever. Learn more and apply here:
- Privacy Policy

How To Study For the CDL Pre-Trip Inspection
As a professional truck driver, there are crucial tasks to complete to be safe and stay compliant. One of the most important tasks is a CDL pre-trip inspection. Not only does this keep you and everyone else on the road safer, but it is required to remain compliant with FMCSA rules and regulations.
The nation has deemed truck drivers essential, and the industry needs new drivers more than ever. Roadmaster can help you start a new high paying career in about a month. And as a professional truck driver, there are crucial tasks to complete to be safe and stay compliant. These are the very things you’ll find when studying and testing.
One of the most important tasks is a CDL pre-trip inspection. Not only does this keep you and everyone else on the road safer, but it is required to remain compliant with FMCSA rules and regulations . It also keeps you in-the-know about how your truck is performing and if there are any issues that need to be addressed.
Here is a guide on how to study for a CDL pre-trip inspection.
What Is a CDL Pre-Trip Inspection?
The definition of a pre-trip inspection is self-explanatory – it is a complete assessment of the trailer, truck, and cargo before each trip. The DOT has a pre-trip inspection list and the guidelines dictate to follow their list. Rules dictate to document everything using a DVIR or driver vehicle inspection report according to federal law FMCSR Section 396.11.
A professional truck driver must have any problems found with the truck and trailer addressed before leaving. This includes things like damage or other issues affecting the trip. The inspection process should be thorough and doesn’t take long – around 15 minutes or so. During this time, the driver must report as on duty, not driving.
This is one important aspect to learn in becoming a driver, so studying it is crucial.
Why Is It Important?
Your safety and the safety of others.
Any kind of issue with your truck can cause safety concerns. From damaged brakes to an unsecured load – these are the very things you are looking for with the inspection. It keeps you on your toes and ensures you know that every trip is the safest possible. This also has the added benefit of keeping you on the road more. You’ll avoid violations that ground you till it’s fixed. And you can better avoid an accident because of a fixable issue.
By learning this information and studying it, you’ll have the knowledge you need to prepare for the exam.
It’s the Law
It is your responsibility as a professional truck driver to ensure your truck is safe and road-ready. This means not only is it safe to operate, but it is free of issues that cause accidents. This has other benefits too. By catching any problems yourself, you are less likely to get a violation.
It Saves Extra Costs
With any situation, catching a problem before it’s a bigger problem is ideal. Instead of finding out you have a major repair, you might be able to find it while it’s still easily fixable. Plus, you have time to take it to a shop rather than a roadside service that costs more and is less convenient. And let’s not forget about how expensive towing is.
Steps in Studying for a CDL Pre-Trip Inspection
Now that you know how important a CDL pre-trip inspection is to your livelihood, here are the steps in conducting one. We showcase these steps to help you study for what the exam requires.
Under the Hood
The engine compartment is the first part of the CDL pre-trip inspection process. This is before you start the truck and the inspections include:
- Make sure kingpins, ball joints, and shocks look good and have lubrication
- Check fluid levels including windshield washer fluid, coolant, and oil
- Look at steering axle tires for uneven wear
- Look for fluid drips or leaks in and around the engine
- Secure the dipstick and tighten any loose caps
- Look for wear or damage to belts and hoses
- Check the blade and fan belt for cracks, nicks, or any other damage
- Check wiring for damage like frays or misplacement
- Air conditioner compressor mounting secure
- Ensure engine air ductwork has secure clamps and no cuts
- No exhaust leaks or oil in the turbocharger
- Check fuel water separator, radiator brace, water pump, pitman arm, oil filler cap
- Inspect engine coolant reservoir, steering shaft, and brake master cylinder
If you find anything wrong, notate it in the DVIR. Notate important information and use photographs. The truck cannot leave until you appropriately fix these issues.
Take a Walk Around
Do an external inspection next. This is where you walk around your truck checking for problems. These include:
- Check all tires for proper pressure, damage, and wear and tear
- Check valve cap, outer oil seal, lug nuts, and hub oil
- Look for proper positioning in brake pads and that they are in good shape
- Inspect brake drum, lining, inner oil seal, slack adjuster, brake line, and chamber
- Inspect airlines and the electrical cord for proper connection
- Inspect the landing gear to ensure the legs are up and secured
- Ensure the 5th wheel is securely coupled to the trailer
- Look for mirror damage such as nicks and cracks
- Ensure doors close properly with secure hinges
Start Your Engine
Before leaving your location, you must ensure the engine is mechanically sound. These key components of the last inspection are:
- With the clutch depressed and the truck in neutral, start the engine
- As you ease off the clutch, idle the truck at 650rpm
- Check your gauges to ensure everything is as it should be
- Turn on your flashers and lights and step out to make sure they are all working
- Look under the hood for leaks and secure belts
- Make sure all lights are working properly
After this inspection, notate any anomalies in the DVIR. This includes things like repairs or part replacements.
The Last Steps
The last step involves moving your truck. Make sure there is nothing in the way or anything that causes a safety hazard.
- Drive forward a few feet and use the trailer brake, making sure the trailer is coupled and the brake works right
- Pull forward a few feet more, using the foot brake to stop
Look for anything not up to par and report it. This is one of the most repetitive tasks you’ll do and the most common. And therefore, it is on the test. You also need to know when to do these steps:
- Each start of the day
- After 10 hour breaks
- Every 24 hours
- When you pick up a new trailer
Ready To Learn More?
These are steps to learn that are on the test. Study these components of the CDL pre-trip inspection so it prepares you to ace the exam.
Once you have your Class A CDL license you are ready to apply for entry-level truck driver jobs. If you attend a truck driving school like Roadmaster, a career services associate will help you apply for your first job. And they’ll assist you in getting your new career started.
During the first few days of school, Placement Associates work with you to choose which company best fits your needs. They will review your job applications and help you submit them to potential employers. The placement staff will follow up with potential employers and notify you of employment offer letters.
Tuition reimbursement could cover up to 100 percent of the cost of school! We offer in-house financing to those who qualify to help cover the cost of tuition. Trucking carriers that recruit from Roadmaster offer up to 100 percent tuition reimbursement .
If you are ready to get your career started as a professional truck driver, contact Roadmaster by filling out the application form or calling us at 1-800-831-1300.
CDL Pre-Trip Inspection Test and How To Memorize It
The pre-trip is one of the things that students fear the most and fail the most. Let’s face it, the pre-trip is intimidating because there is so much stuff to memorize. The key to learning the pre-trip inspection is preparation, memorization, and repetition. Don’t go away, in this article I have exactly what you need to make sure you pass it the first time.
It is going to take time for you to memorize everything and the only way to do this is by repeating it over and over.
Hopefully, the school where you are being trained is giving you enough time to practice it everyday you are there.
I can’t stress that enough, regardless of which method you use below you need to repeat it daily and practice on your own.
Don’t expect that your run through once a day with your instructor is enough, it isn’t.
In this article I’m going to give you 8 tips that will help you memorize the pre-trip so you are able to pass it your first time and move on with your driving career.
1. REPETITION!
The only way to memorize the pre-trip is to repeat it over and over. Start with the engine area and work your way around the truck and finally inside the cab.
There is no way around consistent repetition. The more you do it the more you will memorize it. It’s just that simple.
Now that we have established how important repetition is I want you go through the rest of this list and figure out which method (or methods) works best for you and then repeat it over and over.
2. Record Someone Else
You can use YouTube to find a video of someone doing a pretrip and for the most part they work pretty well (more about YouTube later).
Take it a step further though. Ask someone (like and instructor or friend) to do a pre-trip and video record them.
While they are doing it try to use the zoom function on your camera so that you know what the parts look like and what is being checked.
Students that I come across have said that this method works really well because you have quality video and audio. Just watch your recording over and over and this stuff will be engraved in your brain.
Just make sure you are absolutely sure that the person you record knows what they are doing and are showing you everything. You don’t want to watch a video that skips anything that will be on the test.
3. Smaller Chunks
Break down the pre-trip into smaller chunks so that it is not overwhelming. If you think about memorizing everything at once it will be a daunting task.
My suggestion is you learn your air brakes first, then the inside of the cab, the engine compartment, and then the rest of the truck. You can chose any order that you want to as long as it helps you out.
Memorize each part and then tie it all together. You will find that learning the pre-trip is much easier if you do it this way.
4. Use Your Imagination
Do this while in bed before you fall asleep. Warning: the pre-trip is going to consume a lot of your attention during training, even while you sleep!
When you wake up go through a video you found on YouTube or the one you recorded (see #2) and correct any errors you made.
5. Find A Truck
It really helps if you have access to a truck. Pictures alone are not enough. Most of you are probably getting your training through a private school, company sponsored training , or community college.
All of these will give you access to an actual truck and should be taking time each day to practice the pre-trip.
Take advantage of this time with the truck to practice your pre-trip as much as possible. When class ends try to stick around to get in some extra practice, this could be the difference between passing and failing.
6. Watch A Pre-Trip Video On YouTube (not straight through)
There are a lot of videos on YouTube that you can choose from. Let me save you some time, these two (below) is the best because it has good audio and video quality, is accurate, and is easy to follow.
Don’t watch the video straight through over and over. Like I mentioned earlier you should chunk it into smaller sections.
Watch a section, pause it, and list off the names of the parts and things to look for. Play it again to see if you are getting them correct. When you finish one section go on to another section until you finish it.
Don’t move on to a new section until you have memorized the section you started. When you complete all the sections you should be able to watch the whole pre-trip and repeat everything on it from start to finish.
If you want to challenge yourself a little try mixing up the sections so that the sections that was last is now first. This will let you know if you are really memorizing everything.
7. Use A Checklist
Probably the most popular ways to memorize the pre-trip is to use a checklist. No doubt that wherever you are getting your training at is already giving you a checklist to use.
Use it. A lot.
Not all checklists are done in the same order but they should all cover the same stuff. I like this one here (printable PDF document) by the people at Trucking Truth , it’s easy to follow and is accurate.
Every possible thing that you will need to identify during the pre-trip is on this checklist.
8. Use Pictures/Diagrams
There are a ton of picture resources out there that will help you memorize the test. Just do a search for “cdl pre-trip inspection pictures” and you will find a ton of stuff.
The picture I like most are these (link to PDF) by Driver Solutions. The pictures are easy to see and distinct arrows are used to point to each part. Along with pictures is an explanation of what to look for and what to say for each individual part.
What Is The Pre-Trip Inspection?
The pre-trip inspection is an inspection of the commercial vehicle including the cab, engine compartment, and exterior.
A driver of a commercial vehicle is required, by federal law, to complete one every day before driving the vehicle and at least once in a 24 hour period. Every single time you begin driving your truck you will have to complete a pre-trip.
The purpose of it is to make sure that the vehicle is safe to drive.
This gives you a chance to get whatever is wrong fixed. If you miss something and are inspected it could result in citations by the DOT.
A lot of drivers find it to be a pain in the rear but you really need to do it every single time you drive your truck. Don’t listen to the irresponsible driver at the truck stop that tells you it’s okay to skip it. It’s not okay.
How Long Does An Inspection Take?
A pre-trip usually takes about 15-45 minutes to complete. It really depends on the type of truck you are inspecting and your experience.
After several years of driving it’s inevitable that your pre-trip is going to be quicker because you are better at doing it and you know what to look for.
As a new driver you should take your time and make sure you do it right. Make it a habit to always conduct a thorough inspection so that you run into less problems while on the road.
What To Say During The Pre-Trip Test
Knowing what to say is important during the test. There are some specific language the person testing you is going to be listening for. More than likely you already heard these phrases but here is an easy way to remember what to say:
PMS— Properly Mounted, Secure ABC— Abrasions, Bulges, Cuts CBB— Cracked, Bent, Broken
There are some tricks that you can use to make sure you say the right thing, here they are: 1 . If its mounted (almost everything is) use the words, “Properly Mounted, Secure” (PMS) 2. If its rubber use the words, “Abrasions, Bulges, Cuts” (ABC) 3. If it’s metal or another hard surface use the words, “Cracked, Bent, Broken” (CBB) 4. If it has fluid or air going through it or in it remember to say, “Not Leaking”
This language shouldn’t be new to you, hopefully the school that is training you has already taught you this stuff.
What Should You Cover During The Pre-Trip?
The areas that you should cover include the coupling system, light check, in-cab inspection, engine compartment, trailer, and drivers door fuel area. Make sure that you are prepared for all of these.
Also, keep in mind that CDL schools/classes may cover the pre-trip in different orders. It’s okay though, they all cover the same stuff. The order that you practice is probably going to be different from someones in a different school/class.
There is no correct order as long as you memorize everything.
What Will Be Tested On The Actual State Pre-trip Inspection Test?
You will be required to perform a pre-trip for the light check, the in-cab inspection, and the coupling system. These 3 areas you have to complete.
After completing those 3 areas your examiner will have you perform one of the following: the engine compartment, trailer, drivers door fuel door, or the entire vehicle.
You will not know ahead of time which one the examiner will choose. This is why it is crucial that you know all the areas.
What Else You Can Do To Prepare?
Aside from the ways listed above to help you memorize the pre-trip there are some other things you can do.
One thing you can do is try answering some practice tests like these here from Trucking Truth. There are 5 free practice tests you can take.
I really find that these practice tests reinforce what you need to know for the real test. It’s worth your time try them out just to see how you do.
What If You Fail The Pre-Trip?
If you do fail the pre-trip you are able to retake it. Make sure you know why you failed the test, ask the inspector if he/she can specifically tell you what you did wrong.
This is usually never a problem because the inspectors want you to know what you missed so that you can pass the test the next time.
One more thing, don’t be embarrassed because you didn’t pass it on your first try! This happens to a lot of people! You are not the only person that will fail the pre-trip and you won’t be the last.
Study what it is that you missed/did wrong and pass it on your second attempt.
Extra Tips For Passing The Pre-Trip Test
Probably the most common reason people fail the pre-trip is because they are nervous.
The two things that will help you out the most is to always remember that the pre-trip is a verbal contact test.
As you start walking towards the vehicle you should already be looking for any leaks under it, broken marker lights, loose mirror brakes and anything else that seems out of place.
BE VERBAL! Your number one priority is to make sure the examiner knows that you know what you are talking about. The more you talk the greater your chances are to pass the test.
Even if it might seem you are going overboard just keep going. Examiners tend to like when testers are verbal.
http://www.truthabouttrucking.com/fls/Pre_Trip_Inspection.pd
CONTACT! The second most important thing you can do is make contact with the item you are describing. For example, as you are explaining the radiator brace you need to make sure you point to or put your hand on the brace as well.
Your examiner wants to make sure that you actually know what the item is that you are explaining.
Make sure you are pointing the the correct item though! Don’t describe the radiator brace while pointing to the turbo!
Again, make sure you are VERBAL and CONTACT every single item (correctly) that you are describing.
Now go pass that test! Good luck driver!
Privacy Policy
COPYRIGHT © 2019 CDL TRAINING SPOT
Complete pre-trip inspection checklist for truck drivers

By The Schneider Guy
Estimated reading time: 4 minutes
As a truck driver, performing a CDL pre-trip inspection is one of the most common and repeated tasks you will complete. Pre-trip inspections help truck drivers ensure their tractor and trailer are safe to operat e before hitting the road.
Keep reading to learn what a p re -trip inspection is and what should be on a p re -trip inspection checklist .
What is a pre-trip inspection?
A pre-trip inspection includes checking over the tractor and trailer a truck driver will be operating . A pre-trip should be completed before the operation of a vehicle :
- At the beginning of a driver’s shift.
- Any time a new trailer is picked up.
- After a 10-hour break.
A thorough inspection usually takes anywhere from 30 minutes to one hour and should be logged as on-duty, not driving (line 4) .
How to complete a CDL pre-trip inspection
CDL pre-trip inspection checklist
1. passenger-side engine: .
- Air filter housing: Secure mounting, cover in place.
- Windshield washer fluid reservoir: No leaks, proper fluid level.
- Turbocharger: No oil or exhaust leaks.
- Engine air ductwork: No cuts, clamps secured.
- Alternator: Mounting secured, no broken or loose wire.
- Accessory drive belt: Not cracked or frayed.
- Air conditioner compressor: Secure m ounting .
2. Front brakes (covers all five brake components):
- Brake drum: No cracks.
- Brake lining: No cracks or damage.
- Slack adjuster: Proper angle to the brake chamber, clevis and cotter pin intact.
- Brake air line: No bulges or cuts, fitting tight .
- Brake chamber: Mounting bolts secured, band clamp secured.
3. Front wheel:
- Tire: ABCs (abrasions, bulges, cuts), pressure = 120 PSI, tread depth = 4/32 min ( DOT ) .
- Wheel: Not cracked or bent.
- Hub oil: Not leaking, at proper level – if it’s a sealed unit, can’t check level.
- Oil seal (outer): Not leaking.
- Valve cap: Not missing.
- Lug nuts: None missing, no streaks or shiny areas, none loose.
4. Driver side of engine:
- Radiator brace: No cracks or missing bolts.
- Radiator: Not leaking, secure mounting.
- Water pump: No cracks, not loose or leaking.
- Fuel water separator/filter: Not leaking, secure mounting.
- Pitman arm/drag link: Not cracked, castle nut secured with cotter pin.
- Steering gear box: Secure to frame, not leaking.
- Power steering reservoir: Secure mounting , no leaks, proper level.
- Dipstick: Right level, secured after check.
- Steering shaft: Secure, not loose or damaged.
- Fuel pump: No cracks, not loose or damaged.
- Oil filler cap: Secure, no cracks.
- Engine coolant reservoir: No leaks, proper fluid level.
5. Steer axle suspension:
- U-bolts: No cracks, no loose or missing nuts.
- Leak spring: No cracks, not loose or shifting.
- Tie rod: Secured with castle nuts and cotter pins.
- Shock absorber: Secure mounting, not leaking oil.
- Axle: Not cracked.
6. Rear suspension:
- Spring mount: No cracks, secure mounting.
- Tire: ABCs (abrasions, bulges, cuts), pressure = 110 PSI, tread depth = 2/32 min ( DOT ) .
- Airbag (bellows): Fully inflated, secure mounting, not ruptured.
7. Side of cab:
- Mirrors: Secure m ounting , no broken glass.
- Doors: No damage, glass not broken, hinges secured, opens and closes well.
- Lights and turn signals: Working, not cracked.
- Steps: Mounted, secured to skirting.
- Battery box: Secure m ounting , cover latched.
- DEF cap: Cap secured.
- Fuel cap/tank: Gasket in place, vent in place, chain secures the cap to the tank.
- Side skirting: No damage, panels secure.
- Side box: Secured, safety triangles present.
- Side of sleeper berth: No body damage.
- Sleeper berth window: No cracks.
8. Rear of cab:
- Electrical cord: No bare wire, no corrosion, check the plug at the end of the cord.
- Air line: Not tangled or worn, rubber grommets not worn, fittings tight.
- Cab shock absorber: Secure mounting, not leaking oil.
- Cab airbag (bellows): Not ruptured, securely mounted.
9. Driveshaft/rear frame:
- Driveshaft: Not cracked.
- Universal joint: Not cracked, not missing bolts, no shiny areas.
- Differential: Not leaking oil.
- Frame: Straight, no non-factory welds.
10. Fifth wheel area:
- Pivot pin: Keeper pin and cotter key intact.
- Slider lock pins: Fully engaged.
- Release arm: Not bent.
- Slider rail: No broken welds or missing bolts.
- Slider stop blocks: Welds not broken, not missing bolts.
- 5th wheel platform: Well-greased, tilted down.
11. Front of trailer:
- Top rail: No cracks or collision damage.
- Clearance lights: Not broken, working properly.
- Registration: Not missing, readable.
- Document box: Not missing or loose.
- Air line /glad hands: No bulges or cuts in air lines, rubber grommets not damaged on glad hands.
- Electric hook up: No broken pins, cover intact.
- PM sticker: Current, legible.
- Height sticker: Legible, legal for route.
- Placard holder: Not broken or missing rivets.
- Tracking device: No cracks or collision damage.
12. Side of trailer:
- Top rail: Not cracked, no collision damage.
- Clearance light: Not broken, operational.
- Bottom light: Not cracked, no collision damage, no missing bolts.
- Landing gear: Legs straight, no broken welds in bracing, sand pads secured and clean handle in cradle.
- Reflector tape: Clean.
- Side panels: No holes or cuts, no missing rivets.
13. Rear of trailer:
- Latches: Secured, not damaged.
- Lights: Not broken or missing, operational.
- Splash guard: Brackets and guard secured.
- License plate: Secure and clean, light is working.
- Bumper: Not damaged, no broken welds.
- Door hooks: Not loose, no missing bolts.
- Hinges: Not cracked, no missing bolts on both sides.
- Door seals: No separation, no rubber tubing sticking out.
14. Trailer suspension:
- Air line: No bulges or cuts, fittings are tight and not rubbing.
- Axle: Not bent or broken.
- Clevis pin/cotter key: Not missing.
- Slack adjuster: Proper angle, clevis pin and cotter pin intact.
- Brake linings: Minimum of ¼ inch thick, not cracked.
- Brake drum: Not cracked.
- Tire: (ABCs), tread depth = 2/32 , air pressure = 110 PSI.
- Spring: Not broken, not shifted.
- Spring mount: No broken welds.
- U bolts: Not loose, not cracked.
- Torque rod: Secure mounting, bushings intact.
- Spring brake chamber: Secure m ounting , band clamp secure.
15. Gauges/inside the truck:
- Fuel: Matches visual when looking in the tank.
- Def level: Maintain a minimum of one light bar.
- Oil pressure: 25-50 PSI.
- Speedometer: 0-60 MPH.
- Air pressure: 90-120 PSI.
Please note that the list above is just an example. It is important to remember the type of driver you are, the company you work for and the type of truck you drive can impact your CDL pre-trip inspection . Be sure to consult your company guidelines or speak with your leader for more information on your post-trip inspection requirements.
Get more great driving tips and guides.
Schneider Guy loves the "Big Orange." He's passionate about the trucking industry and connecting people to rewarding careers within it. He's been the eyes and ears of our company since our founding in 1935, and he's excited to interact with prospective and current Schneider associates through "A Slice of Orange."
Related posts

8 CDL Road Test tips to help you pass

How hard is it to get a CDL?

How to get your CDL – 7 simple steps for new truck drivers

How to Pass the CDL Test Vehicle Pre-Trip Inspection

How Do I Pass the CDL Test Vehicle Pre-Trip Inspection: Tips From the Experts
Learning the vehicle inspection portion of the CDL test is difficult for many students. In most states, there are over 100 items to be checked on the tractor-trailer. Passing the test requires each student to study and memorize the items tested. Drivers need to be able to point out a part, and describe what condition it is in.
Here are some important tips to help you learn how to pass the vehicle inspection:
1. Read the CDL Manual. The state manual has a comprehensive list of items that will be tested. Take the time to read and understand the items. Ask your instructor questions if you are unclear on a part’s function, condition or location.
2. Make Index Cards and Use Them as “Flash Cards”. Write a specific vehicle part on the front of the card, and the description on the back. For example, the front might say “headlights.” The back of the card might say “lights are working, not cracked or broken.”
3. Repeat After me! There is no way around it: to learn over 100 parts, you need to practice and repeat. Every day of your training, see if you can practice a full pre-trip, start to finish.
4. Buddy System. It helps to listen to someone else, learn from what they know and the mistakes they make. Get a buddy from your class and each of you do a vehicle inspection. Help each other learn. Use a checklist so you can keep track of what was identified or missed.
5. Know the In-Cab Air Brake Check! This is complicated, and if you do not do it correctly, it is an ATOMATIC FAILURE of the CDL test. This includes the static and applied air brake checks, low air warning system and spring brake check, for example. These take practice and an understanding of the truck’s air brake system. This is an easy procedure to do every time you get in the truck.
6. Study Guides Work. There are numerous study guides available that can help you learn. These can be obtained from your school, or from the internet. Formats that include a checklist and photos, and are in the order of a front to rear vehicle inspection help.
7. Break it Down to Bitesize. Do the pre-trip in easy “bites.” This means describing items that are related. For example, always do the front exterior first; then move to the engine compartment; then look at the axles; then the brakes. This way, you are not overwhelmed with 100 items. Instead, you complete the inspection one area at a time, which is much more manageable.
8. Take photographs with your cell phone. You can take a picture of most items on the truck. Use these to study. If you have a function on your phone to add a description or notes, you can do that too. Study the photos and quiz yourself.
9. Relax! Many students fail the CDL test because they are nervous that a “Tester” is grading them. Take a couple deep breaths before the test. Visualize yourself passing. If you need to stop and just collect your thoughts, that’s OK. Most important, practice so that you are confident. Most nervousness in testing is because the student is not prepared.
10. Use the phrases the Tester wants to hear. For most items, you can use simple language that communicates to the tester that you understand what is to be inspected. Use phrases that are standard in the industry, and that the Tester wants to hear. There are some common abbreviations and hints. For example:
– Anything mounted to the truck – PMS: means “Properly Mounted and Secure” – Anything that is rubber – ABC: means no “Abrasions, Bulges, or Cuts” – Any metal parts – CBB: means not “Cracked, Bent, or Broken” – Any fluids or air hoses – say it is “Not Leaking”
11. You Tube (but be careful!). There are very good resources on YouTube showing and explaining pre-trip vehicle inspections. Some are good, some are not. Some follow the CDL test format, others are a more practical “Driver’s” pre-trip designed for the real world, not a CDL exam. You Tube is a good resource, just keep in mind that not every YouTuber is correct or knowledgeable.
12. Consistency Helps. Each time you do the vehicle inspection, follow the same order. Don’t jump around. Have a plan and a system. Follow it. Practice it. That way, you should miss very few items.
13. Point and Touch. Testers want clear communication. The clearest way to identify an item is to touch it or point carefully, identify the part loudly and clearly, and then describe the condition. Since you have to speak clearly during the test, make sure that is how you practice.
14. Don’t Over-Complicate the Inspection. Keep in mind that the vehicle inspection is not rocket science or brain surgery. Keep the inspection simple. You don’t need to ramble on and on about each part. Just identify it out loud, touch it when you can, and then give a simple explanation of the condition you are inspecting for. Then move on to the next part.
15. Listen to the Tester. Put yourself in the Tester’s position. They administer the test several times a day to all sorts of people. They see people who cooperate, but also some who are arrogant or combative. Don’t make their job difficult. Listen to their instructions. Be friendly and cooperative. Have a good attitude. Demonstrate that you want to be a safe and professional driver.
Keep in mind that much of the process of learning the vehicle inspection depends on the student driver working to learn and memorize the pre-trip items. A school cannot force a student to memorize, learn or practice. Every student who wants to go into trucking must take responsibility for this process. So start early in your preparation for the vehicle inspection part of the CDL test, and you can easily pass!
What specific items are commonly overlooked during the pre-trip inspection?
Commonly overlooked items during the pre-trip inspection include less obvious parts or those that may seem minor but are critical for safety and compliance. These might include:
- Reflectors and lights: Ensuring all are clean, functional, and free from damage.
- Tire tread depth: Tires are often checked for inflation and visible damage, but the specific tread depth can be overlooked.
- Emergency equipment: Such as fire extinguishers, warning triangles, and spare fuses, which must be present and in good condition.
- Air lines and electrical connections: Especially in the case of a tractor-trailer combination, ensuring these are properly connected and in good condition is crucial but sometimes missed.
How are the inspection items weighted during the test?
Typically, the CDL pre-trip inspection is designed to assess overall knowledge and ability to ensure a vehicle is safe to operate. While specific weighting can vary, all items are important. However, certain aspects like brake functionality, steering mechanisms, and other safety-critical systems might be scrutinized more closely. It’s essential to show competency across all areas, as failure in a critical safety area could result in a fail even if other areas are performed well.
What are the most common reasons for automatic failure besides the in-cab air brake check?
Automatic failures can result from missing any safety-critical inspection item or improperly performing a task that could lead to immediate danger on the road. These might include:
- Failure to identify major defects in the braking system (aside from the in-cab air brake check), such as visibly damaged brake lines or leaking air systems.
- Ignoring severe tire damage or wear, which could lead to a blowout.
- Overlooking critical fluid leaks, such as from the engine oil, coolant, or hydraulic systems, indicating a risk of vehicle failure or fire.
- Neglecting to check for proper securement of cargo (for those tests involving cargo securement), which could lead to shifting loads or loss of cargo.
How long does it typically take to complete the CDL vehicle pre-trip inspection during the test?
The duration of the CDL vehicle pre-trip inspection part of the test can vary significantly depending on the state, the specific requirements of the test, and the thoroughness of the examiner. However, candidates are generally advised to anticipate spending between 30 minutes to an hour on this section. The key to efficiently completing the inspection within this timeframe is thorough preparation and practice, ensuring familiarity with each item on the checklist and being able to efficiently demonstrate knowledge and understanding to the examiner.
Are there any mobile apps recommended for CDL pre-trip inspection study or practice?
While the original article does not mention specific mobile apps, there are several available designed to aid CDL students in preparing for the pre-trip inspection part of their exams. Apps like “CDL Prep,” “Truck Driver’s Pre-Trip Checklist,” and others provide interactive checklists, study guides, and practice quizzes. These tools can complement traditional study methods by offering a more engaging and portable way to review. It’s important for users to read reviews and choose apps that are up-to-date with the latest CDL testing standards and regulations to ensure the information is accurate and helpful.
How does one deal with discrepancies between the CDL manual and real-world inspection requirements?
Discrepancies between the CDL manual and real-world inspection requirements can be confusing for candidates. The best approach is to prioritize the CDL manual and official study materials provided by the testing authority in your state, as these will reflect the criteria on which you will be tested. However, for practical knowledge and application, understanding the reasoning behind real-world practices can be invaluable. If discrepancies arise, discuss them with a qualified instructor or mentor who can explain the differences. They can offer insights into why certain practices might vary in the field and how to reconcile these differences while ensuring that you’re prepared for both the test and real-world driving scenarios. Remember, the goal of the CDL test is not only to pass but also to ensure you are a safe and knowledgeable driver.
How to pass pre trip inspection Class A?
To pass the Class A CDL pre-trip inspection, start by thoroughly studying the CDL manual specific to your state, which provides a detailed list of all the items you need to inspect. Understanding each part and its condition is crucial, so consider making flashcards with part names on one side and their conditions on the other to quiz yourself regularly. Daily practice is essential; perform the full pre-trip inspection from start to finish every day to reinforce your knowledge and routine.
Pairing up with a classmate for practice sessions can be highly beneficial. Use a checklist to track your progress and ensure you are not missing any parts. It’s also important to master the in-cab air brake check, as this is a critical part of the test. Practice the static and applied air brake checks, low air warning system, and spring brake check until you are confident in performing them correctly. Breaking the inspection down into manageable sections, such as the front exterior, engine compartment, axles, and brakes, can help you stay organized and avoid feeling overwhelmed.
Maintaining a consistent inspection routine is key to ensuring you don’t miss any items during the test. Following the same order each time helps build muscle memory and confidence. On the day of the test, stay calm and confident by taking deep breaths and visualizing your success. Remember, clear communication is essential, so point to or touch each part as you describe its condition loudly and clearly. By diligently studying, practicing consistently, and staying organized, you can successfully pass the Class A CDL pre-trip inspection.
Want to be a professional truck driver?
- Notice of Right to Opt Out
- Strictly Necessary Cookies
Third-Party Cookies and Sharing
Like many companies, we allow certain third-party advertising partners to place tracking technology such as cookies and pixels on our websites. This technology allows these advertising partners to receive information about your activities on our website, which is then associated with your browser, device, or online identifier. These companies may use this data to serve you more relevant ads as you browse the internet.
Your Right to Opt-Out
Under California privacy law, you have the right to opt out of sharing data for targeted online advertising. You can exercise your right to opt-out by clicking Do Not Share My Personal Information. If you opt-out, you will still see ads but they will not be personalized based on your online activity. Please note that if you disable your cookies or upgrade your browser after opting out, you will need to opt-out again. Further, if you use multiple browsers or devices you will need to execute this opt-out on each browser or device. Additionally, when we detect a Global Privacy Control (GPC) signal from a user’s browser within California, we stop sharing the user’s personal information online with other companies (except with our service providers). You can learn more about the GPC and how to enable it in your browser from the Global Privacy Control website.
You can also generally opt-out of receiving targeted ads from third-party advertisers and ad networks who are members of the Network Advertising Initiative (NAI) by visiting http://optout.networkadvertising.org/. You may opt-out of receiving targeted advertisements from other companies that perform interest-based advertising services, including some that we may work with, via the Digital Advertising Alliance (DAA) site at http://optout.aboutads.info/.
Privacy Policy
For further details on how we use your personal information, please review our Privacy Policy.
Strictly Necessary Cookie should be enabled at all times so that we can save your preferences for cookie settings.
If you disable this cookie, we will not be able to save your preferences. This means that every time you visit this website you will need to enable or disable cookies again.

Pre-Trip Inspection Guide
Our Pre-Trip Inspection Guide is a CDL Pros imperative resource that we have for purchase to anyone! It is also readily available for all students who go through our programs. This is a guide to better prepare you when you go to the Department of Transportation to test for your class A or class B Commercial Driver’s License whether it be in Missouri or Kansas. For the people out there who need a more visual training approach to learning this guide is for you.

We also offer our Pre-Trip Inspection Guide in Spanish.
También ofrecemos nuestra Guía de inspección previa al viaje en español.
Pre-Trip Inspection Training Video
We also have a Pre-Trip Inspection Training Video Available purchase for those that need the full training experience. This video is actual-live course material that students study from “in class” when they are learning how to preform there pre-trip inspection for the test at the Department of Transportation.

If you would like to order your Pre-trip Inspection Guide or Training Video then please feel free to contact us at 816-918-5620 or email us directly at [email protected] .
ATS Pre-Trip
Cdl learning goes digital. download today.

Let’s get started!

How does it work?
- Download the Pre-Trip app from your devices app store
- Start the program, and follow the directions to login
- Start learning and practicing your vehicles Pre-Trip Inspection, today!
Advanced Training Systems, LLC
2438 cades way vista ca 92081, info@atstrainingsystems. www.atstrainingsystems.com.
Privacy Terms – © 2020 Advanced Training Systems LLC

Ensuring Safety on the Road: A Complete Truck Pre-Trip Inspection Checklist
By: TRUX Team on Jul 12, 2024 2:04:16 PM

For truck drivers and fleet operators, safety begins long before the vehicle hits the road. A thorough pre-trip inspection is essential to ensure the safety of the driver, the vehicle, and other road users.
Using a comprehensiv e truck pre-trip inspection checklist not only complies with Department of Transportation (DOT) regulations but also plays a critical role in preventing on-road breakdowns and avoiding costly penalties during inspections.
Every journey should begin with a detailed inspection to ensure that all parts of the truck are in safe working condition. This routine practice helps identify potential mechanical issues and safety hazards before they lead to serious problems. An effective truck inspection sheet is instrumental in this process, providing a systematic approach to checking the truck’s components.
Click a topic below to jump to the relevant section:
Essential Components of a Truck Pre-Trip Inspection Checklist
Best Practices for Using Your Truck Inspection Sheet
Essential Components of a Truck Pre-Trip Inspection Checklist
The pre-trip inspection starts in the engine compartment, where the engine oil and coolant levels should be checked to ensure they are within the recommended specifications to prevent engine overheating and damage. It's also crucial to examine the belts and hoses for signs of wear or damage, as these are critical for proper engine operation.
Moving into the cab, the inspection continues with a check of the dashboard indicator lights to confirm that all indicators, including the check engine and ABS lights, function correctly. The steering and horn should also be tested for responsiveness and functionality, ensuring they are in good working order.
External checks are next, focusing on the tires, which should be inspected for adequate tread depth and signs of uneven wear or damage, and inflated to the correct pressure. The lights and reflectors need to be operational and clean, including headlights, taillights, turn signals, and reflectors, to ensure visibility and safety on the road.
The inspection of the brake system includes checking the brake pads and drums for excessive wear or damage. The air pressure system should be examined for any leaks and must build up adequate pressure to ensure reliable braking performance.
Each of these steps is critical in maintaining the safety and efficiency of commercial and work trucks, highlighting the importance of a thorough pre-trip inspection.
Best Practices for Using Your Truck Inspection Sheet
- Be systematic : Always follow the same order when conducting your inspection to ensure no part is overlooked.
- Use a checklist : Trux has a downloadable Inspection Checklist designed to cover all critical safety areas, helping drivers maintain consistency and thoroughness.
Routine pre-trip inspections significantly reduce the risk of accidents caused by vehicle malfunction. They are also vital for avoiding delays and penalties during DOT inspections. Demonstrating compliance with safety regulations through well-documented inspection reports can protect your company’s reputation and reduce insurance costs.
Regular use of a truck pre-trip inspection checklist is mo re than a regulatory requirement; it’s a fundamental practice that ensures each trip is as safe as possible. By thoroughly inspecting your vehicle before each journey, you help maintain high safety standards, protect your vehicle’s longevity, and ensure you’re fully prepared for any DOT checks. Visit our website for additional resources and expert advice.

Related Posts
Next-generation truck delivery tracker unveiled | trux.
Over two and a half years ago, Trux launched a solution that was unique in the dump trucking...
Construction Vehicle & Material Tracking with Trux
Construction vehicle tracking has become a booming industry, expected to reach $14,957.5 million by...
How Real-Time GPS Tracking Solution Supports Contractors | Trux
As a contractor, it’s likely that staying ahead of the competition is one of your main priorities....
Driving Perfection: An In-Depth Look at the Pre-Delivery Inspection in the Automotive

Introduction
In the realm of the automotive industry, the concept of Pre-Delivery Inspection (PDI) stands as a pivotal process that plays a multifaceted role in ensuring the utmost quality and reliability of vehicles before they embark on their journey into the hands of eagerly awaiting customers.
PDI encompasses a comprehensive examination carried out on vehicles as a final checkpoint to unearth any potential defects, damages, or discrepancies that may have arisen during the manufacturing, transit, or storage phases. This meticulous inspection aims to address and rectify any issues, thereby setting the stage for the delivery of vehicles that meet and exceed the highest standards of safety, performance, and quality.
The importance of PDI reverberates throughout the automotive industry, resonating with both manufacturers and dealerships alike. By delving into the intricate details of PDI, it becomes evident that this process acts as a safeguard, a quality assurance mechanism that acts as a shield against the delivery of vehicles plagued by imperfections. In essence, it serves as a beacon of assurance, underlining the commitment of manufacturers and dealerships to deliver vehicles that not only meet but surpass the lofty expectations and stringent benchmarks set by customers.
Check our automotive industry software solutions services.
Upholding safety and reliability
One of the foremost reasons why PDI holds such paramount importance is its role in upholding the safety and reliability of vehicles. Through the rigorous scrutiny of various components, systems, and functionalities, PDI ensures that every vehicle aligns with the uncompromising safety standards demanded by customers, regulators, and industry best practices. By identifying potential safety hazards and addressing them proactively, PDI becomes an indispensable ally in preserving the well-being and trust of customers.
Enhancing customer satisfaction and trust
In the grand narrative of customer experience , PDI emerges as a protagonist that significantly influences the plot. The successful execution of PDI fosters a ripple effect that culminates in elevated customer satisfaction and unwavering trust in the brand. By averting the delivery of defective or subpar vehicles, manufacturers and dealerships can instill confidence in their customers, cementing enduring relationships and fostering advocacy that reverberates across the industry.
Mitigating risks and warranty costs
Furthermore, the implementation of a robust PDI process serves as a proactive measure to mitigate potential risks and minimize warranty costs. By diligently identifying and rectifying issues prior to delivery, manufacturers and dealerships can circumvent the repercussions of post-sale defects, thereby reducing the financial burden associated with warranty claims and after-sales service .
What is Pre-Delivery Inspection (PDI)?
Pre-Delivery Inspection (PDI) stands as a process within the automotive industry, guaranteeing the quality, safety, and overall reliability of vehicles before they are delivered to customers. The meticulous nature of PDI encompasses a comprehensive examination of various components, systems, and functionalities within a vehicle to ensure that it meets and exceeds the stringent standards set forth by manufacturers and expected by customers.
The essence of PDI manifests as a detailed and methodical procedure that revolves around meticulously inspecting both the exterior and interior of a vehicle. This inspection encompasses a holistic approach, delving into the examination of electrical parts, mechanical components, fluid levels, and accessories, if any. Through this thorough scrutiny, potential defects, damages, or discrepancies that may have arisen during the manufacturing, transit, or storage phases are brought to light and addressed proactively.
The comprehensive nature of PDI extends beyond the mere visual inspection, encompassing a detailed examination of the vehicle’s mechanical components, such as its engine, transmission, suspension, steering, and brakes. Moreover, the inspection also delves into the assessment of the vehicle’s electrical systems, including its lighting, instrumentation, and onboard technology. By scrutinizing these integral facets, PDI serves as a linchpin in ensuring that every vehicle is not only visually appealing but also functionally sound and roadworthy.
The role of PDI in ensuring the quality and safety of vehicles
The significance of PDI reverberates in its profound impact on upholding the quality, safety, and overall reliability of vehicles. By subjecting vehicles to a rigorous PDI process, manufacturers and dealerships uphold their commitment to delivering vehicles that embody uncompromising safety standards and exemplary quality. Through the identification and rectification of potential defects or issues, PDI acts as a safeguard, ensuring that each vehicle undergoes a stringent evaluation before it embarks on its journey into the hands of customers.
The role of PDI transcends beyond a mere procedural formality; it embodies a commitment to excellence, safety, and customer-centricity within the automotive industry. By embracing the pivotal role of PDI, manufacturers and dealerships embark on a journey towards delivering vehicles that stand as paragons of quality, reliability, and customer confidence.
Steps involved in the PDI process
The Pre-Delivery Inspection (PDI) process is a pivotal stage in the journey of a vehicle from the manufacturer to the customer. It involves a series of meticulous steps aimed at ensuring that the vehicle is in optimal condition and meets the highest standards of quality and safety before being handed over to the customer. Let’s delve into a detailed explanation of each step involved in the PDI process and explore the significance of each step:
#1 Receiving the vehicle
Upon receiving the vehicle from the manufacturer, the PDI team initiates the process by conducting a thorough inspection to detect any damages that may have occurred during transportation. This step sets the foundation for the entire PDI process, as it allows the team to identify and address any external issues that may have arisen during transit, ensuring that the vehicle’s integrity is preserved.
#2 Visual inspection
The visual inspection stage involves a comprehensive scrutiny of the vehicle’s exterior. The PDI team meticulously checks for any scratches, dents, or imperfections on the bodywork. Additionally, they ensure that all lights are in proper working condition, inspect the tires for signs of wear or damage, and verify the presence of all accessories specified for the particular vehicle model. This step holds immense significance as it not only contributes to the vehicle’s aesthetic appeal but also confirms its functional integrity.
#3 Interior inspection
Moving to the interior, the PDI team focuses on examining the cleanliness of the cabin area and the precise fitting of all interior components. Moreover, the functionality of electronic systems such as the stereo, air conditioning, and navigation system is thoroughly tested to ensure seamless operation. This step is integral in delivering a superior customer experience, as a clean and well-functioning interior enhances the overall appeal and usability of the vehicle.
#4 Mechanical inspection
The mechanical inspection phase encompasses a detailed assessment of the vehicle’s crucial mechanical components. This includes a close examination of the engine, transmission, brakes, and other essential mechanical parts to identify any potential issues that may affect the performance or safety of the vehicle. Furthermore, the fluid levels, including engine oil, brake fluid, and coolant, are meticulously checked and topped up as necessary to guarantee optimal performance and safety standards.
#5 Test drive
Conducting a comprehensive test drive is a pivotal step in the PDI process. This involves taking the vehicle on a test drive to evaluate its performance, including the responsiveness of the brakes, the precision of the steering, the smooth operation of the transmission, and the overall driving experience. During the test drive, any unusual noises or vibrations are carefully noted for further investigation. This step ensures that the vehicle delivers on its promise of a smooth and reliable driving experience for the customer.
#6 Final check and cleaning
Following the test drive, a final comprehensive check is carried out to address any issues identified during the test drive. Any anomalies or concerns discovered during the test drive are thoroughly addressed to ensure that the vehicle meets the highest standards of quality and performance. Subsequently, the vehicle undergoes meticulous cleaning, both inside and out, to present it in a pristine and appealing condition for customer delivery.
#7 Documentation
All findings from the PDI process are meticulously documented for future reference. This documentation includes detailed records of the inspections conducted, any issues identified, and the corresponding resolutions. By maintaining comprehensive documentation, the dealership ensures transparency and accountability throughout the PDI process, allowing for traceability and continuous improvement in the inspection procedures.
#8 Customer handover
As the vehicle is prepared for customer delivery, the PDI team engages in a transparent and informative handover process. They explain the comprehensive checks and inspections that have been carried out, providing the customer with detailed documentation for their records. This step ensures that the customer is fully informed about the quality and condition of their new vehicle, instilling confidence and satisfaction in their purchase.
By meticulously adhering to each step of the PDI process, dealerships and manufacturers demonstrate their commitment to upholding the highest standards of quality, safety, and customer satisfaction. The thoroughness and attention to detail in the PDI process not only ensure that the vehicle meets regulatory and quality standards but also contribute significantly to the overall customer experience and brand reputation.
The role of PDI in customer satisfaction
Pre-Delivery Inspection (PDI) plays a crucial role in shaping the customer experience and significantly influences customer satisfaction in various industries. The interaction between the customer and the service provider during the PDI process has been shown to have a profound impact on overall satisfaction. Let’s delve into a discussion on how PDI affects customer satisfaction, supported by examples and case studies that illustrate its impact on the customer experience.
Influence of cultural differences on PDI and customer satisfaction
The influence of cultural differences on Pre-Delivery Inspection (PDI) and customer satisfaction is a critical aspect that significantly shapes the customer’s perception and evaluation of service quality. Research findings have underscored the substantial impact of cultural nuances on customer satisfaction, emphasizing the need to recognize and adapt PDI processes to align with diverse cultural perspectives.
Cultural disparities have been identified as influential factors that can affect customer satisfaction by influencing the interpretation of service encounters. The joint effect of consumer and service providers’ culture has emerged as a pivotal determinant of overall satisfaction in various service settings. Adapting PDI processes to resonate with diverse cultural perspectives presents an opportunity to enhance customer satisfaction and positively influence the customer experience.
Understanding and acknowledging cultural differences in the context of PDI is instrumental in fostering an environment where customers from varied cultural backgrounds feel valued and understood. By tailoring PDI processes to accommodate diverse cultural perspectives, businesses can demonstrate their commitment to providing a customer-centric experience that respects and reflects the cultural diversity of their clientele.
This approach not only contributes to enhancing customer satisfaction but also fosters an inclusive and empathetic customer experience, ultimately strengthening the relationship between the service provider and the customer.
Service quality and cross-border e-commerce
In the realm of cross-border e-commerce, the influence of cultural values on customer satisfaction has garnered significant attention. Academic studies have shed light on the profound impact of cultural values on shaping customer satisfaction, emphasizing the necessity for tailored Pre-Delivery Inspection (PDI) processes that consider and accommodate cultural nuances, particularly in the context of cross-border transactions.
The distinct cultural values held by consumers in different regions play a pivotal role in determining their expectations and perceptions of service quality. Recognizing and addressing these cultural disparities through customized PDI processes can effectively contribute to ensuring high levels of customer satisfaction in cross-border e-commerce scenarios.
By incorporating an understanding of cultural values into the PDI process, businesses engaged in cross-border e-commerce can proactively mitigate potential misunderstandings or dissatisfaction arising from cultural differences. This proactive approach serves to align the service delivery with the diverse cultural expectations of customers, thereby fostering an environment conducive to elevated customer satisfaction and positive customer experiences.
The integration of tailored PDI processes that account for cultural nuances in cross-border e-commerce transactions serves as a testament to a customer-centric approach that respects and adapts to the diverse cultural fabric of the global consumer base. Ultimately, this approach not only bolsters customer satisfaction but also contributes to building trust and loyalty among customers engaged in cross-border e-commerce interactions.
Impact of Justice Dimension of service recovery on customer satisfaction
Studies have suggested that the justice dimension of service recovery plays a substantial role in influencing customer satisfaction. This highlights the critical importance of Pre-Delivery Inspection (PDI) in ensuring that any issues or concerns are addressed transparently and fairly, thereby contributing to a positive service recovery experience and ultimately bolstering customer satisfaction.
The concept of justice in service recovery encompasses various dimensions such as perceived fairness, equity, and procedural justice, all of which have been found to significantly impact customer satisfaction following a service failure. When customers perceive that their concerns are being addressed in a just and equitable manner, it can lead to a restoration of trust, an enhanced perception of service quality, and ultimately, greater satisfaction with the overall service experience.
Incorporating the principles of justice into the PDI process is crucial for businesses aiming to mitigate the negative effects of service failures and actively engage in effective service recovery. By embracing fairness and transparency in addressing customer concerns, businesses can demonstrate a commitment to upholding the rights and expectations of their customers, thereby fostering an environment conducive to heightened customer satisfaction and loyalty.
Furthermore, understanding the nuanced dimensions of justice in service recovery can inform the development of proactive strategies aimed at preempting potential issues and effectively addressing customer concerns, thereby contributing to the creation of a robust service recovery framework that positively impacts customer satisfaction.
Higher customer satisfaction through PDI
A case study conducted by PDI Technologies showcased the impact of PDI on customer satisfaction. The study presented a real-world example of how a robust PDI process led to higher customer satisfaction, underscoring the tangible benefits of prioritizing thorough pre-delivery inspections.
By considering the influence of cultural differences, the significance of service quality in cross-border transactions, and the impact of justice in service recovery, it becomes evident that PDI plays a pivotal role in shaping customer satisfaction. These examples and case studies provide compelling evidence of the profound impact of PDI on the overall customer experience, highlighting the necessity of a meticulous and customer-centric approach to pre-delivery inspections.
Challenges in the PDI process
The Pre-Delivery Inspection (PDI) process is a pivotal stage in the journey of a vehicle from the manufacturer to the customer. It involves a series of meticulous steps aimed at ensuring that the vehicle is in optimal condition and meets the highest standards of quality and safety before being handed over to the customer. Let’s delve into a detailed explanation of each step involved in the PDI process and explore the significance of each step.
#1 Limited time and resources
- A high volume of vehicles requiring PDI.
- Insufficient manpower to carry out thorough inspections.
- Time constraints leading to rushed inspections.
The Pre-Delivery Inspection (PDI) process often grapples with the challenge of limited time and resources, primarily due to the high volume of vehicles requiring inspection and the subsequent strain on available manpower. The demand for PDI often outpaces the available resources, leading to a scenario where there is insufficient manpower to carry out thorough inspections within the allocated timeframes. As a result, time constraints can force technicians to conduct rushed inspections, potentially compromising the comprehensiveness and accuracy of the process. This confluence of limited time and resources underscores the need for strategic resource allocation and efficient workflow management to uphold the integrity of the PDI process.
#2 Inadequate training
- Lack of proper training for PDI personnel.
- Misinterpretation or misunderstanding of inspection guidelines.
The lack of proper training for Pre-Delivery Inspection (PDI) personnel presents a significant challenge within the automotive industry. Without adequate training and certification, inspectors may face difficulties in interpreting and implementing inspection guidelines effectively. This can result in misinterpretation or misunderstanding of crucial inspection protocols, potentially leading to overlooked issues or inconsistent assessment practices. It is imperative that PDI personnel receive comprehensive training and ongoing professional development to ensure a thorough understanding of inspection guidelines, thereby upholding the integrity of the PDI process and promoting consistent, high-quality inspections.
#3 Logistics and coordination
- Difficulty coordinating between different departments involved in the PDI process.
- Challenges in managing the flow of vehicles from receiving to delivery.
The logistics and coordination aspects within the Pre-Delivery Inspection (PDI) process are often fraught with challenges, particularly in coordinating between different departments involved in the PDI workflow. The seamless management of vehicle flow from the receiving area to the final delivery stage poses a significant logistical challenge, necessitating efficient coordination and communication among various departments.
The complexity of the PDI process, involving multiple checkpoints and stages, demands meticulous coordination among departments such as receiving, inspection, maintenance, and delivery. Issues related to bottlenecks, delays, or miscommunication can arise, impacting the smooth flow of vehicles through each stage of the PDI process.
Efficiently managing the flow of vehicles from the moment they are received for inspection to their eventual delivery to customers is essential for maintaining operational efficiency and meeting customer delivery expectations. Addressing these challenges requires strategic planning, streamlined communication channels, and the implementation of efficient logistical solutions to ensure a seamless PDI process.
#4 Technological challenges
- Inadequate or outdated tools and technology for conducting and documenting inspections.
- Challenges in implementing new technologies into the PDI process.
The Pre-Delivery Inspection (PDI) process faces several technological challenges that impact its efficiency and effectiveness. One such challenge is the presence of inadequate or outdated tools and technology for conducting and documenting inspections. This inadequacy can hinder the ability to perform thorough and accurate inspections, potentially leading to oversight of critical issues.
Moreover, integrating new technologies into the PDI process presents its own set of challenges. The adoption of advanced inspection tools, automated systems, and digital documentation methods may encounter resistance or difficulties in implementation. Ensuring seamless integration and optimizing the use of new technologies within the PDI workflow requires careful planning, training, and a phased approach to mitigate potential disruptions and maximize the benefits of technological advancements.
Addressing these technological challenges is crucial for enhancing the accuracy, speed, and comprehensiveness of the PDI process, ultimately contributing to improved customer satisfaction and operational efficiency.
#5 Quality control
- Inconsistencies in the quality of inspections due to human error.
- Difficulties in maintaining high standards throughout the entire inspection process.
In the realm of quality control, inconsistencies can arise in the quality of inspections due to human error. The subjective nature of certain inspection criteria and the reliance on individual judgment can lead to variations in assessments, impacting the overall consistency and reliability of the inspection process.
Moreover, maintaining high standards throughout the entire inspection process presents its own set of challenges. From initial assessment to final review, ensuring that rigorous quality standards are upheld at every stage demands meticulous attention to detail, standardized protocols, and ongoing training to equip inspectors with the necessary skills and knowledge.
Addressing these inherent challenges in quality control is crucial for enhancing the integrity and efficacy of inspection processes, ultimately contributing to the delivery of high-quality products and services to customers.
#6 Communication issues
- Challenges in communicating any identified issues to the relevant parties.
- Difficulties in conveying the results of the PDI to customers in a clear and understandable manner.
The Pre-Delivery Inspection (PDI) process encounters challenges in effectively communicating any identified issues to the relevant parties. Whether it’s relaying inspection findings to the maintenance team for necessary repairs or communicating critical issues to upper management for decision-making, ensuring clear and concise communication poses a significant challenge.
Furthermore, conveying the results of the PDI to customers in a clear and understandable manner presents its own set of difficulties. Translating technical inspection reports into customer-friendly language, effectively conveying the severity of identified issues, and providing transparent information to customers without causing undue alarm requires a delicate balance and a high level of communication proficiency.
Addressing these communication challenges is pivotal for fostering transparency, maintaining trust, and ultimately delivering a positive customer experience throughout the PDI process.
#7 Documentation and record-keeping
- Challenges in accurately documenting the findings of the inspection.
- Difficulties in managing and retrieving inspection records for future reference.
Accurately documenting the findings of inspections presents a significant challenge within the inspection process. Ensuring that all pertinent information is captured, recorded, and organized in a consistent manner demands attention to detail and a standardized approach to documentation. The potential for errors or omissions in recording crucial inspection findings adds complexity to maintaining the integrity of inspection records.
Additionally, managing and retrieving inspection records for future reference poses its own set of difficulties. As the volume of inspection records grows, organizing, storing, and efficiently retrieving specific records becomes increasingly challenging. Implementing effective systems for record management and retrieval is essential for preserving the accuracy and completeness of inspection records over time.
Addressing these challenges in documentation and record keeping is fundamental for fostering transparency, regulatory compliance, and informed decision-making based on historical inspection data.
Strategies for overcoming some of PDI challenges
To ensure a thorough and effective Pre-Delivery Inspection (PDI), addressing the inherent challenges in the process is important. Here are strategies to overcome these challenges:
Enhancing quality control
- Implement automated inspection tools: Leverage technology to reduce human error in inspections. Automated tools can provide consistent and objective assessments.
- Standardize inspection procedures: Develop and enforce standardized inspection checklists and procedures to ensure consistency across all inspections.
Improving communication
- Use clear and concise language: When communicating issues or PDI results, use language that is easy for all stakeholders to understand, avoiding technical jargon when possible.
- Implement a central communication platform: Utilize a centralized platform for communication where all stakeholders can access updates, reports, and feedback, ensuring transparency and timely information flow.
Streamlining documentation and record-keeping
- Adopt digital record-keeping systems: Transition from paper-based to digital systems for easier documentation, storage, and retrieval of inspection records.
- Regular training on documentation practices: Conduct regular training sessions for staff on the importance of accurate documentation and how to effectively use record-keeping systems.
Additional strategies
- Continuous training for inspectors: Provide ongoing training and certification for inspectors to keep them updated on the latest standards and inspection techniques.
- Customer involvement: Engage customers throughout the PDI process, offering them insights and explanations about the inspection outcomes to foster trust and satisfaction.
- Feedback loops: Establish mechanisms for receiving feedback from all stakeholders involved in the PDI process. Use this feedback for continuous process improvement.
Technological advances and efficient information transfer in PDI
The landscape of Pre-Delivery Inspections (PDI) has been significantly transformed by technological advancements, fundamentally changing how data are collected, analyzed, and shared. These innovations have streamlined the PDI process, enhancing both efficiency and accuracy.
The evolution of technology in PDI
Technological evolution has introduced automated tools and systems that facilitate more thorough inspections and quality control measures. For instance, digital platforms and IoT (Internet of Things) integrations enable real-time data capture and analysis directly from field operations, laboratories, and greenhouses. This seamless data flow not only speeds up the inspection process but also improves the precision of data collected, minimizing human error.
Moreover, the advent of specialized software solutions has revolutionized data stewardship from collection to analysis. These platforms support the comprehensive management of data, ensuring quality assurance and control throughout the PDI process. The integration of such technologies into everyday PDI activities has significantly enhanced the capability to process and analyze large volumes of data efficiently.
The importance of proper reporting
Accurate and timely reporting is a cornerstone of the PDI process. It ensures accountability and maintains the integrity of the inspection outcomes. Technological advances have facilitated the development of reporting tools that can automatically generate detailed and understandable reports. These reports are crucial for decision-making, providing stakeholders with clear insights into the inspection findings and any necessary corrective actions.
Efficient information transfer through well-designed applications
To ensure the smooth transfer of information from PDI to other relevant parties, well-designed applications play a pivotal role. These applications offer platforms for effective communication and data sharing, bridging the gap between inspectors, management, and customers.
These applications not only streamline the dissemination of information but also enable the customization of data presentation according to the needs of different stakeholders. As a result, they support a transparent and inclusive approach to sharing PDI outcomes, fostering trust and collaboration among all parties involved.
So, technological advancements have profoundly impacted the PDI process, from enhancing data collection and analysis to improving the efficiency of information transfer. The implementation of digital tools and well-designed applications has elevated the standards of reporting, ensuring that the PDI process remains thorough, accurate, and accountable in the digital age.
The seamless integration of PDI technologies is important for companies aiming to maintain a competitive edge, improve operational efficiency, and ensure data consistency across all platforms.
A Vehicle Management System (VMS) serves as a compelling example of how back-end systems can be leveraged to create custom applications, particularly for processes related to PDI technologies. VMS, at its core, manages critical information about vehicles, from inventory management to sales tracking and customer interactions. By integrating PDI with a VMS, businesses can unlock a new level of precision, efficiency, and customization.
The integration process involves leveraging the robust capabilities of VMS as a foundation upon which custom applications dedicated to managing product data can be built. Such custom applications are designed to address specific business needs, ranging from automating data entry to enhancing data accuracy and facilitating real-time updates across systems. This tailored approach ensures that businesses can manage their product data more effectively, leading to improved decision-making, optimized inventory management, and enhanced customer satisfaction.
However, achieving successful integration requires a deep understanding of both VMS and the intricacies of custom solutions. Hicron stands out as a knowledgeable partner in both domains, offering a comprehensive understanding of VMS capabilities and a proven track record in developing custom solutions tailored to unique business requirements. The company’s holistic approach ensures that the integration of PDI technologies with existing systems is not only seamless but also maximizes the potential benefits for the business.
Hicron’s expertise encompasses the entire process, from initial consultation and system assessment to the development and implementation of custom applications. By partnering with us, businesses can rest assured that they are leveraging the full potential of their VMS.
The need for integration with existing systems cannot be overstated. It is a bigstep for businesses aiming to optimize their operations and enhance their competitive advantage. With our deep knowledge of both VMS and custom solutions, businesses can achieve a seamless and effective integration, unlocking new levels of efficiency, accuracy, and customer satisfaction.
Learn more about the topic, reading a real case: Smart car configuration management
Enhancing the Pre-Delivery Inspection (PDI) process is pivotal for businesses aiming to boost customer satisfaction and ensure the delivery of high-quality, safe vehicles. To achieve this, companies must embrace technological advancements that streamline the PDI process, making it more efficient and reducing the margin for error through automated tools and digital reporting systems. The implementation of a standardized set of procedures across all inspections ensures consistency and maintains high-quality standards, which are important for customer trust.
Investing in the continuous training and upskilling of inspectors is another key aspect. Equipping them with the latest knowledge and tools enables them to perform thorough inspections, ensuring vehicles meet the required safety and quality standards before delivery. Furthermore, enhancing communication channels among all stakeholders involved in the PDI process, including service managers, inspectors, and customers, promotes transparency and builds trust. This open line of communication is essential for keeping customers informed and involved in the process.
Incorporating mechanisms to gather and analyze customer feedback post-delivery provides valuable insights into the effectiveness of the PDI process and areas that require improvement. Addressing these insights not only enhances customer satisfaction but also contributes to refining the overall inspection process. Additionally, integrating quality control measures throughout the PDI process helps in identifying and rectifying issues early, minimizing the risk of delivering vehicles with defects. Adopting a customer-centric approach, where decisions and improvements are guided by the goal of enhancing customer satisfaction, is important. This approach ensures that the PDI process not only meets but exceeds customer expectations, fostering long-term loyalty and trust.
By focusing on these strategies, businesses can significantly improve their PDI process, leading to the delivery of vehicles that are not only of high quality and safe but also meet the evolving needs and expectations of customers.
- follow the expert:
Related Articles
Accelerating automotive efficiency: the role of tailored front-ends.
- Angelika Agapow
How Quality Assurance Impacts Safety in the Automotive Sector
- February 26
Streamlining Success: Managing Spare Parts, Auto Inventory, and After-Sales Processes
- February 16
Streamlining Warranty Claims: Automation, Pattern Identification, and Process Standardization
The importance of after-sales service in the automotive industry, testimonials.
After carefully evaluating suppliers, we decided to try a new approach and start working with a near-shore software house. Cooperation with Hicron Software House was something different, and it turned out to be a great success that brought added value to our company.
With HICRON’s creative ideas and fresh perspective, we reached a new level of our core platform and achieved our business goals.
Many thanks for what you did so far; we are looking forward to more in future!
Hicron is a partner who has provided excellent software development services. Their talented software engineers have a strong focus on collaboration and quality. They have helped us in achieving our goals across our cloud platforms at a good pace, without compromising on the quality of our services. Our partnership is professional and solution-focused!
The IT system supporting the work of retail outlets is the foundation of our business. The ability to optimize and adapt it to the needs of all entities in the PSA Group is of strategic importance and we consider it a step into the future. This project is a huge challenge: not only for us in terms of organization, but also for our partners – including Hicron – in terms of adapting the system to the needs and business models of PSA. Cooperation with Hicron consultants, taking into account their competences in the field of programming and processes specific to the automotive sector, gave us many reasons to be satisfied.
Get in touch
Message sent, thank you! We will reply as quickly as possible.

This site uses cookies. By continuing to use this website, you agree to our Privacy Policy .
- Live TV stream

Modi's Moscow visit points to enduring friendship with Putin's Russia

MOSCOW — Indian Prime Minister Narendra Modi is in Moscow for a two-day visit with Russian President Vladimir Putin — his first trip to Russia since the Kremlin ordered its full-scale invasion of Ukraine more than two years ago.
Yet there are few signs Modi, the leader of the world’s largest democracy, plans to challenge Putin directly over his actions in Ukraine. Instead, the Indian leader appears to be engaging Moscow as part of a wider balancing act between East and West that has been at the core of his foreign policy.
Ahead of his departure for Moscow, Modi noted the partnership with Russia had “advanced” over the past 10 years, and he looked forward to reviewing all aspects of bilateral cooperation with his “friend” Putin.
“We seek to play a supportive role for a peaceful and stable region,” Modi added, without clarifying.
Statements by the Kremlin were similarly sanguine, saying that Modi’s visit would build on “traditionally friendly Russian-Indian relations.”
Modi was greeted by a goose-stepping honor guard upon arrival at Moscow’s Vnukovo airport Monday afternoon. Russian Deputy Prime Minister Denis Manturov, who had worked with an Indian-Russia aeronautics company in the past, greeted him on the tarmac.
As Modi’s motorcade made his way toward his hotel across from the Kremlin, throngs of well-wishers gathered to wave Indian and Russian flags.
Among other announced activities: Putin will host Modi for a private dinner “with a free agenda” for discussion, the Kremlin’s spokesman said — setting the tone for formal talks on Tuesday.
Modi is also expected to lay flowers at Russia’s Tomb of the Unknown Soldier.
There were no current plans for the leaders to address the media, the spokesman added.
Cold War allies
Russia and India have strong ties that date back to the height of the Cold War.
In a partnership that often blurred ideological lines, the Soviets provided weapons to India as both countries found a common threat in the rise of their neighbor China.
Fast forward to today and much has changed: The United States is now one of India’s major partners and India’s military needs have diversified. Yet Modi’s Moscow visit is part tribute to an enduring Indian-Russian friendship, analysts say.
India has refused Western entreaties, including by Washington, to condemn Russia's invasion of Ukraine — with Modi instead urging a vague diplomatic settlement to the conflict.
“Today’s era is not an era of war,” the Indian prime minister told Putin during their last meeting on the sidelines of a regional summit in Central Asia in the fall of 2022.

Putin responded by promising Modi that Russia was doing “everything to stop this as soon as possible.”
Nearly two years later, the death toll and destruction in Ukraine continue to mount, with hundreds of thousands dead and no end to the fighting in sight.
Just hours before Modi landed, Russian rockets struck cities across Ukraine, killing at least 29 people and injuring dozens more. Among the targets hit was a children’s hospital in the Ukrainian capital of Kyiv.
Russia’s Defense Ministry insisted its forces had carried out precision attacks on military installations.
Meanwhile, New Delhi has grown increasingly alarmed as Western sanctions have pushed Russia into the arms of India’s key regional rival China, regional exports say.
“India has not condemned the Russian invasion, but that doesn't mean that it supports the war,” Michael Kugelman, South Asia director of the Wilson Center, told NPR late last year. “It doesn't support the war at all. The war makes Russia more dependent on China, and India doesn't want that because China is India's strategic competitor."
The economic ties that bind
Further complicating the picture: New Delhi has also benefited from purchases of Russian oil at steep discounts after the U.S. and its allies imposed sanctions on Russian crude.
Meanwhile, easing the way for more Russian-Indian business — and adjusting a massive trade imbalance that has come with Russia's oil exports — appears at the heart of this week’s talks.
One of key topics discussed will be development of alternative money transfer systems — think a Russian-Indian version of Paypal, Zelle or Venmo — as a workaround to Western sanctions that removed most Russian banks from the global SWIFT payment system.
Ahead of Modi’s visit, India’s Foreign Secretary Vinay Kwatra, said talks would also focus on freeing between 30-40 Indians who were “misled” into Russian military service by promises of mercenary pay.
Different views of a multipolar world
In Moscow, Modi’s arrival is seen as the latest evidence of the West’s failure to isolate Russia over its invasion of its neighbor. Shortly before Modi’s visit, Putin hosted Hungary’s prime minister , Viktor Orban, in Moscow and met with China’s Xi Jinping and a host of other leaders at a Eurasian regional summit in Kazakhstan.

The Indian prime minister’s visit — which partially coincides with this week’s NATO summit gathering in Washington, D.C. — provides yet another opportunity for Putin to herald Russia’s membership in non-Western clubs such as the BRICS group of advanced developing nations and the Shanghai Cooperation Organization among others.
Putin has framed these organizations as evidence of a new “multipolar world order” emerging from what, he argues, is the West’s moral rot and economic decline.
Modi, too, has embraced India’s rise in a new multipolar reality. But he has pursued a balancing act to maintain good relations with Western economies with which New Delhi does much of its business.
Copyright 2024 NPR
COMMENTS
Learn the Pre-Trip inspection with our free Pre-Trip inspection videos, flash cards, and inspection lists. We'll prepare you for your CDL exams!
The CDL Pre-Trip Inspection Exam is an integral part of obtaining your commercial driver's license. This guide covers Class A and Class B pre-trip inspections, provides a checklist, and offers tips for memorizing the inspection process.
Complete CDL pre-trip inspection checklist with online reference and study guide plus a free PDF pre trip inspection checklist to print.
Jeff from Apex CDL Institute is a licensed 3rd party CDL examiner in the state of Kansas. Here he demonstrates how to perform a proper pre-trip inspection on...
Learn how to perform a proper CDL Pre-Trip Inspection with featured video, checklists, visual study guide, and Pre-Trip practice tests.
Learn the Pre-Trip inspection with our free Pre-Trip inspection videos, flash cards, and inspection lists. We'll prepare you for your CDL exams!
The Federal Motor Carrier Safety Administration mandates pre-trip inspections as part of DOT inspections for commercial motor vehicles, requiring drivers to acknowledge and certify that appropriate repairs have been made before commencing a trip. Non-compliance with pre-trip inspection regulations can result in fines, penalties, and harm to a driver's or company's reputation. Conducting ...
Prepare for your CDL Examination by learning from this video. This is a complete demonstration of performing pre-trip inspection of the entire tractor/trailer, including in-cab inspection and the ...
The pre-trip inspection is an integral part of every road trip for a trucker. It's probably the most disliked and most often overlooked part of the job of the professional truck driver in the trucking industry. This inspection is meant to be a thorough check of the truck, trailer and load. The check is to ensure that everything is in correct ...
What does the pre-trip inspection exam include? You will be expected to be able to perform a complete pre-trip inspection on your vehicle, including both in-cab & external features, as well as the engine compartment. Fluids, belts, brakes, air brakes, and lights are some of the main components to the test. The pre-trip inspection will ensure ...
Pre-Trip Inspection. My pre-trip begins as I approach the vehicle. I am looking for leaks, leaning one way or the other (which may indicate a low tire or bad suspension). Hint: Start at the bottom and work your way up. License plate - Secure, clean and up to date. Bumper - Secure, not cracked, bent or broken.
Learn how to study for the CDL Pre Trip Inspection that is part of the CDL License test. This is a basic guide on how to study for the test.
The pre-trip is one of the things that students fear the most and fail the most. Let's face it, the pre-trip is intimidating because there is so much stuff to memorize. The key to learning the pre-trip inspection is preparation, memorization, and repetition.
Pre-trip inspections are an essential part of a trucker's daily routine. Check out our comprehensive guide on how to complete yours safely.
How Do I Pass the CDL Test Vehicle Pre-Trip Inspection: Tips From the Experts Learning the vehicle inspection portion of the CDL test is difficult for many students. In most states, there are over 100 items to be checked on the tractor-trailer. Passing the test requires each student to study and ...
Air compressor test: start the truck. Fast idle the engine until air pressure reaches 85psi. Stop fast-idling and verify that the air pressure rises from 85 to 100psi in 45 seconds or less. Fast idle to 120-125psi and verify the governor cut out (Pshhh!).
Cargo Inspection - Unless you are driving a sealed trailer, examine the cargo and all the devices used to secure it within the first 50 miles of the trip to make sure that it is all properly loaded and secured.
We also have a Pre-Trip Inspection Training Video Available purchase for those that need the full training experience. This video is actual-live course material that students study from "in class" when they are learning how to preform there pre-trip inspection for the test at the Department of Transportation.
Download the Pre-Trip app from your devices app store. Start the program, and follow the directions to login. Start learning and practicing your vehicles Pre-Trip Inspection, today!
Learn the importance of a pre-trip inspection checklist to ensure safety, comply with DOT regulations, and prevent on-road breakdowns for secure travels.
The Pre-Delivery Inspection (PDI) process often grapples with the challenge of limited time and resources, primarily due to the high volume of vehicles requiring inspection and the subsequent strain on available manpower.
In addition to the type of overspeed protection provided, the trip logic utilized by the control system to open the circuit breaker associated with the steam turbine's generator does have some effect on the performance of the protection. Typically, two trip schemes are utilized; sequential tripping and simultaneous tripping.
K&K Consultants provide home inspections, mold testing, radon testing and more in the Moscow, Idaho area. We are nationally certified as home inspectors through ASHI.
Inspectors used the Department for Education standards for the inspection of British schools overseas. The purpose of the inspection is to provide information to parents, teachers, senior managers and the school's owners on the overall effectiveness of the school and the standard of education.
MOSCOW — Indian Prime Minister Narendra Modi is in Moscow for a two-day visit with Russian President Vladimir Putin — his first trip to Russia since the Kremlin ordered its full-scale invasion of Ukraine more than two years ago. Yet there are few signs Modi, the leader of the world's largest ...